Bot Studio Tutorial
Introduction
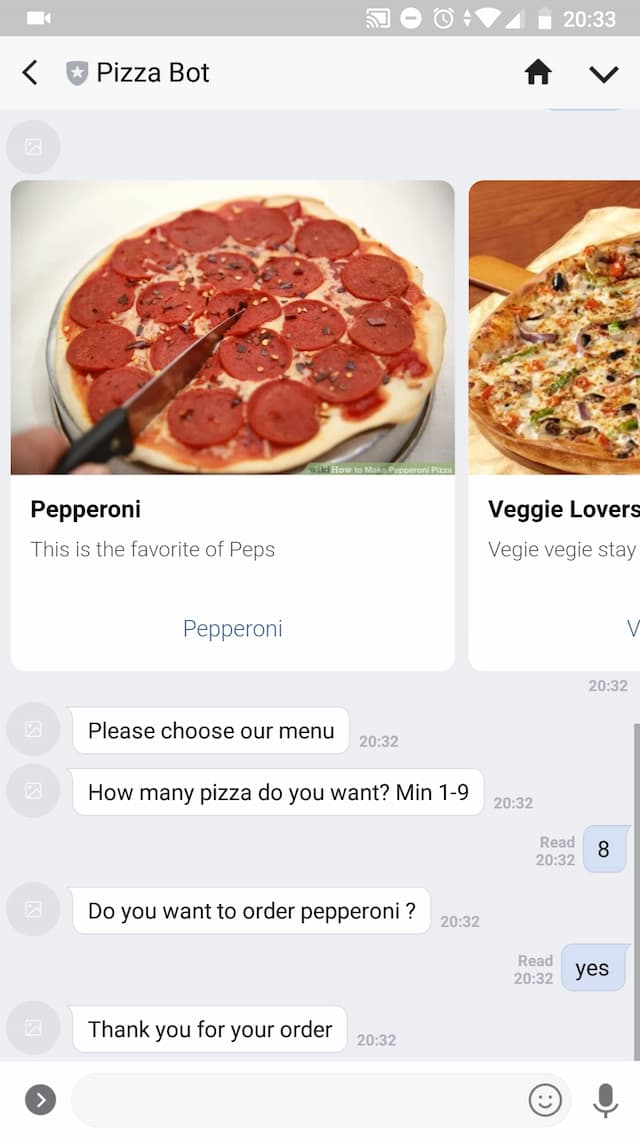
Building a chatbot on Kata | Platform is quick and easy, even with a lack of programming knowledge. In this tutorial, we will learn how to create a simple bot on LINE Messenger to order a pizza. We will also learn how to train your bot with NL Studio.
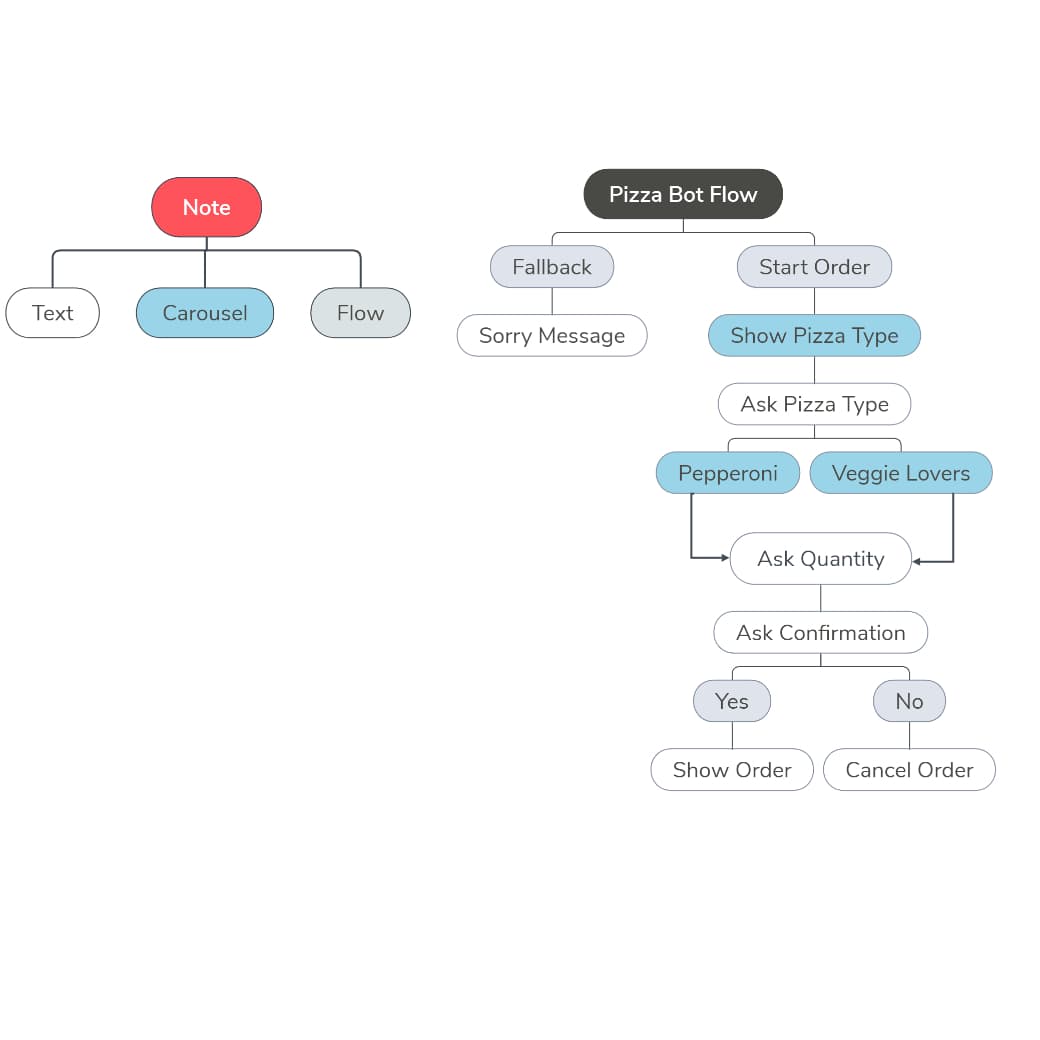
Let's start by looking at this bot diagram, or commonly called “conversation tree.” Conversation tree is an overview of chatbot functionalities. In this conversation tree, we break down the process of ordering pizza and the types of bot action we want to use on each state.

Sign up to Kata | Platform
Create an account on Kata | Platform to start building chatbot.
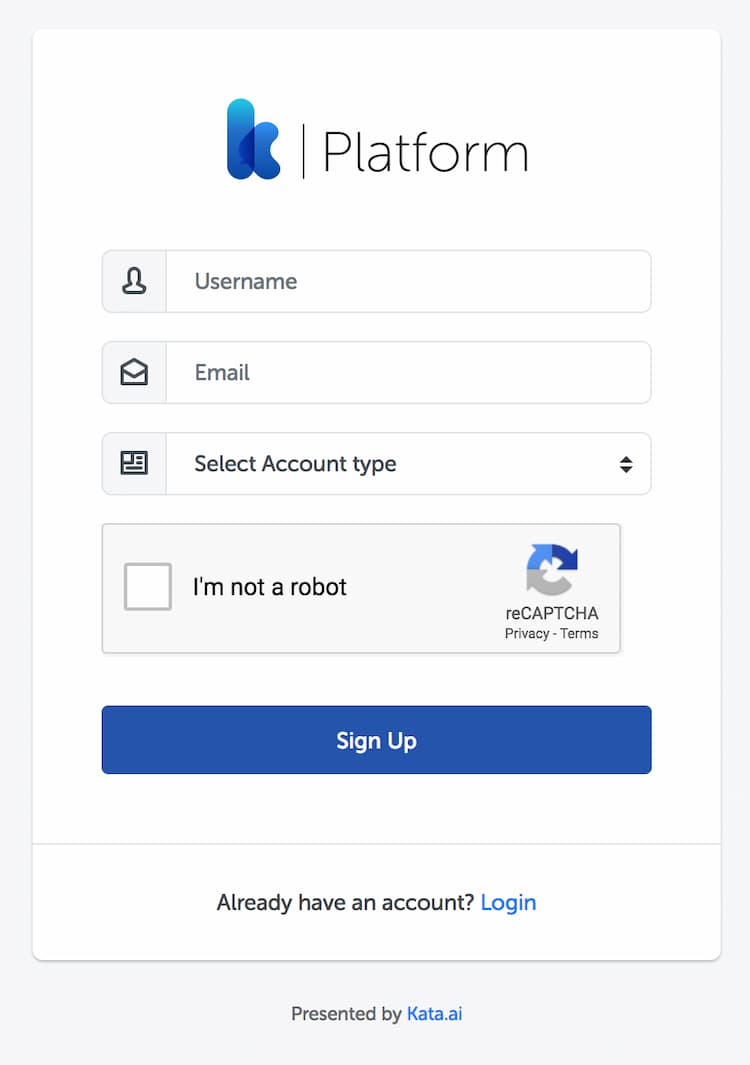
On your browser, open https://platform.kata.ai/login and click “Sign Up”

Then fill the form with a username, an email, and an account type. Continue by clicking "Sign Up."

You will get a confirmation email once our team has verified your account.
You may follow the instructions provided in the confirmation email to activate and start using your account.
Create a Project
Login to Kata | Platform
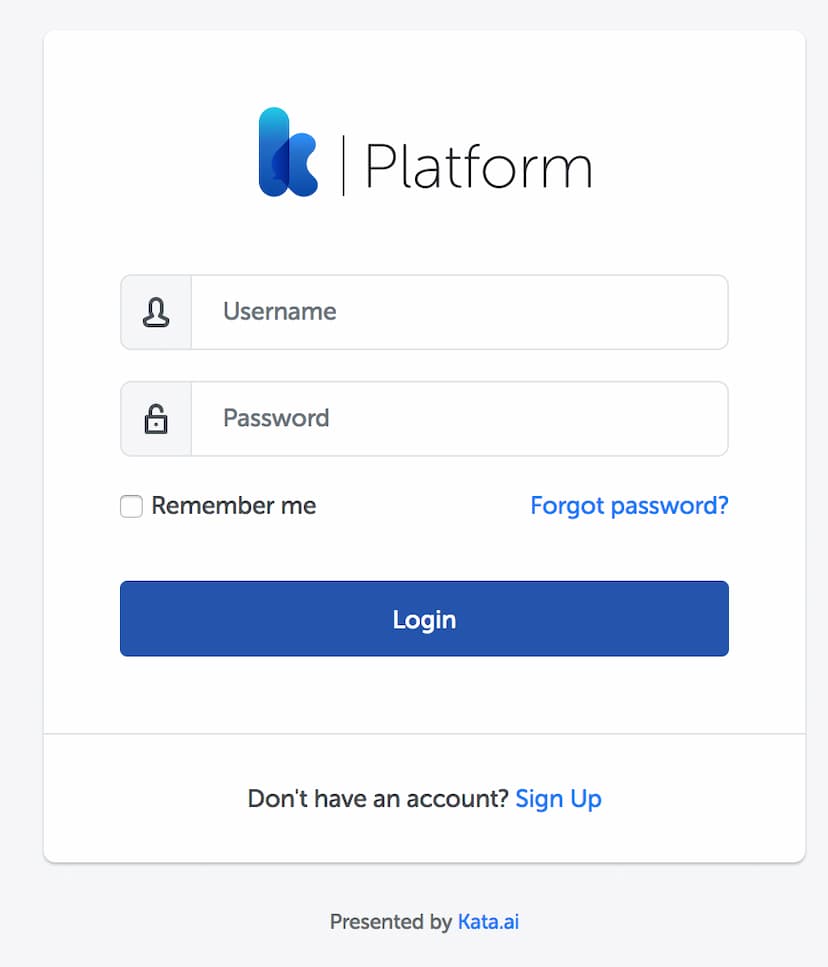
On your browser, open platform.kata.ai/login and enter your username & password.

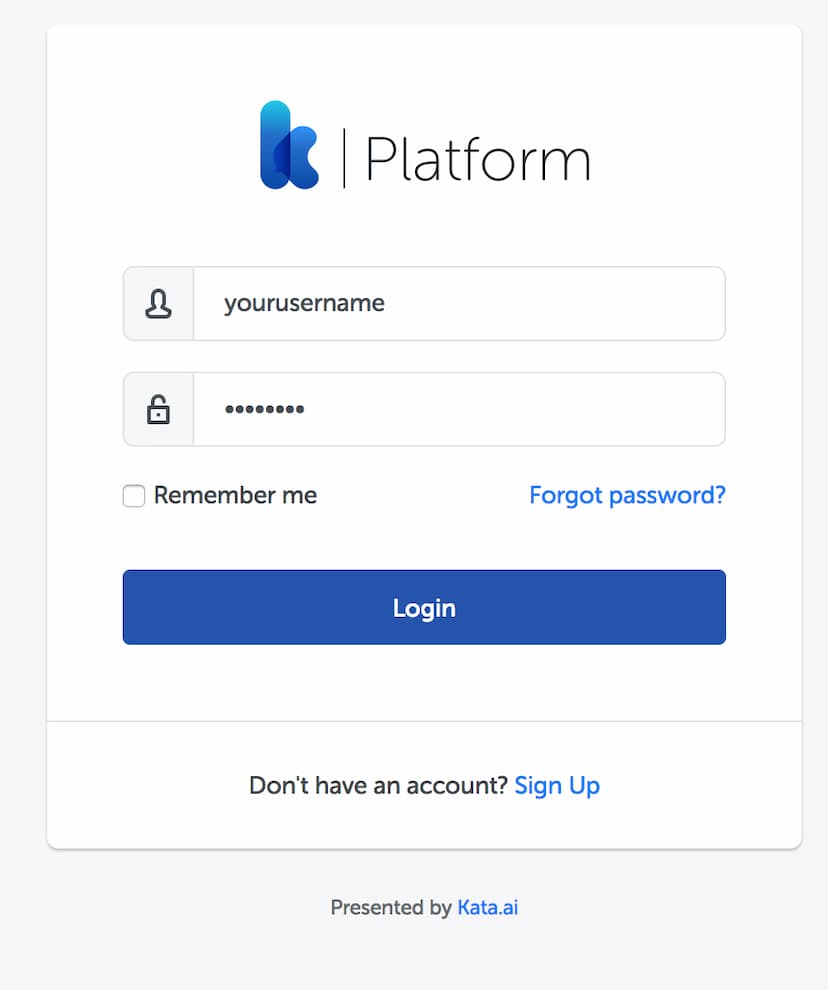
Click "Login" to continue.
Create a project
After you logged in, you will be taken to the Project Page.

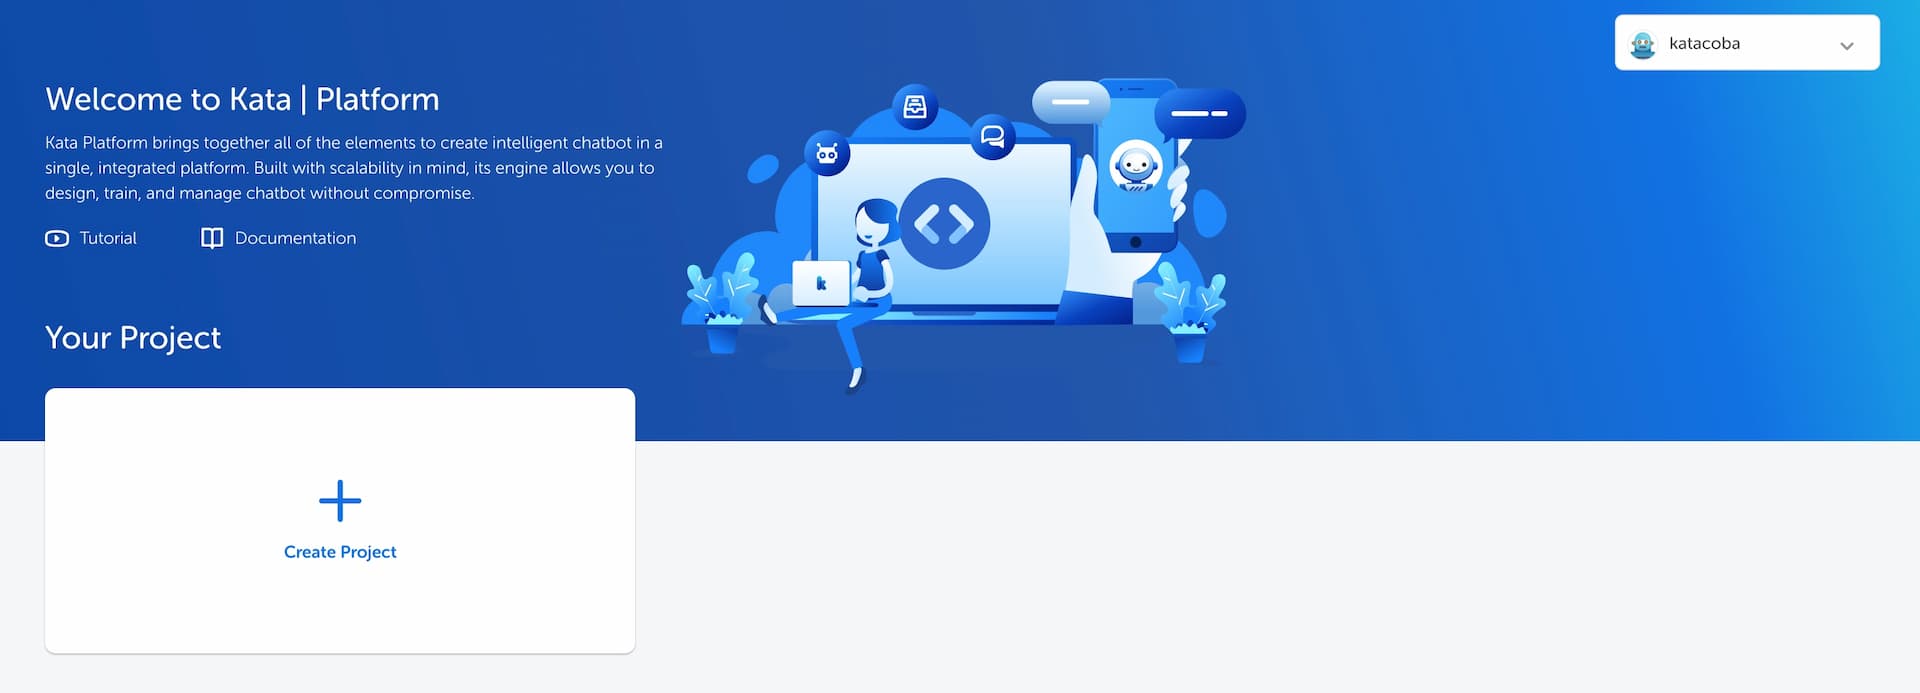
Click on “Create Project” and fill in the form. Each project contains one bot design, one NL, and one CMS.


NLU language is used to determine which language model you want to use. Currently, we support Bahasa Indonesia and English.
You can also choose NLU Visibility to be public or private. If you choose public, all Kata | Platform users can utilize your NLU using root and inherit function.
Create Fallback Flow
Create fallback flow
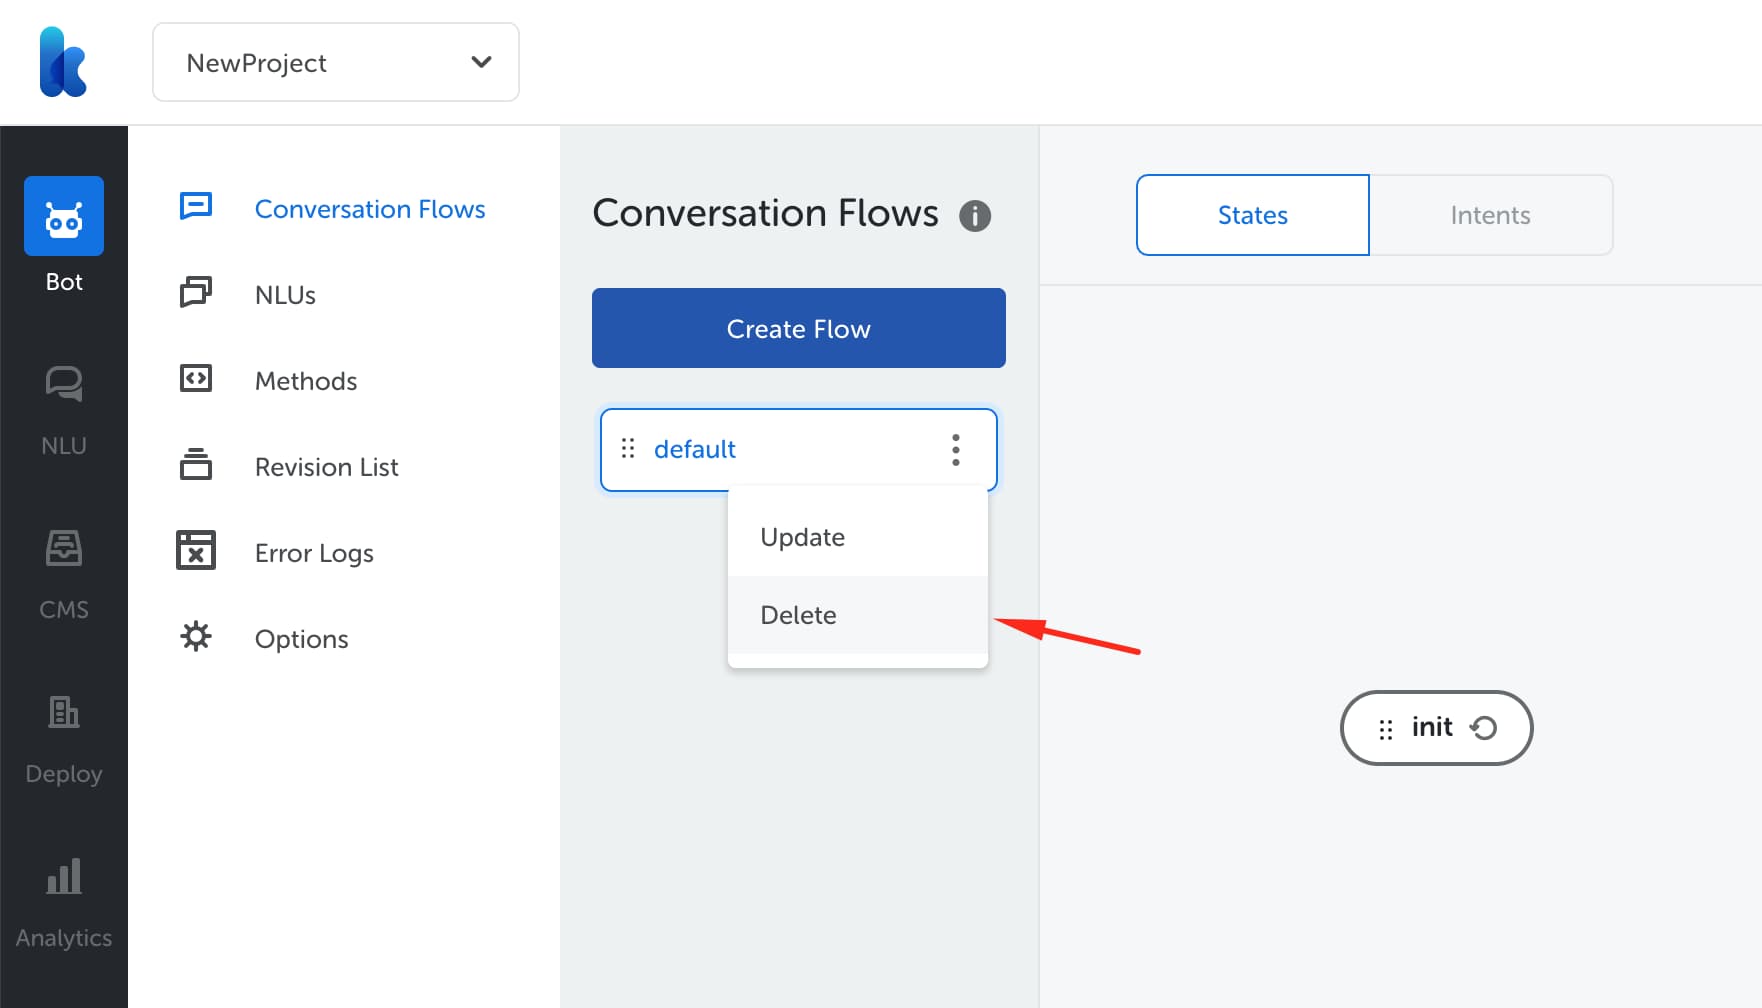
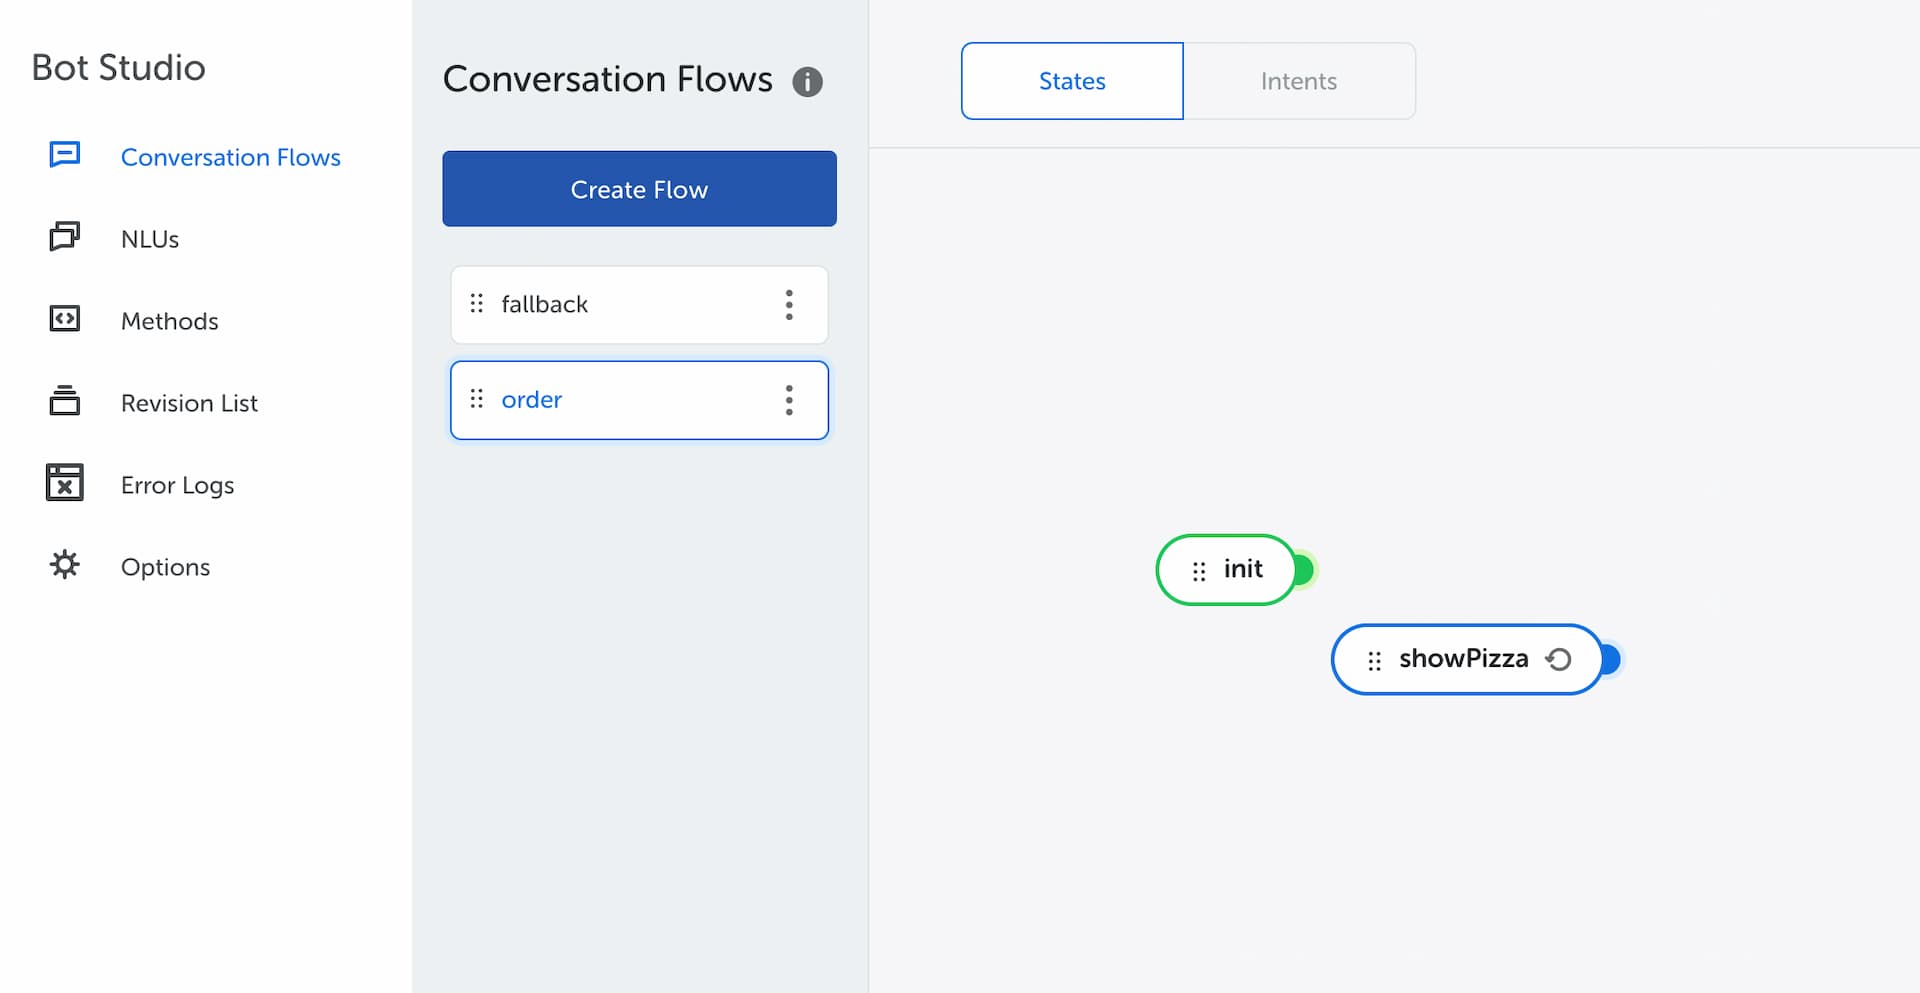
Once you create a project, you will be redirected to the Bot Studio menu.
Now we are going to learn how to create a flow. Flow is a container of intent, state, and action. A flow typically represents a linear process.
The first flow that we will create is a Fallback Flow. Its purpose is to handle undefined users input, or commonly called “else condition” state. In this case, the “else condition” is everything that is not “Start Order”.
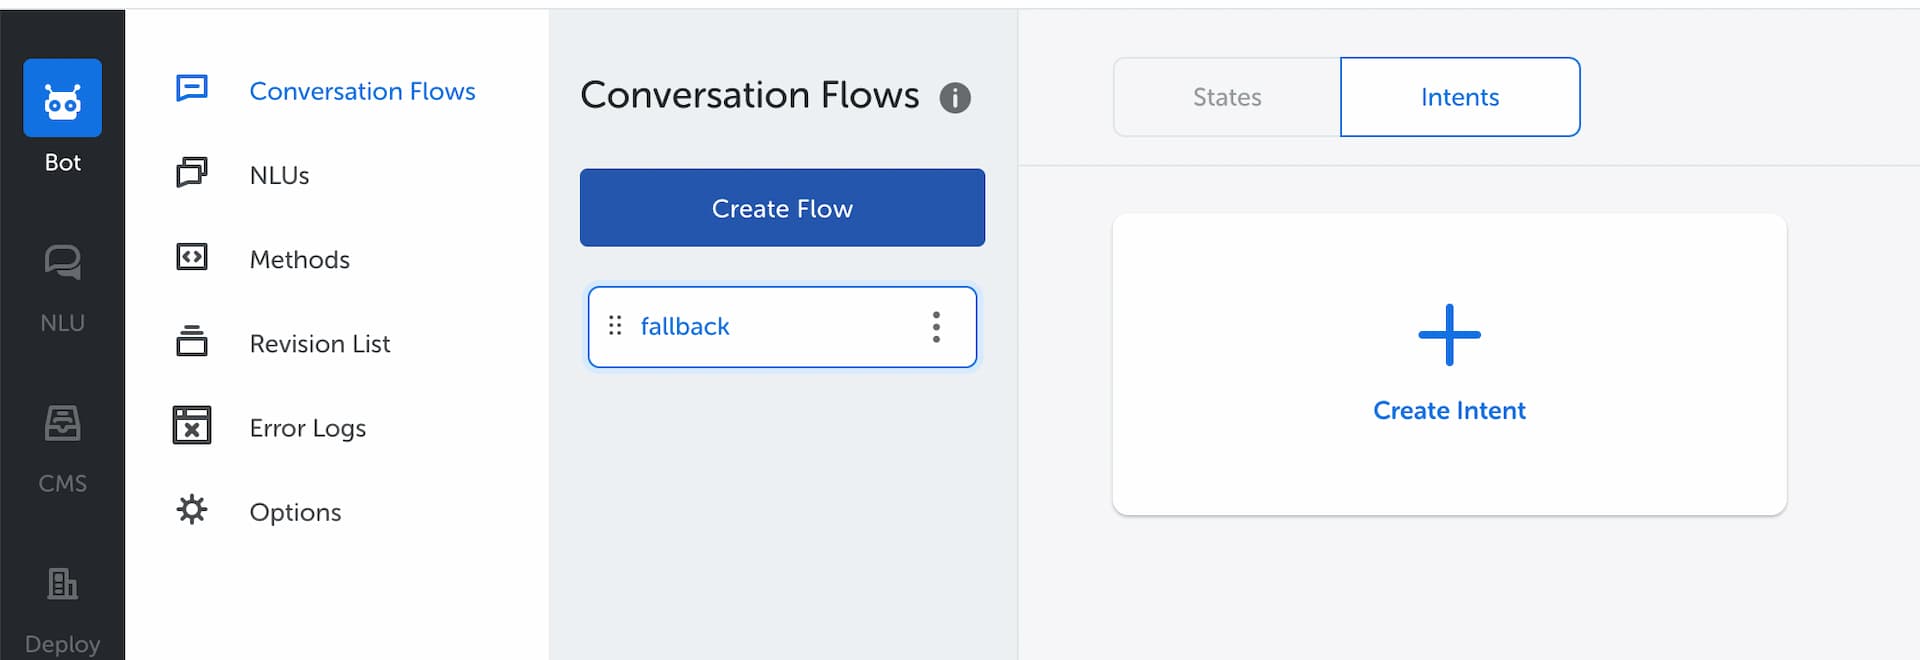
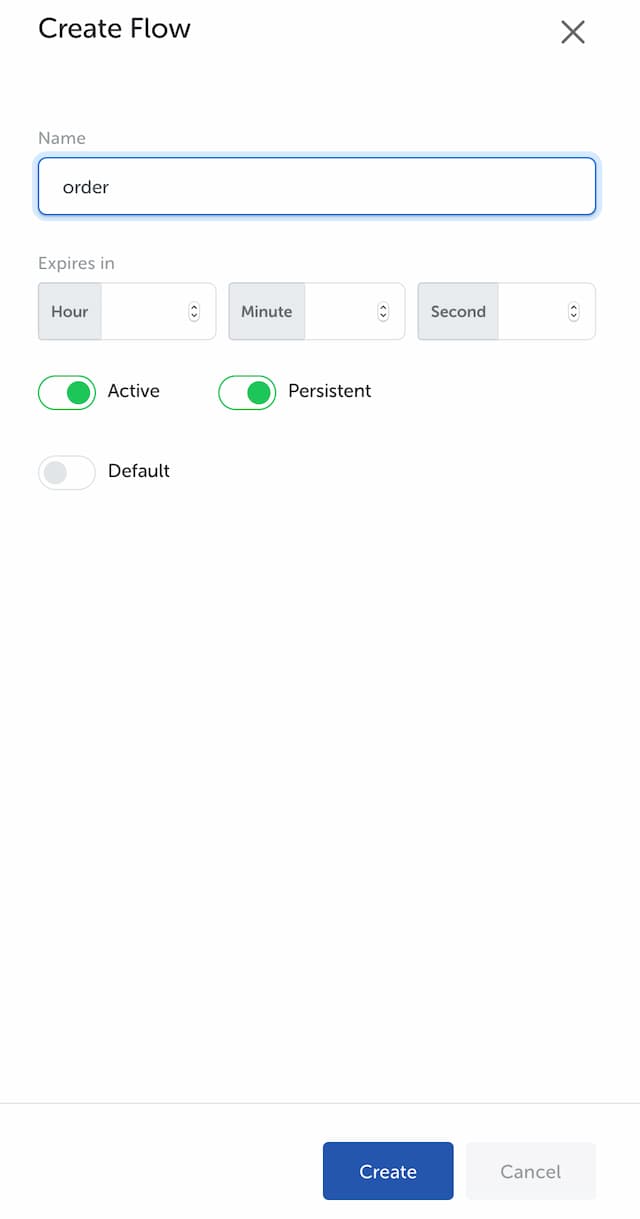
You may find a flow that is created automatically by the system or default flow. We will delete that flow by pressing more button and then “Delete.”

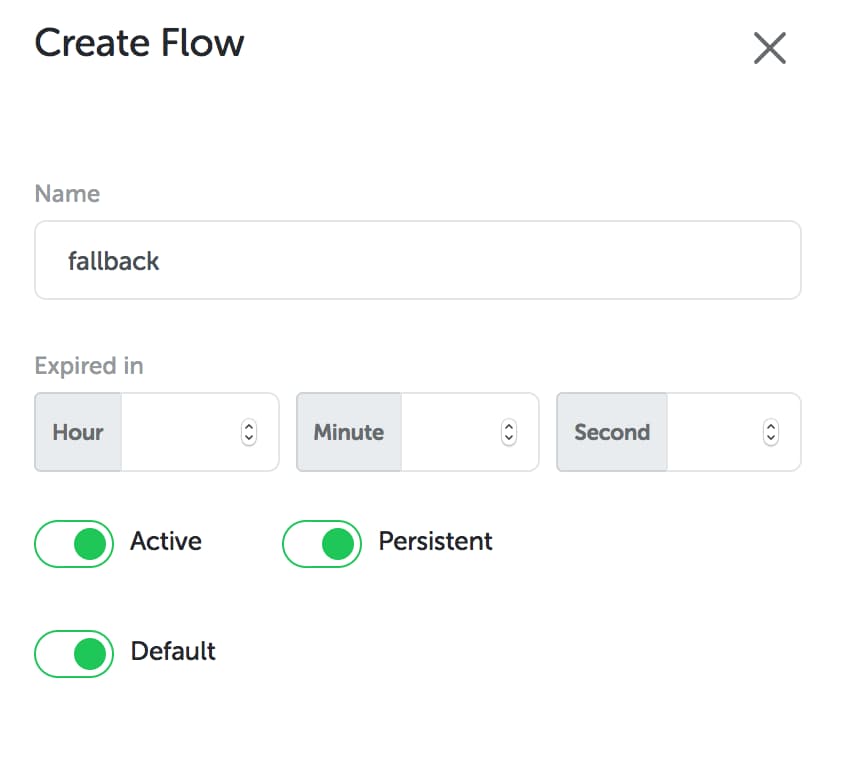
Next, click “Create Flow” button to create fallback flow. Set flow to active, persistent, and default.

Create fallback intent
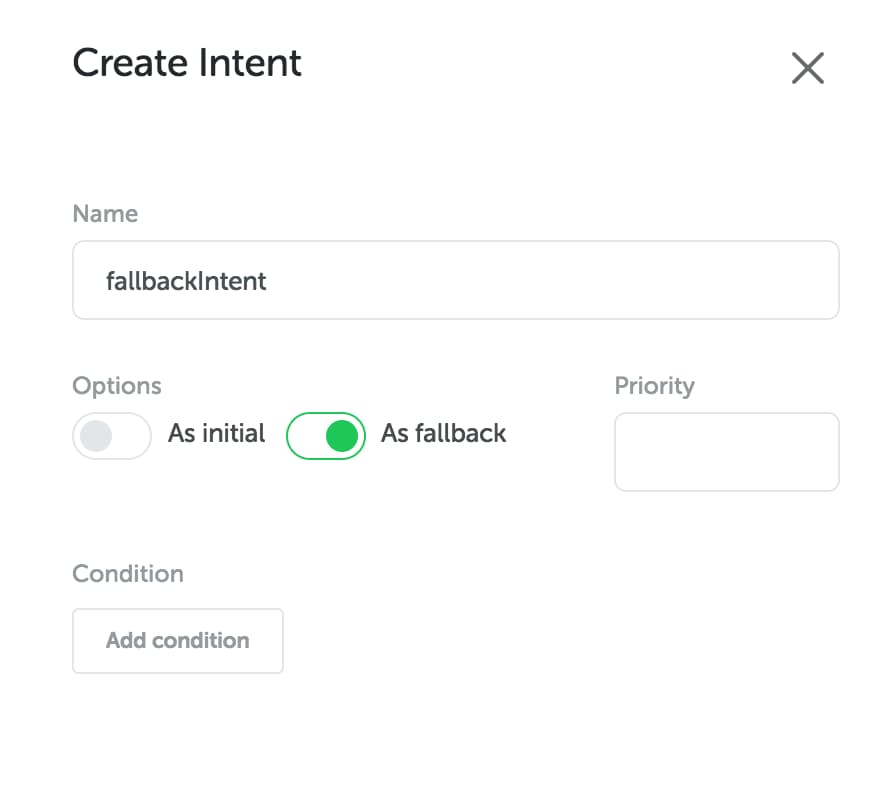
After you have created fallback flow, we will create new intent by pressing the Intents tab on the sub-menu. Then, we will create a new intent for fallback flow. Click “Create Intent” button to create.

Then, fill in the form as follows

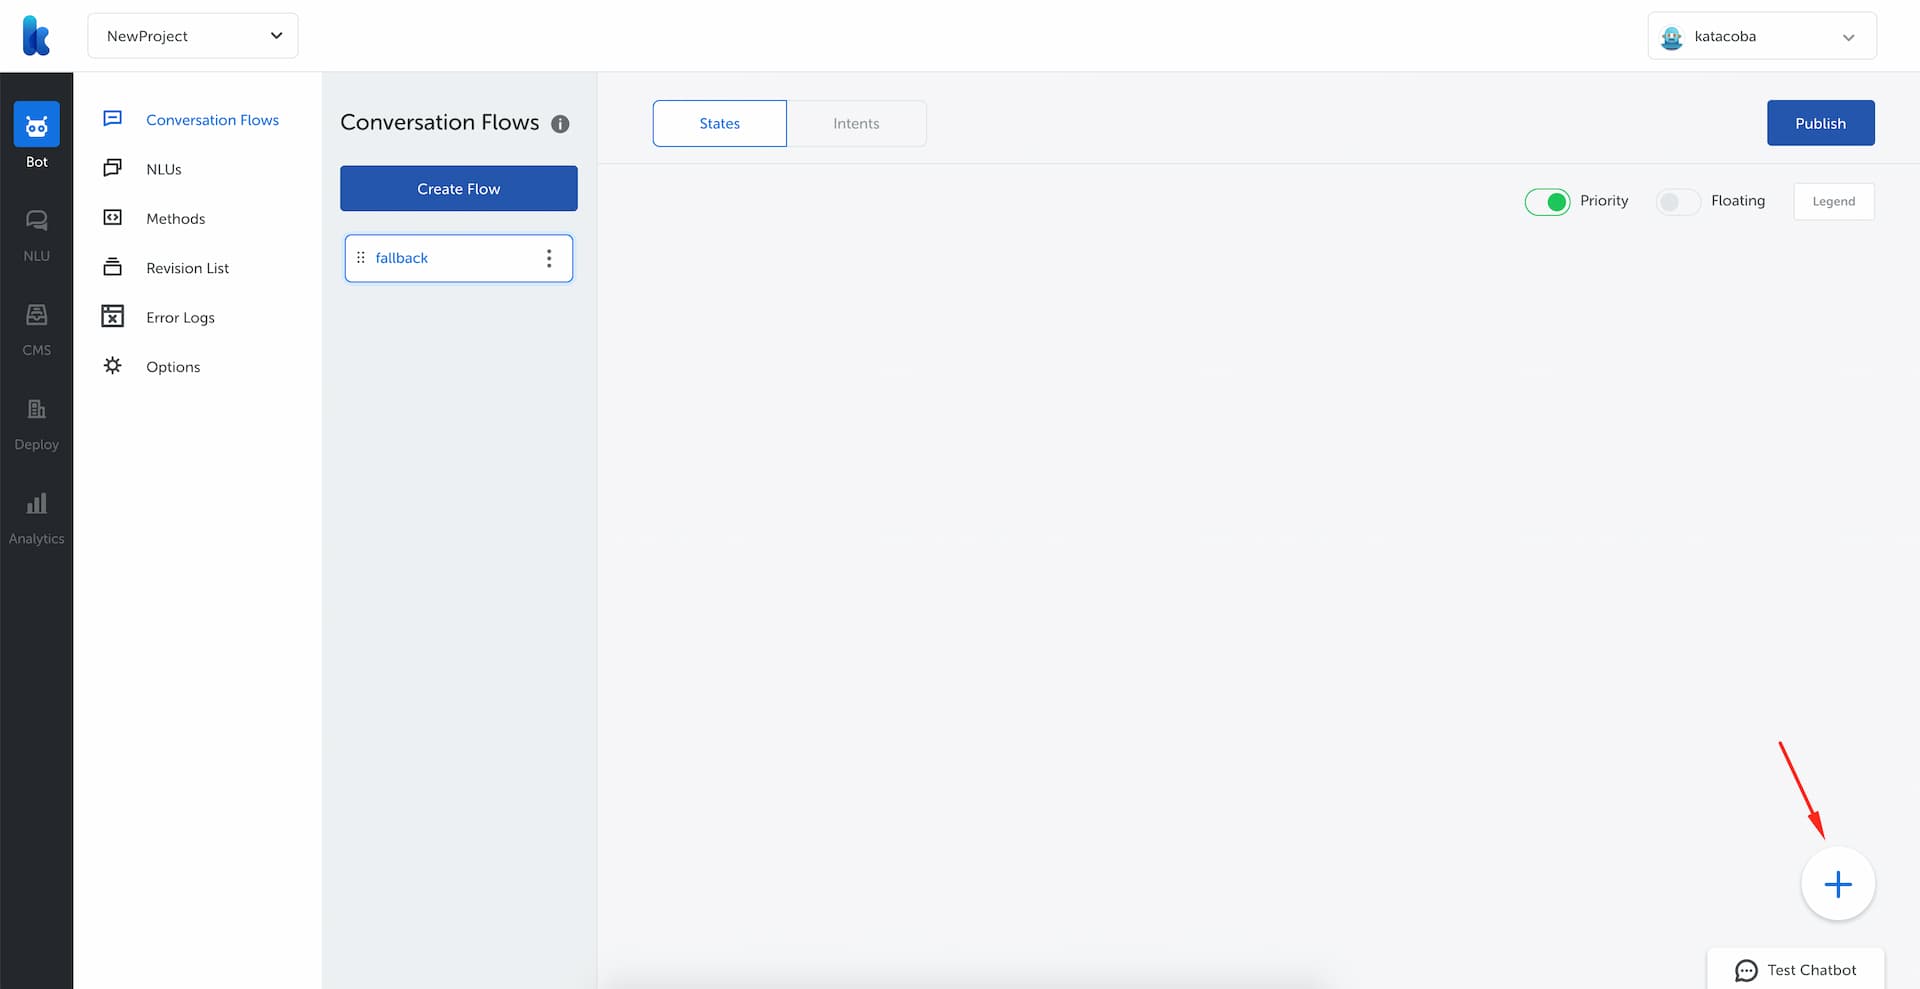
Create State init
Next, we will create a state called init. Click the ”+” button at the bottom right of your screen.

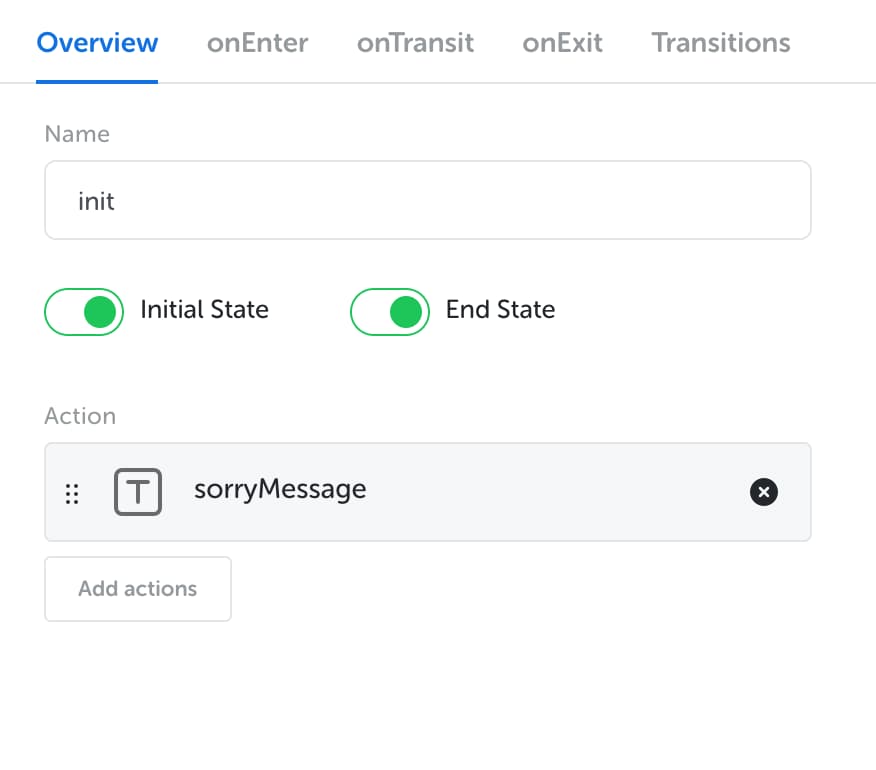
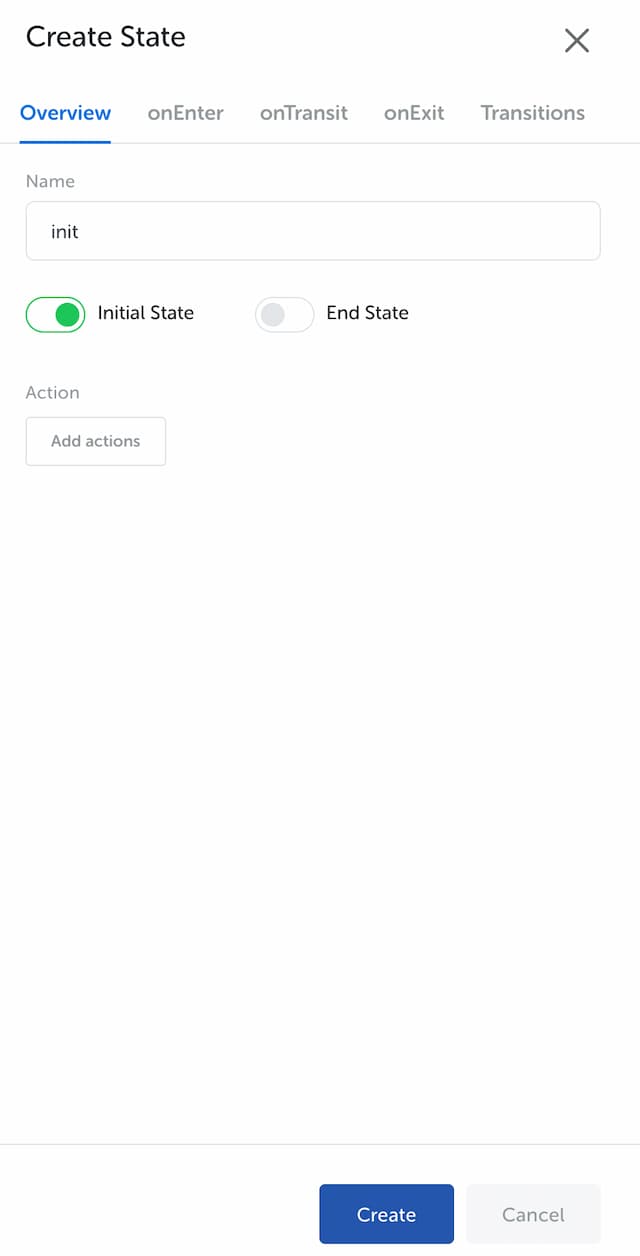
Fill state with name init on Overview tab and set it to initial state and end state (as shown below).
Enabling Initial State and End State will make init the first and the last flow to be checked by the bot when there isn't any flow that matches a user's input.

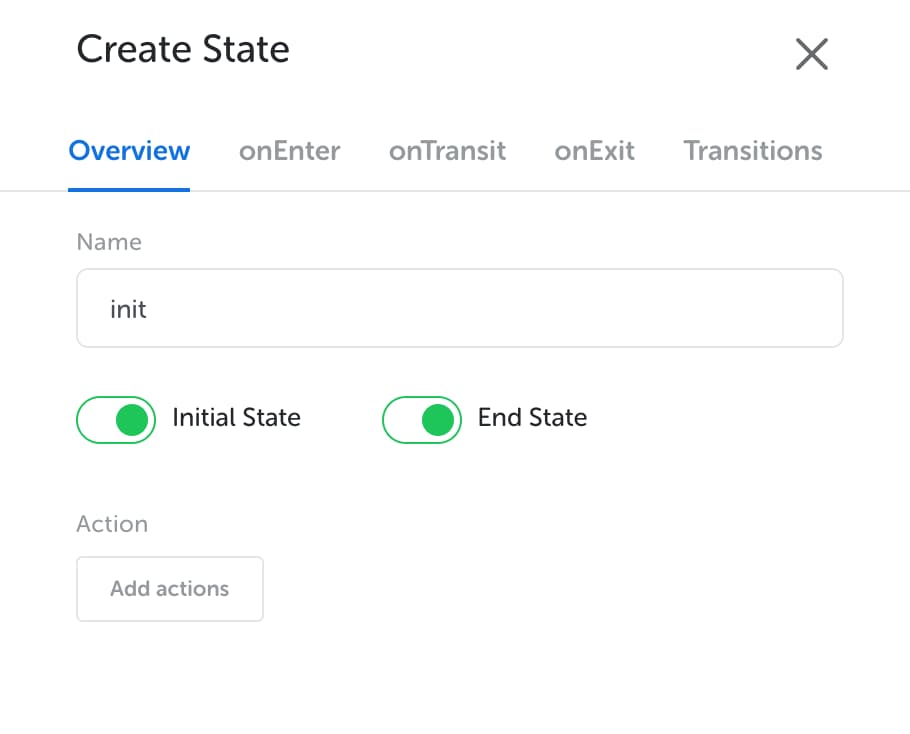
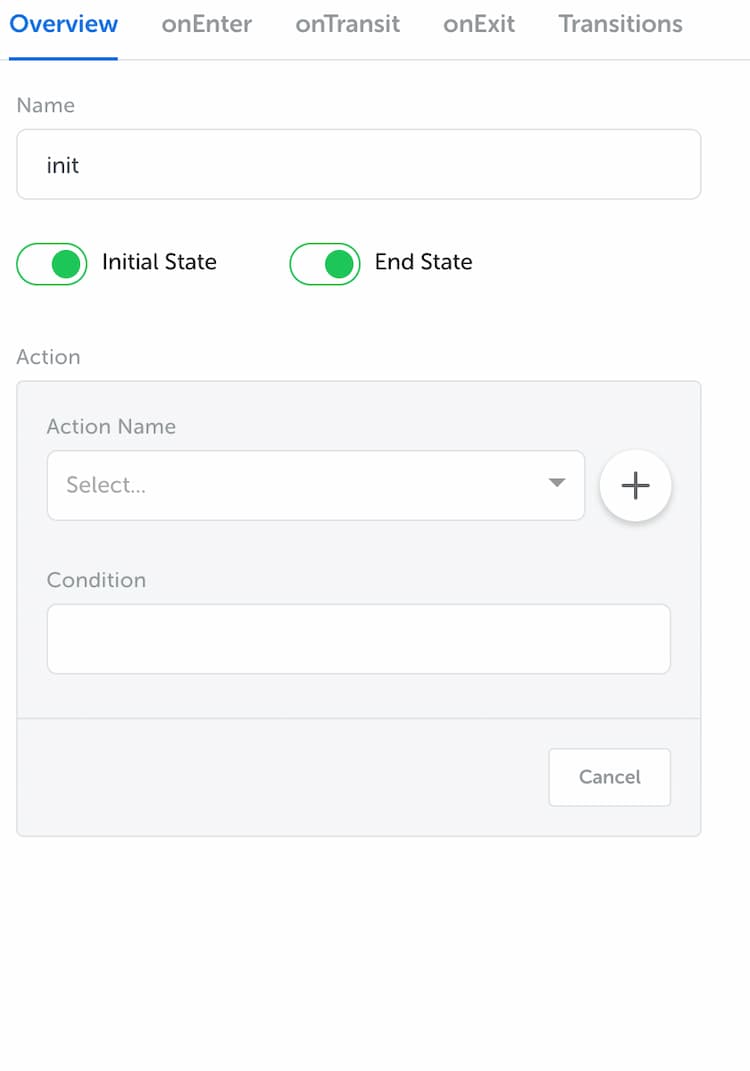
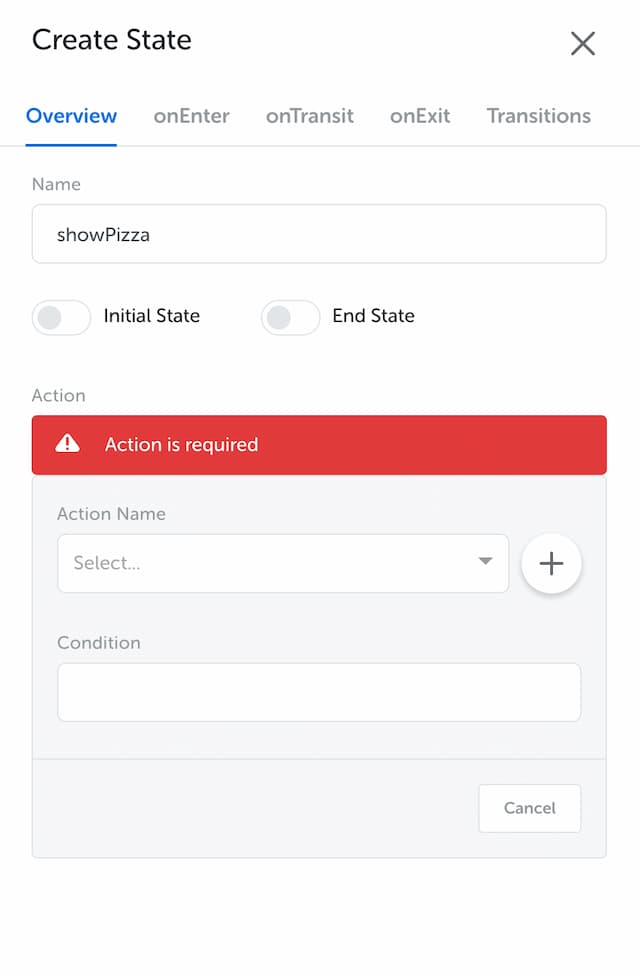
Now we will create a bot response to display an apology message. Click “Add actions” button to create a response.

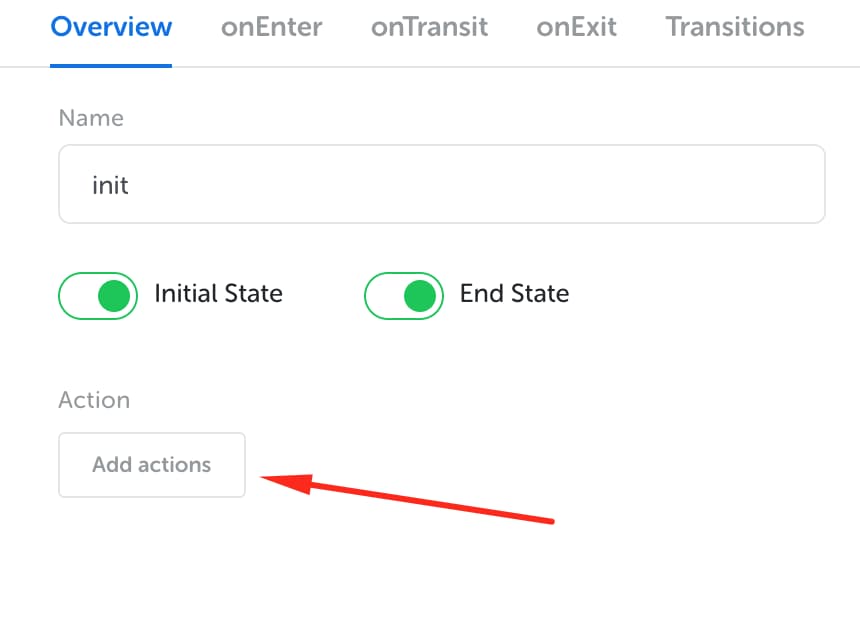
Container for creating action will appear

Create Action Text in State init
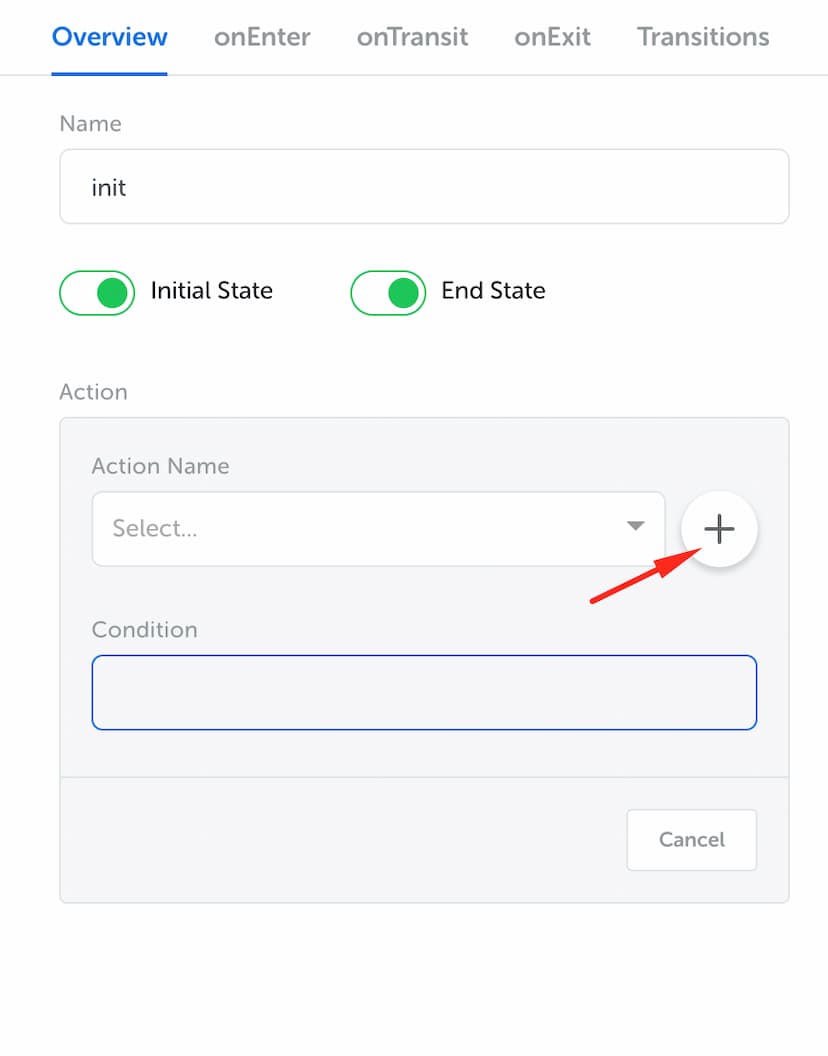
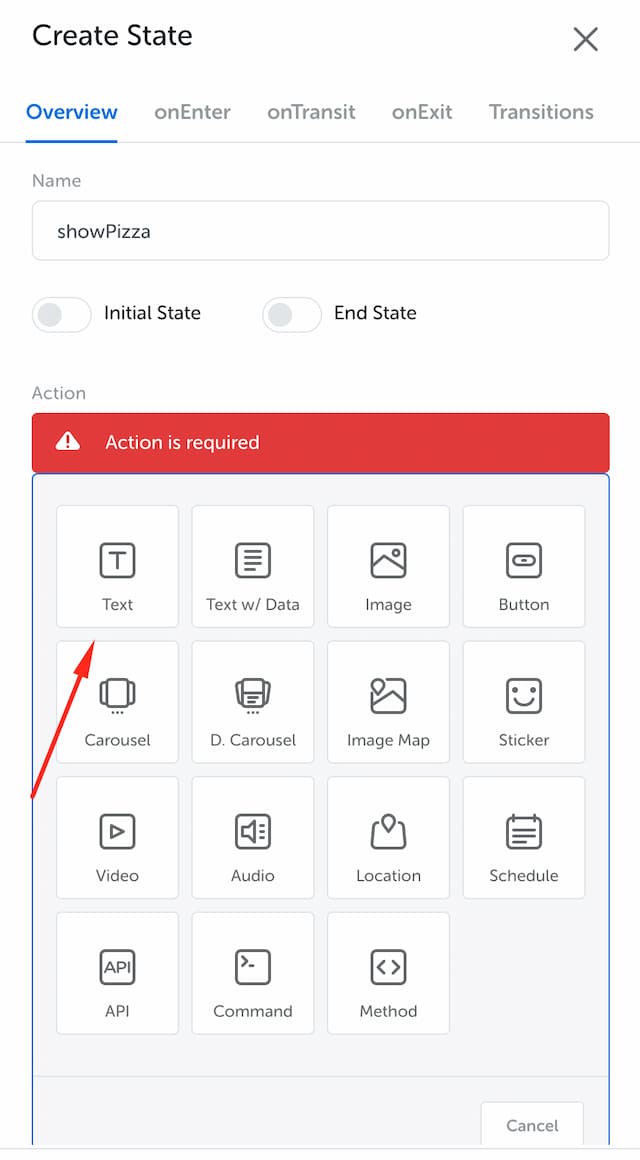
Click on “+” button to create a new action.

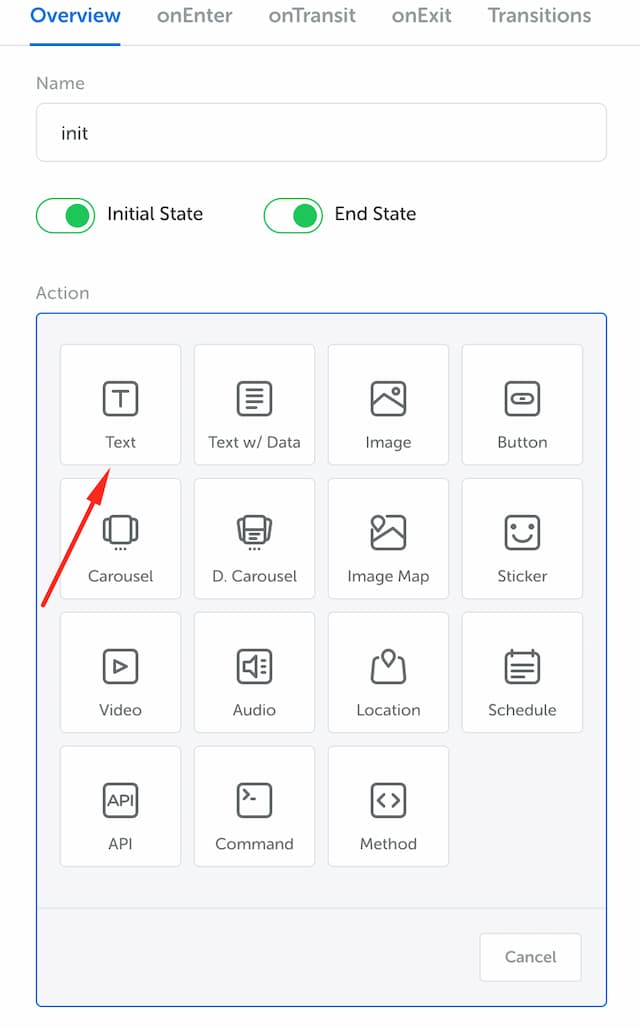
Choose action type “Text”

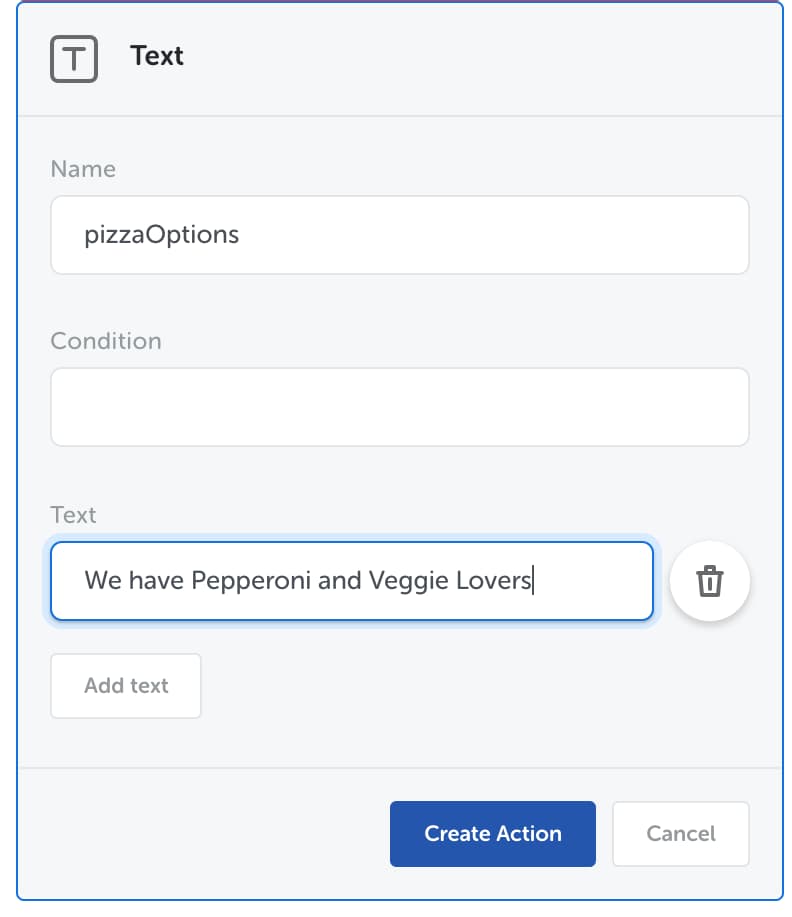
Then, fill in the form

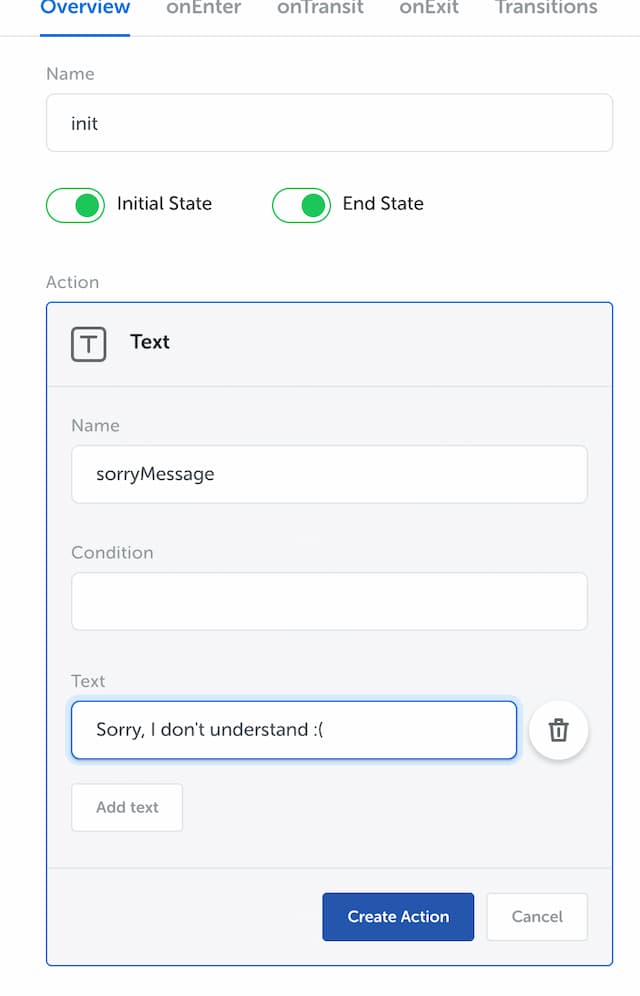
Click on “Create Action” button.

Create Self Transition in State Init
The last step to finalize fallback flow is to create self-transition for init state. Self transition is required to avoid error when the next state is not available. Click on “Transitions” and enable Self Transition.

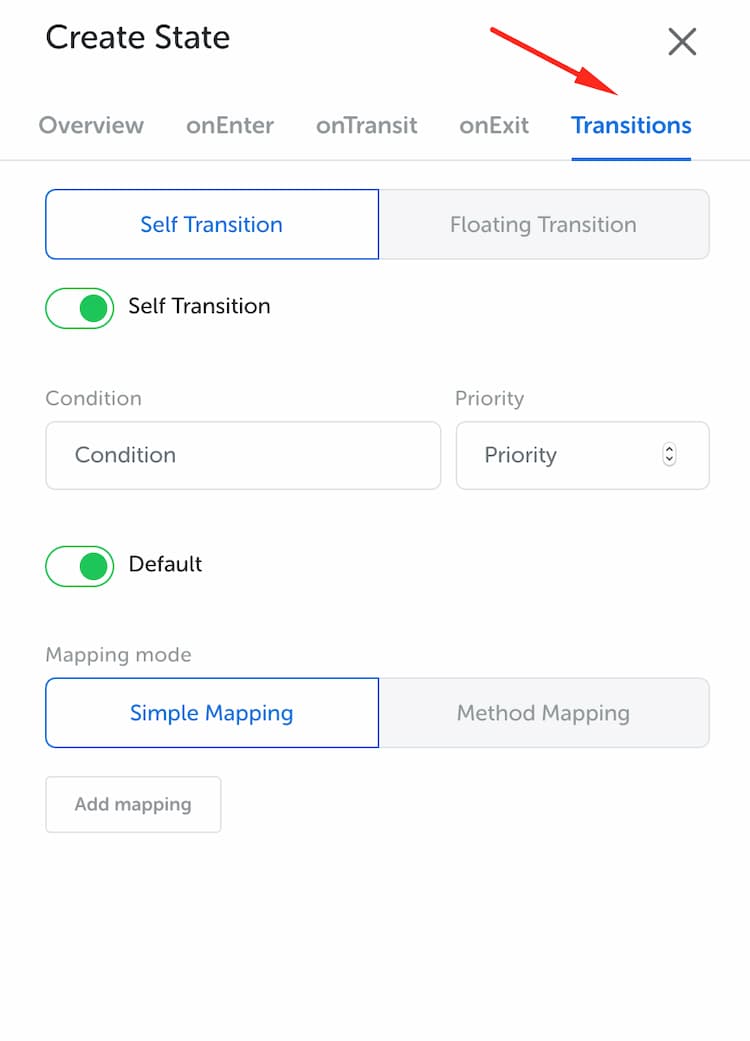
Click “Create” button. Your screen should look like this


Create Order Flow
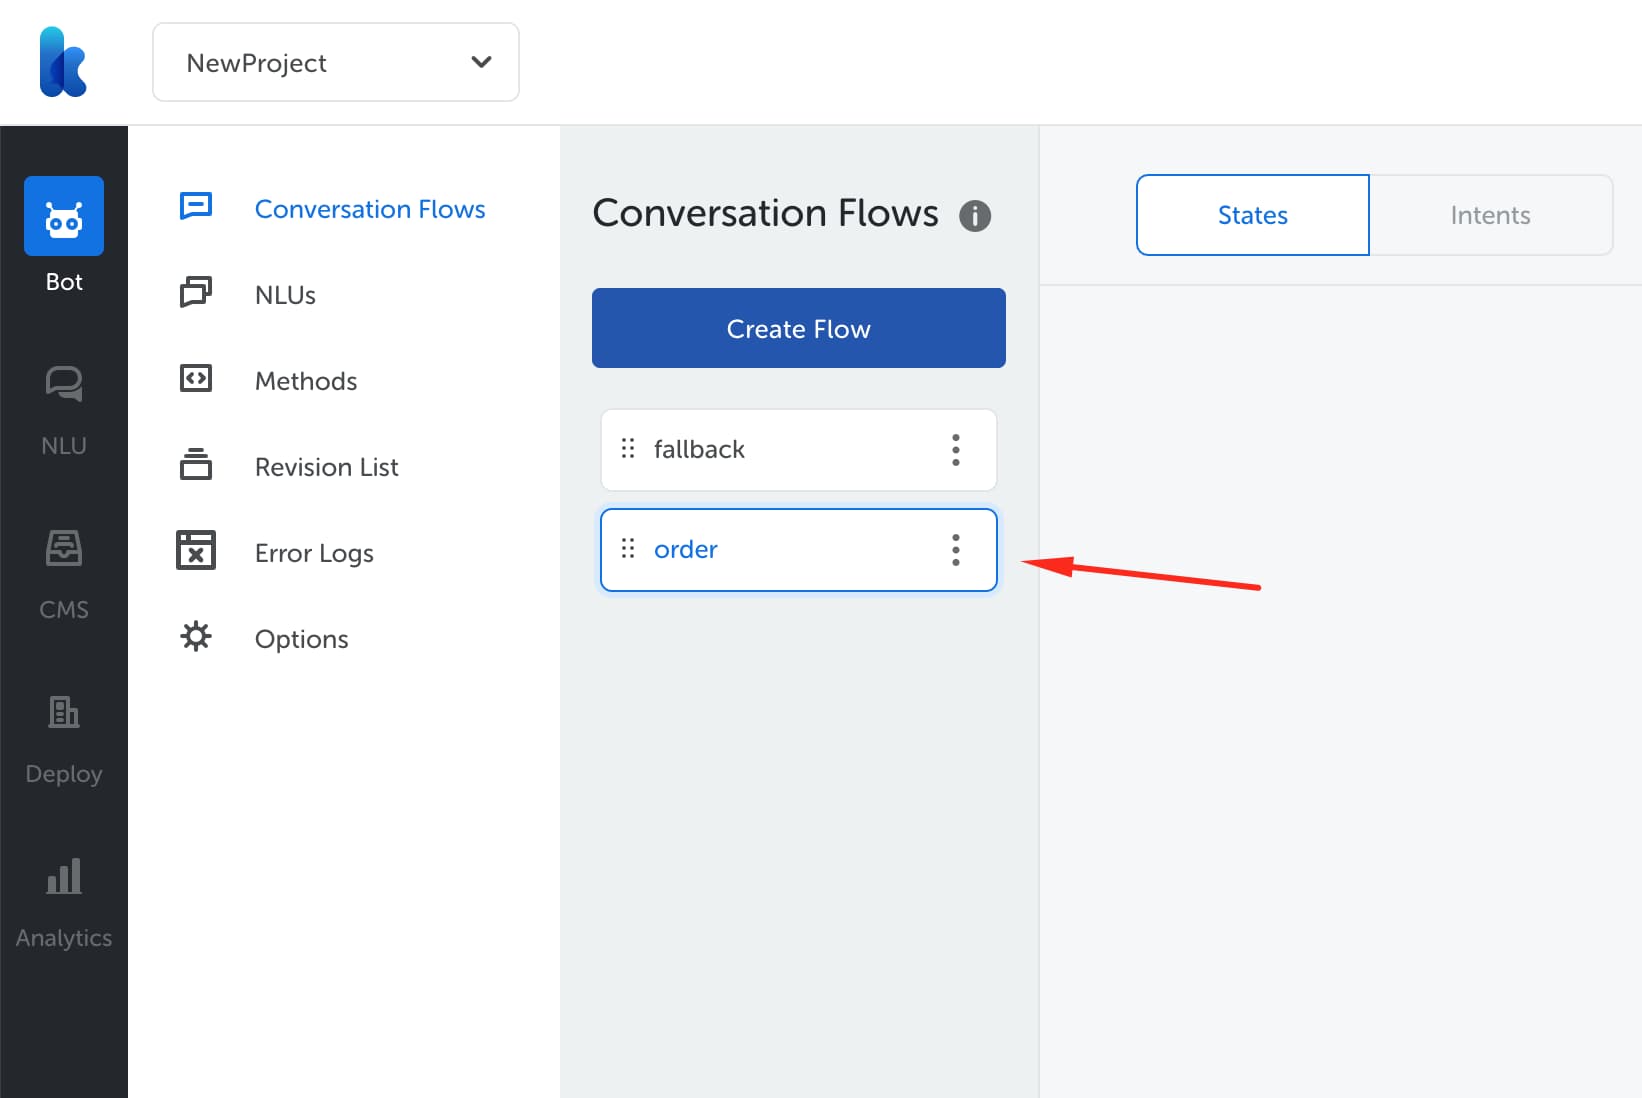
Next, we will create Start Order flow to handle pizza order.
Create Flow Order
First step is to create another flow called order .

Created flow will be shown like this

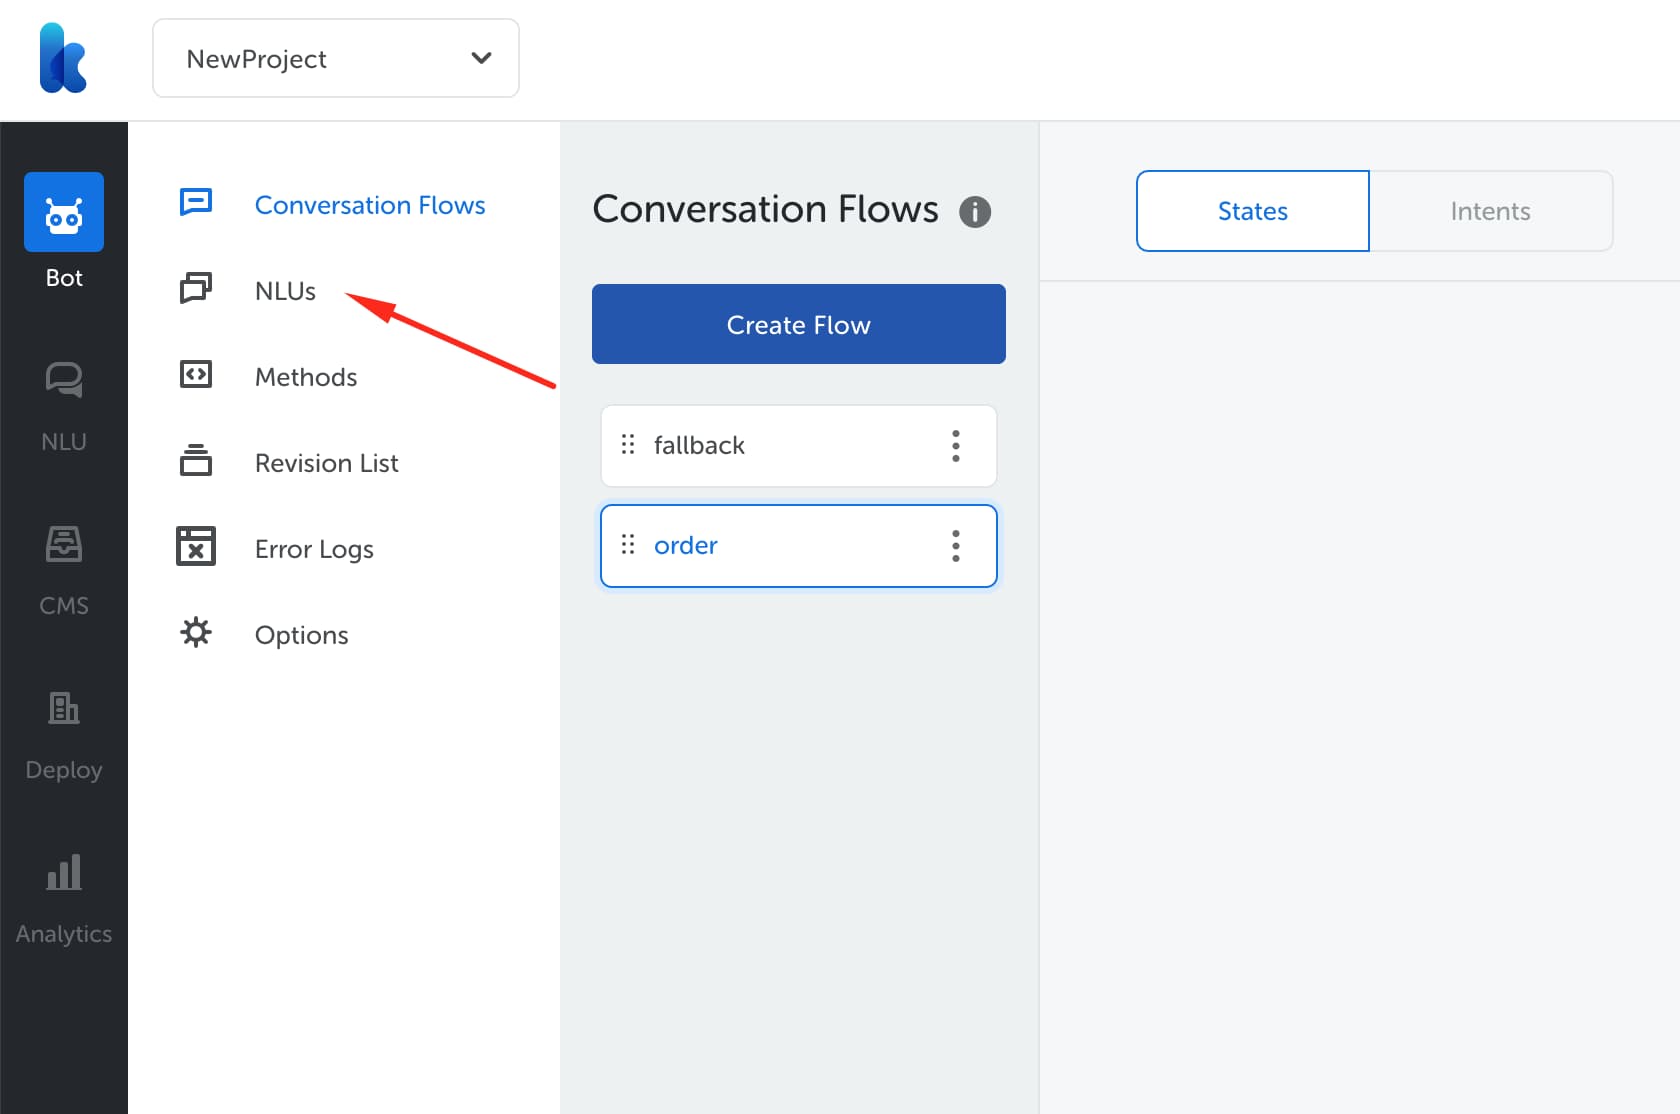
Create Keyword NLUs for 'Order'
In this step, we will define the NLU (Natural Language Understanding) to trigger order flow. NLU is used to translate user inputs into data that machine can understand. There are many types of NLU, but the type that we will use in this particular flow is called keyword. To define the NLU, go to NLUs menu.

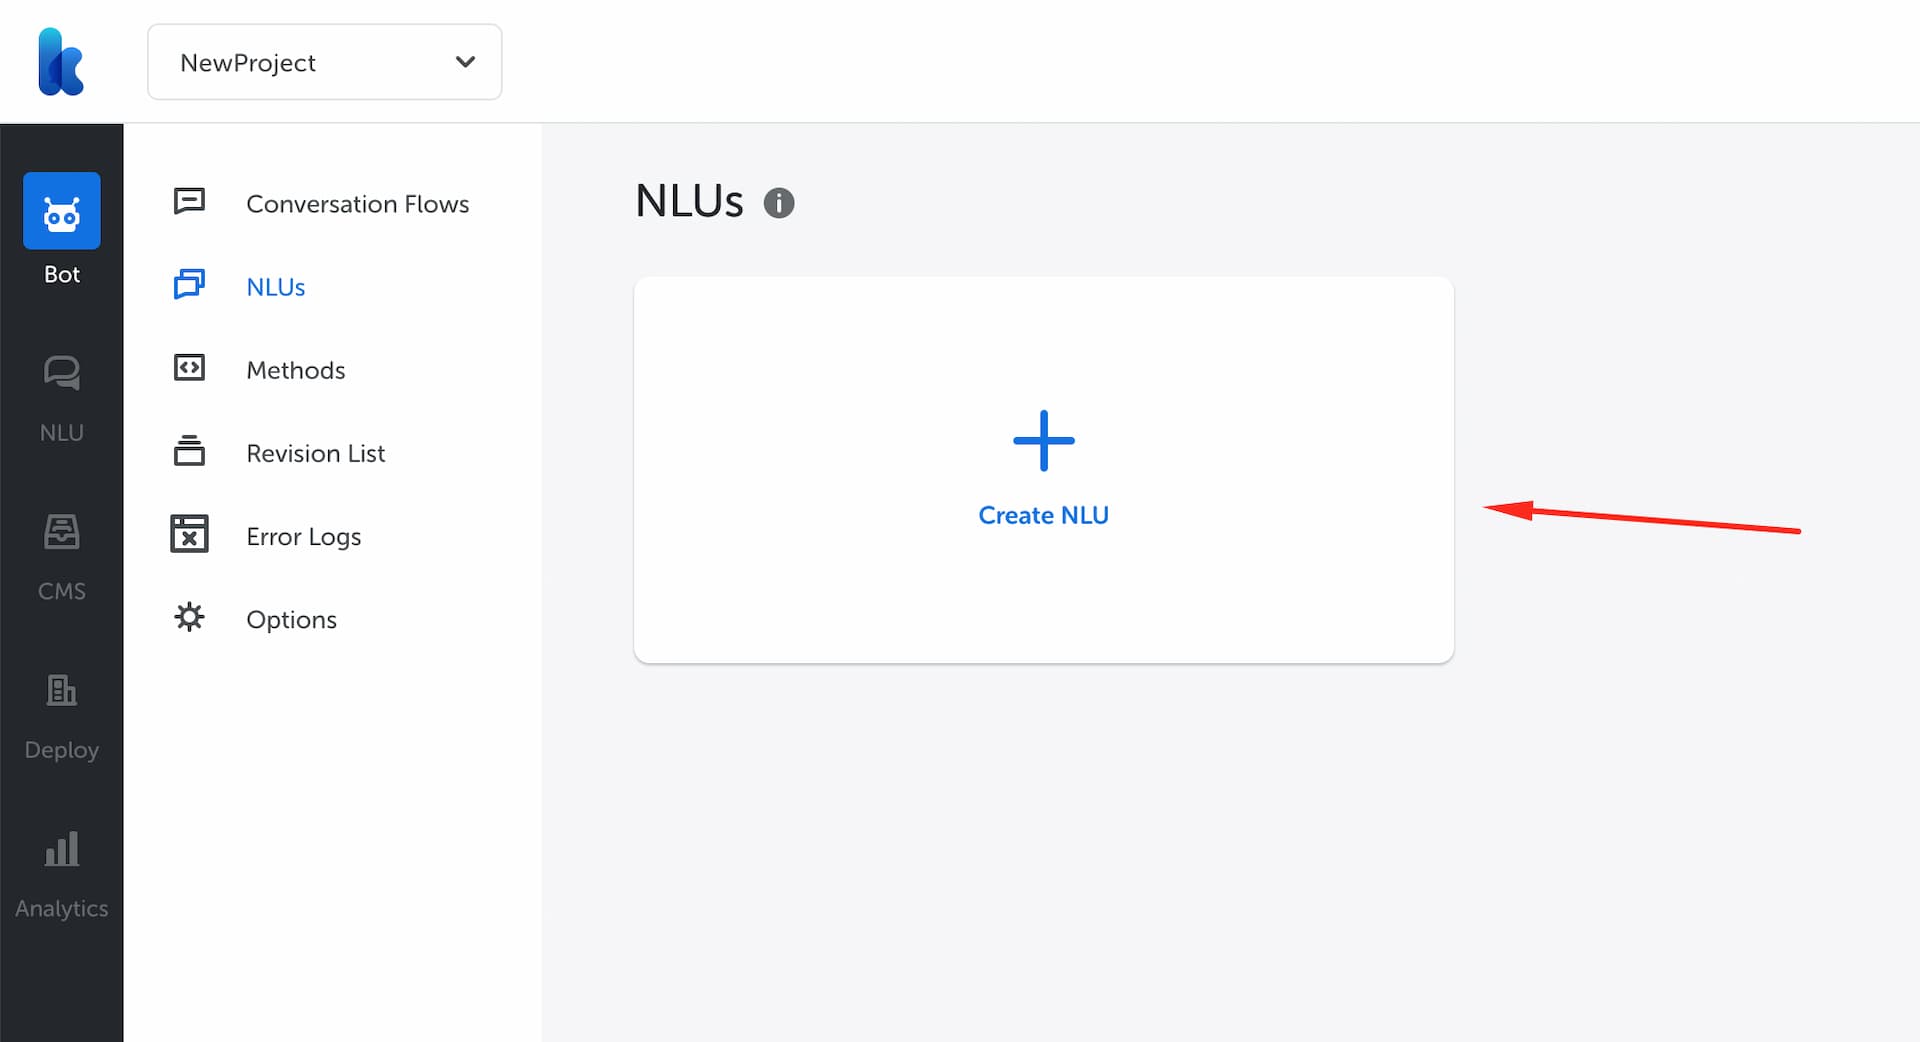
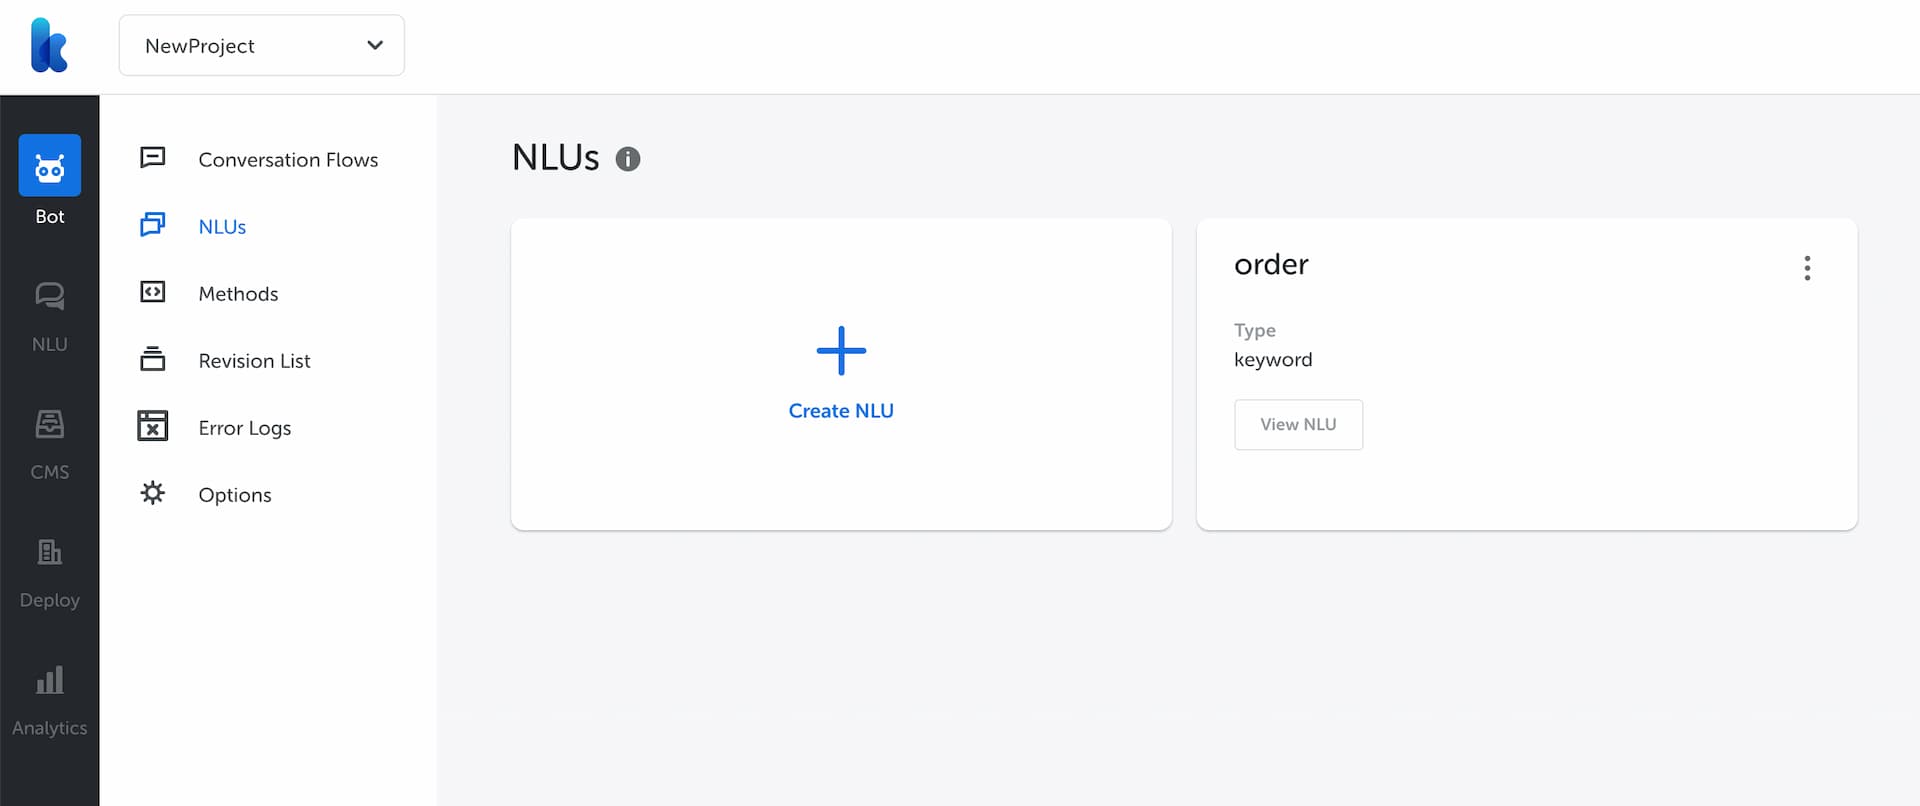
Next, click on “Create NLU”

Choose Keyword type and enter keywords that represents order, such as “order”, “pls order”, “order pza”.

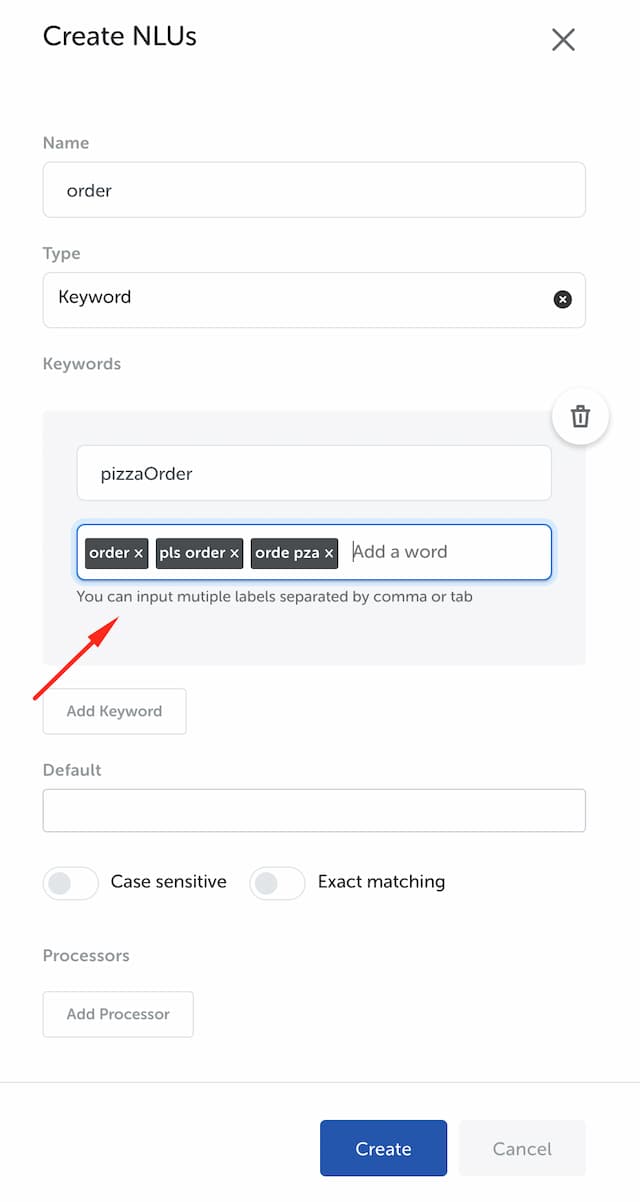
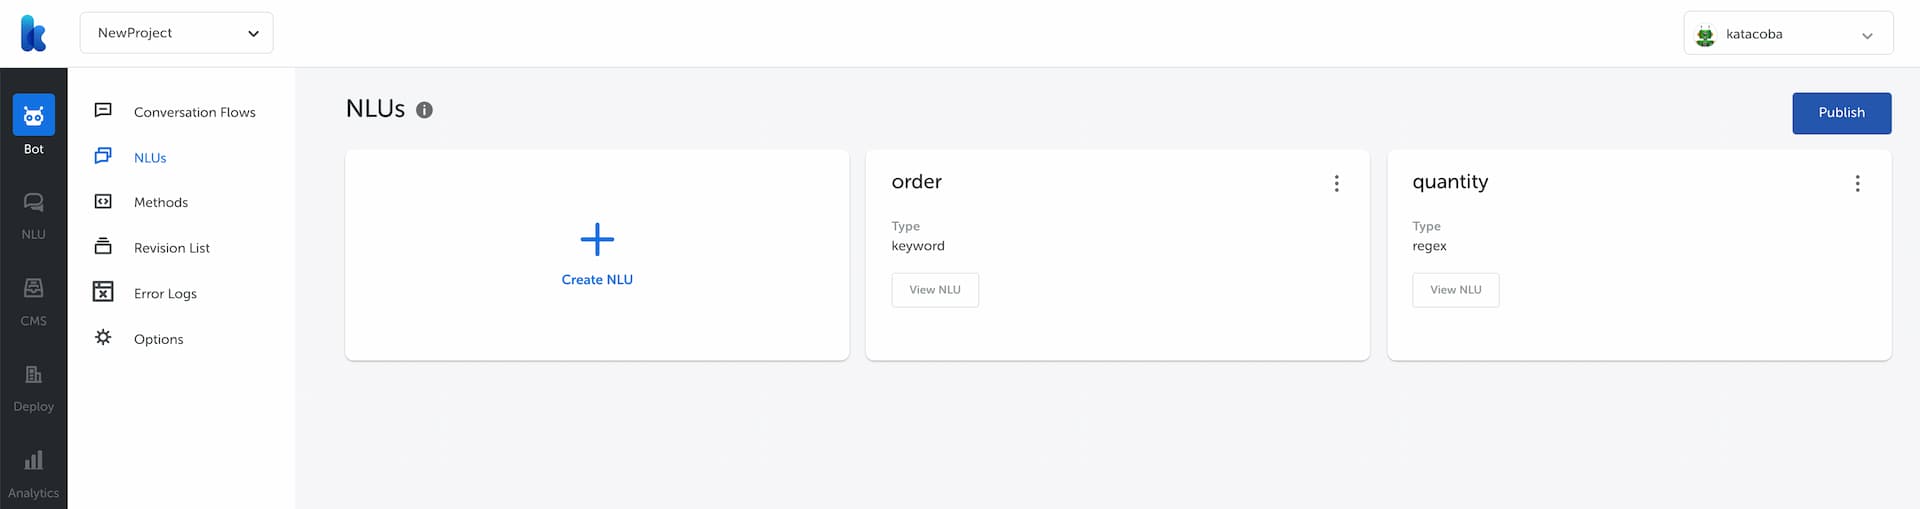
Successfully created NLU looks like this

Create Intent for Order
Each flow requires an intent to classify user's inquiry and trigger matching flow. So our next step is to set initial intent for order flow.
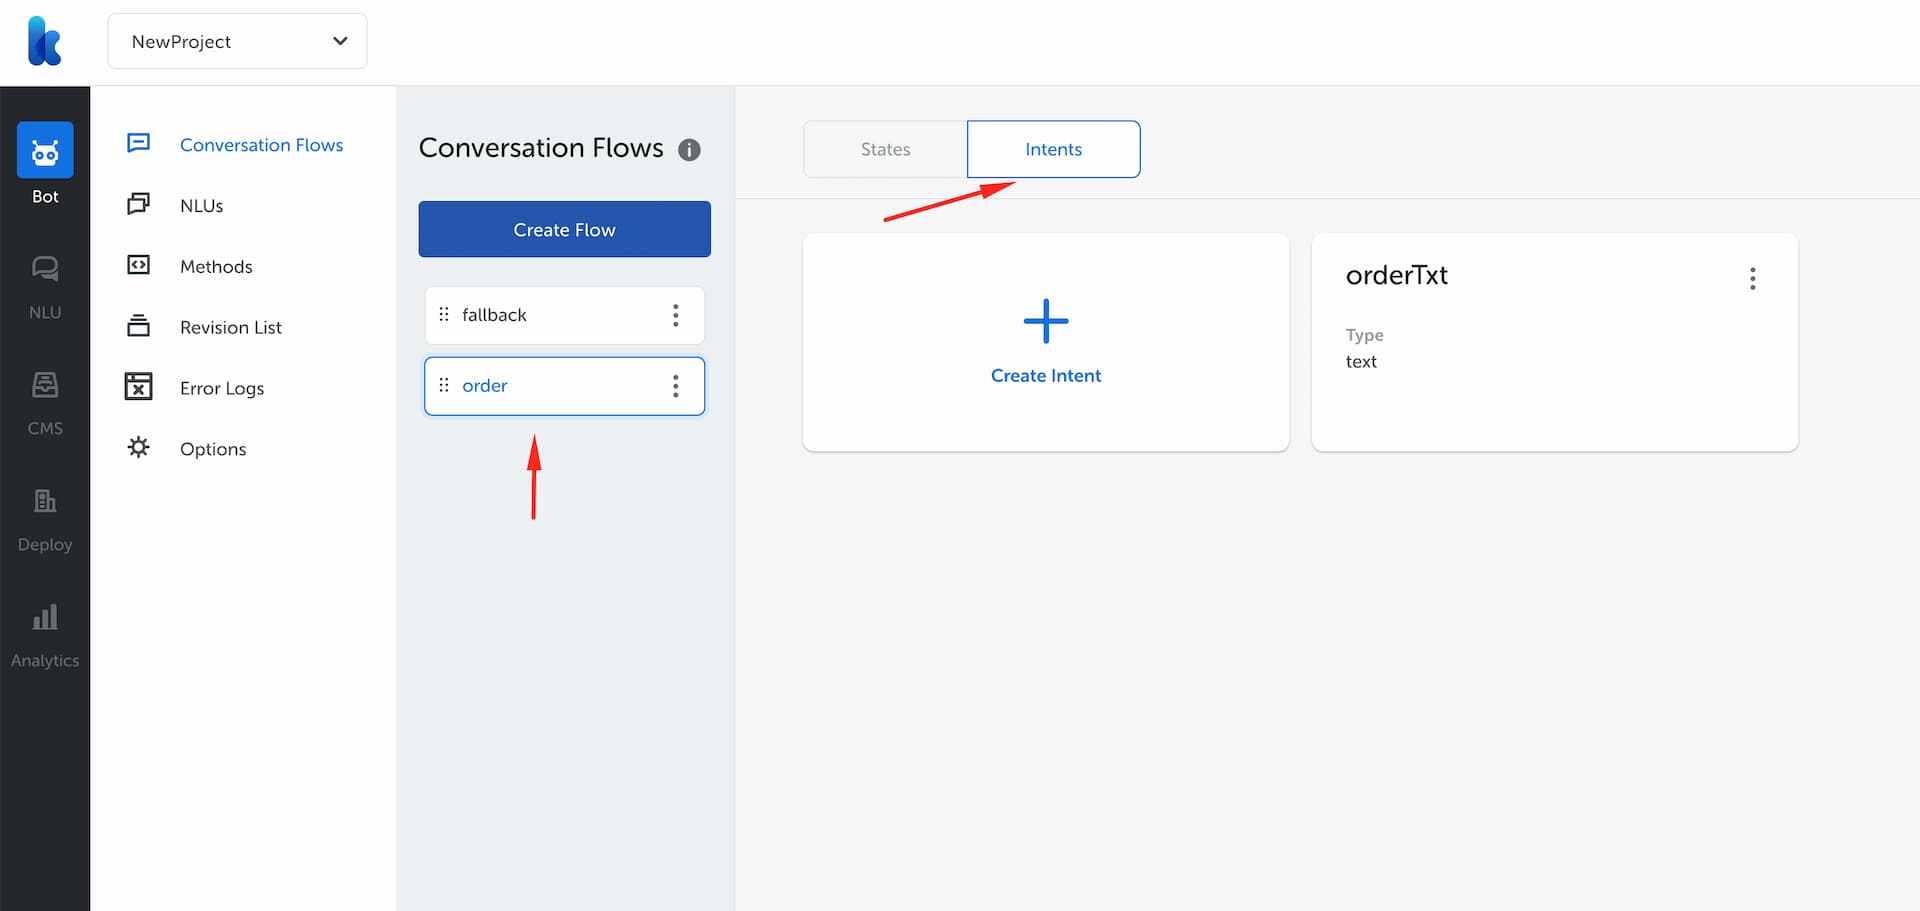
Go back to Conversation Flow menu and click on order flow, then click on “Intents” tab.

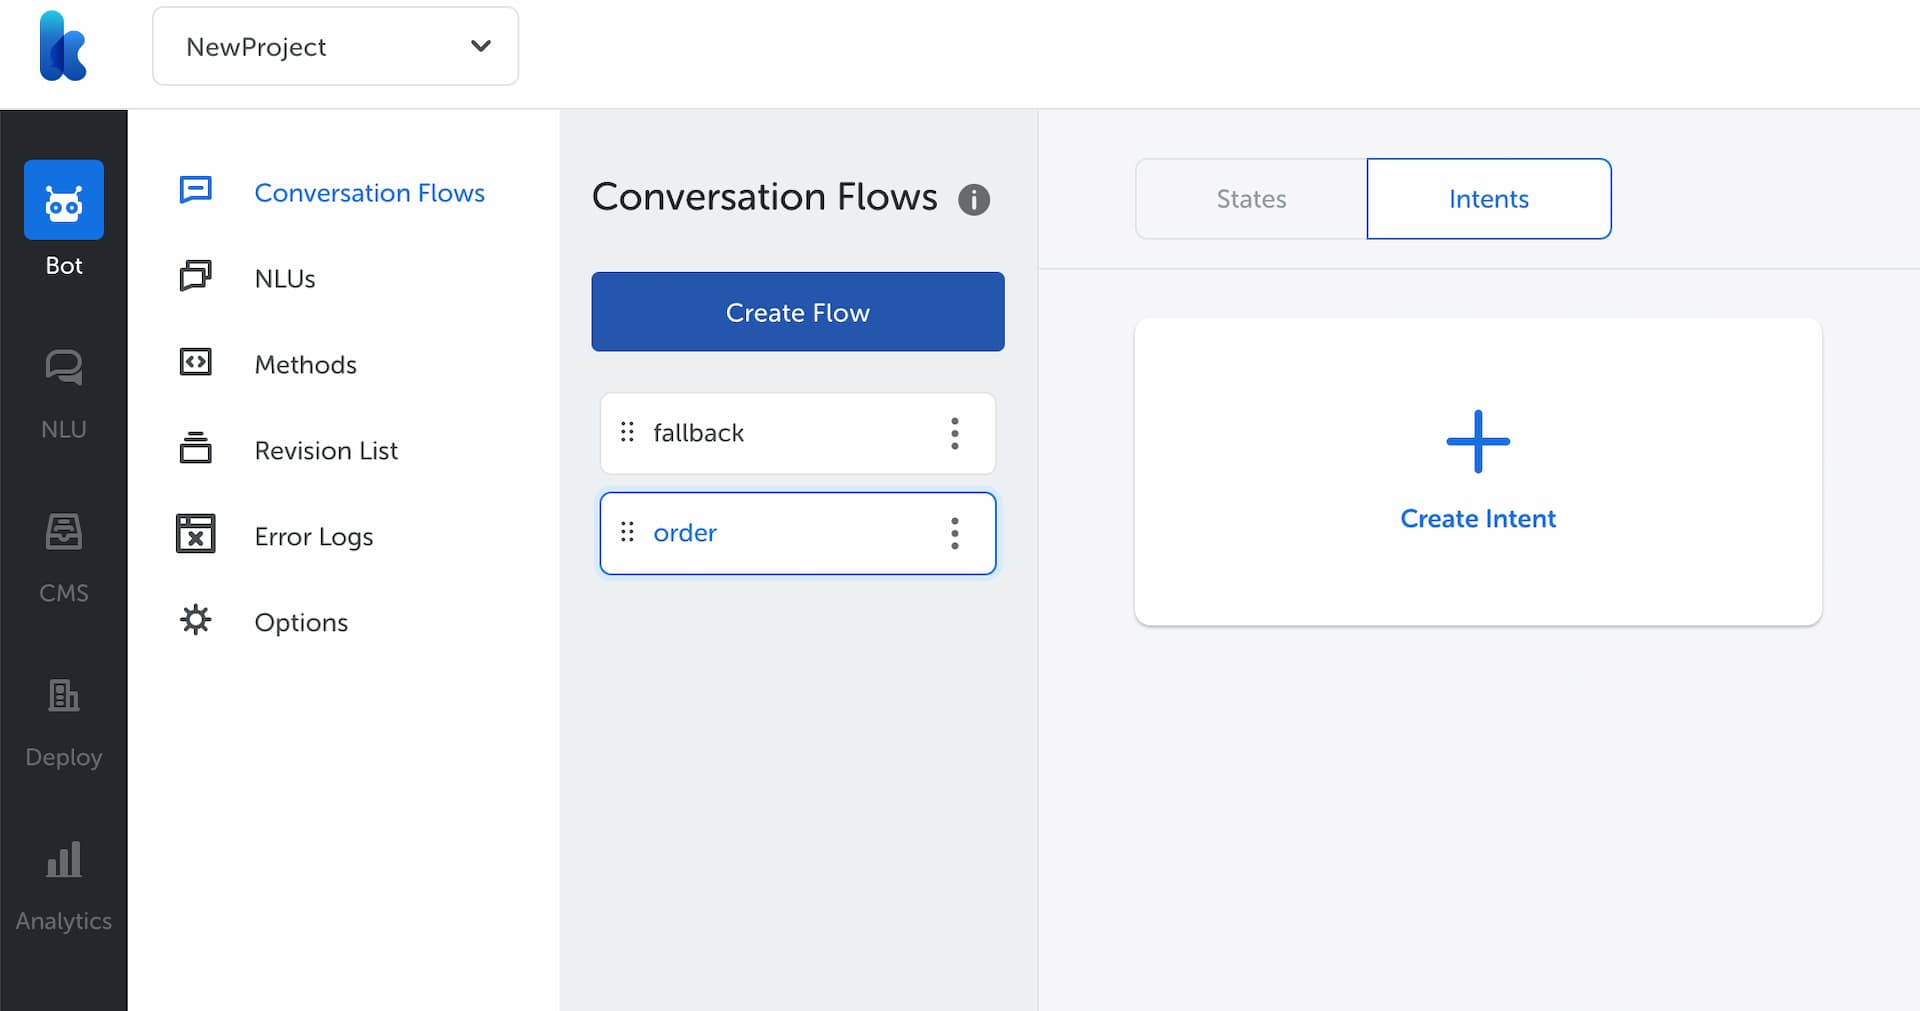
Previously, you already created keyword NLUs called order. We will set that keyword as intent in order flow. Map the NLU on classifier section.

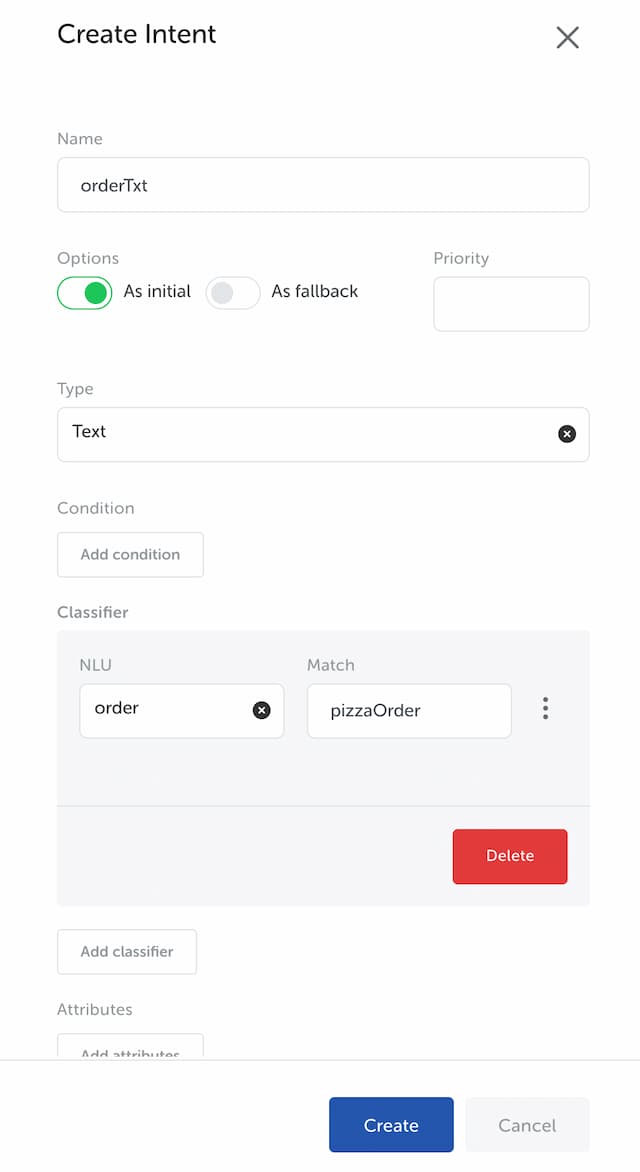
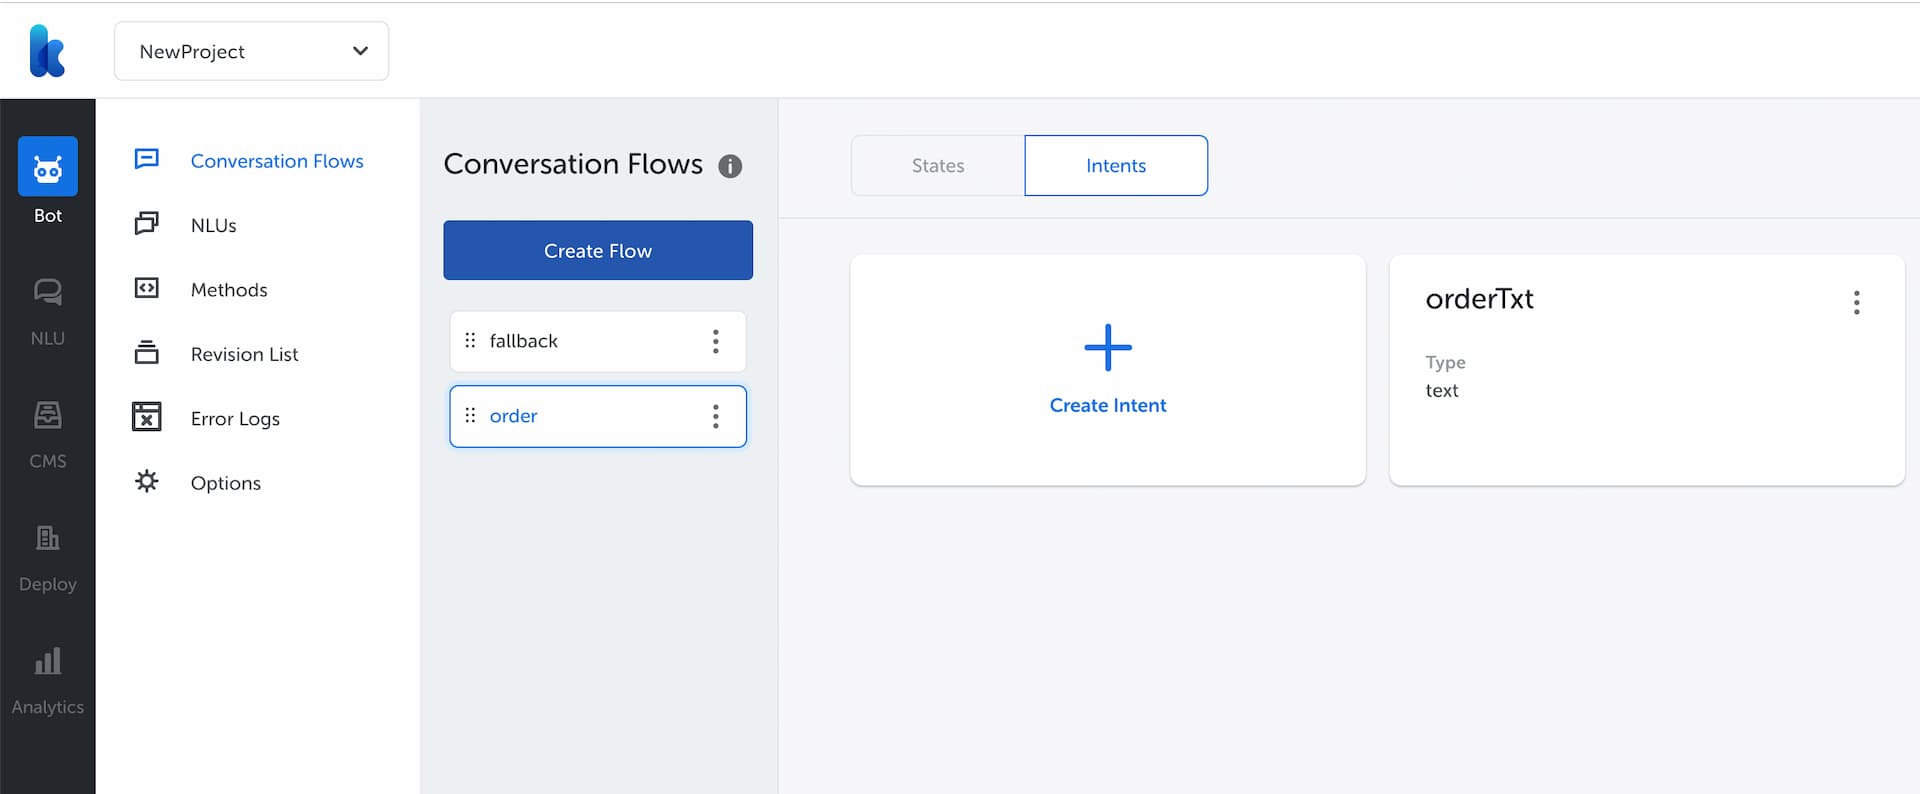
Click “Create” to create the intent. Your screen should look like this

Create a State Named init
Every flow must have at least one state. Because we haven't created any state in order flow, we have to create one. Let's create a state called init.

Click “Create” button to create initial state.
Next, we will define how the bot will respond to user who entered order flow.
Create Action for Pizza Menu
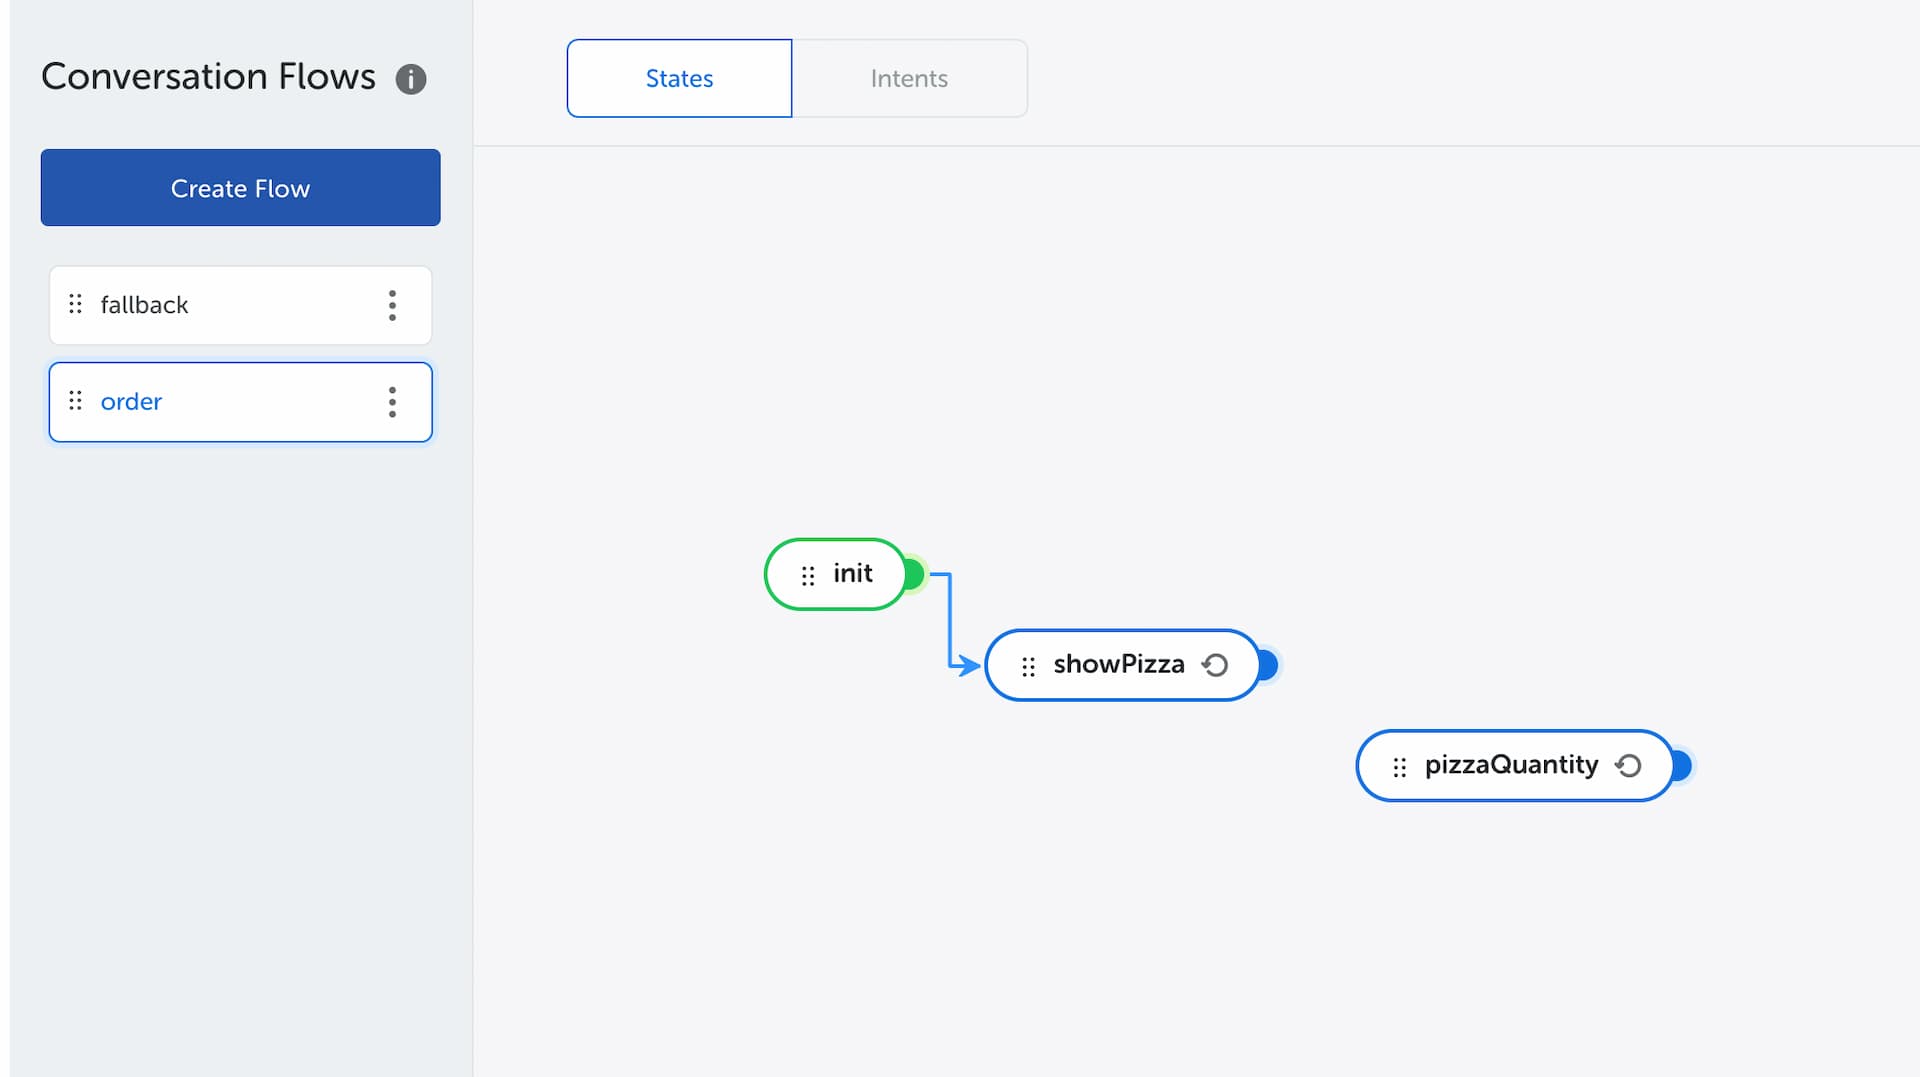
As seen on the conversation tree below, the first message in order flow is “Show Pizza Type”
Create a State to Show Pizza type in Text Action Type
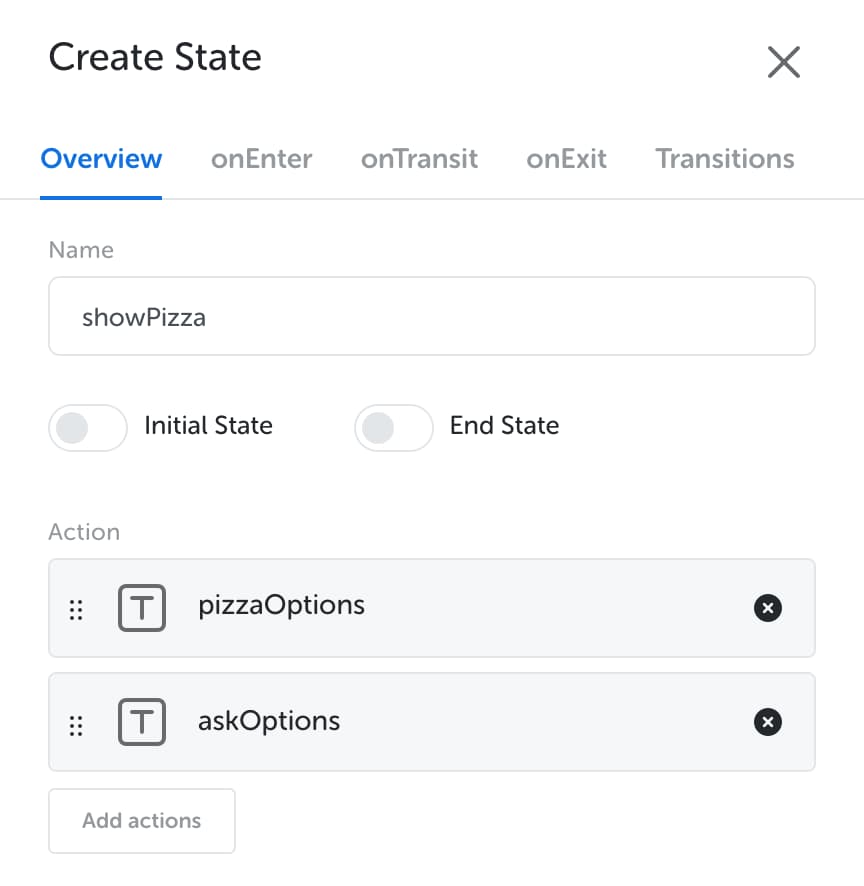
To get started, we need to create a state named showPizza on order flow. Click on “+” button in Conversation Flow menu.

Let's begin by creating an action called pizzaOptions. This action will inform users in text about our available pizza menu.
Click on “+” button to create an action and choose Text as action type.

Fill in Text action type to inform our pizza menu

Click on “Create Action” to finalize. Next step is to create an action called askOptions
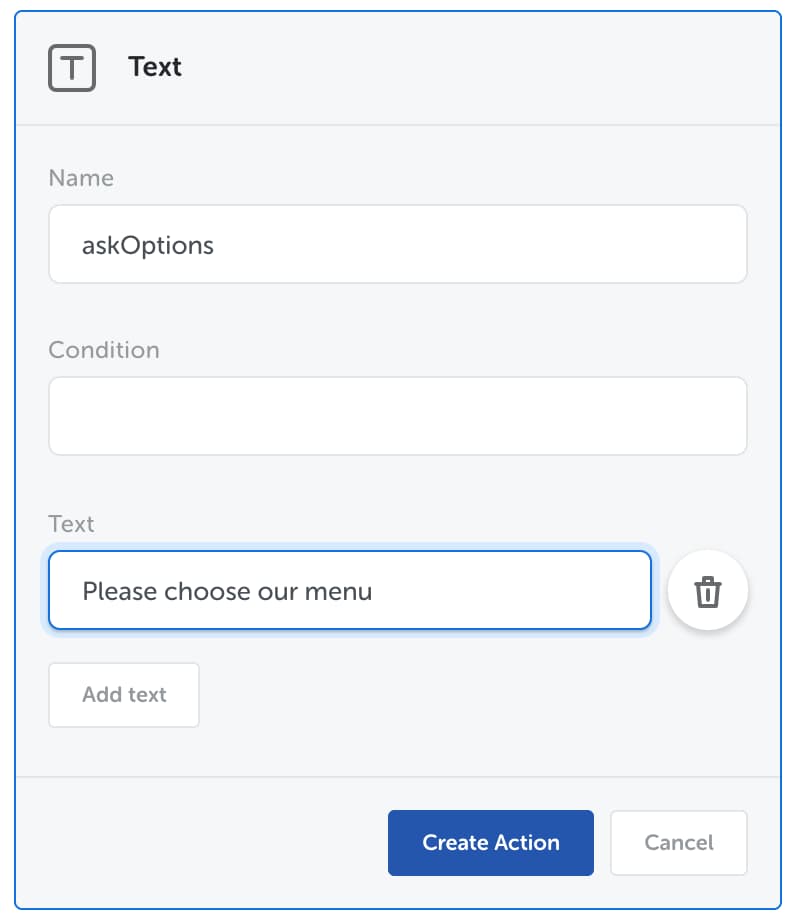
Click on “Create Action” button. Your form should look like this

Then you have to make self-transition in Transition tab as follow


Click “Create” to create the state. Successfully created state will look like this

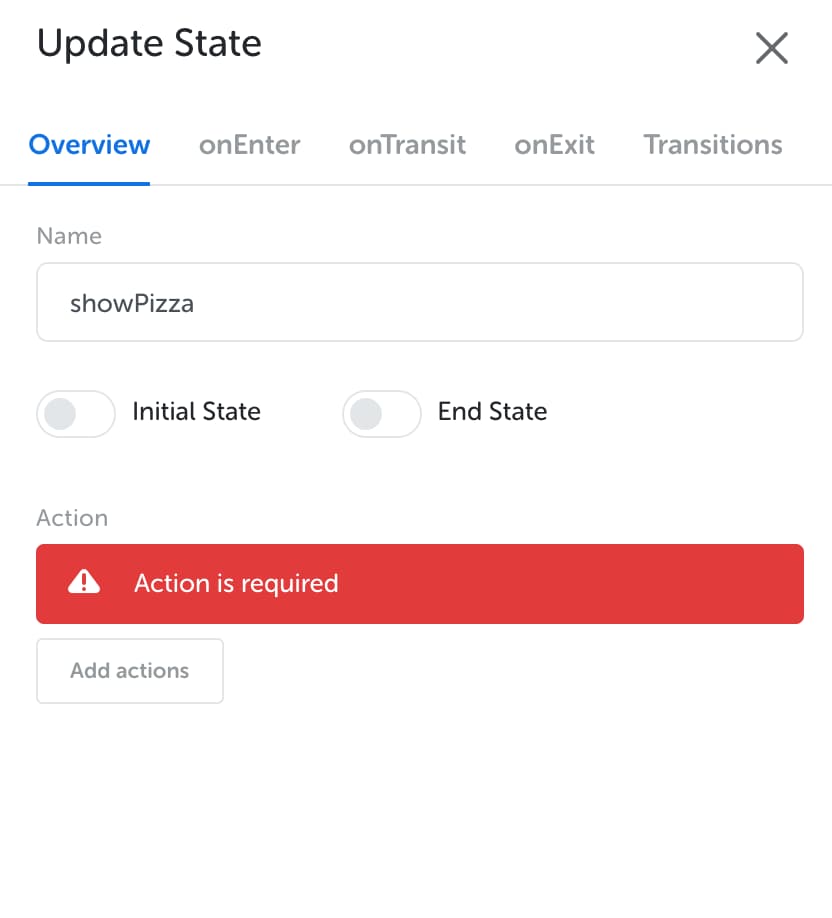
Update showPizza state Into Show Pizza Menu in Carousel Action Type
Previous step is an example to create action to show pizza menu in text. Let's try to update the state into Carousel action type.
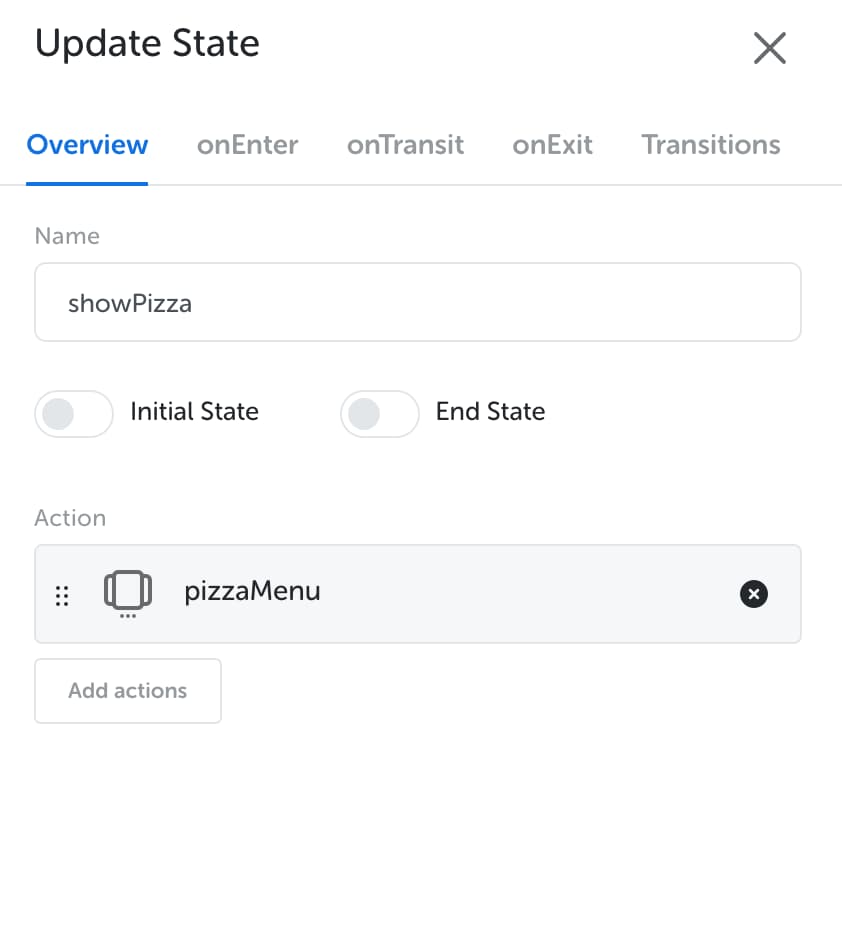
To update the state, click on showPizza state and an update state form will appear

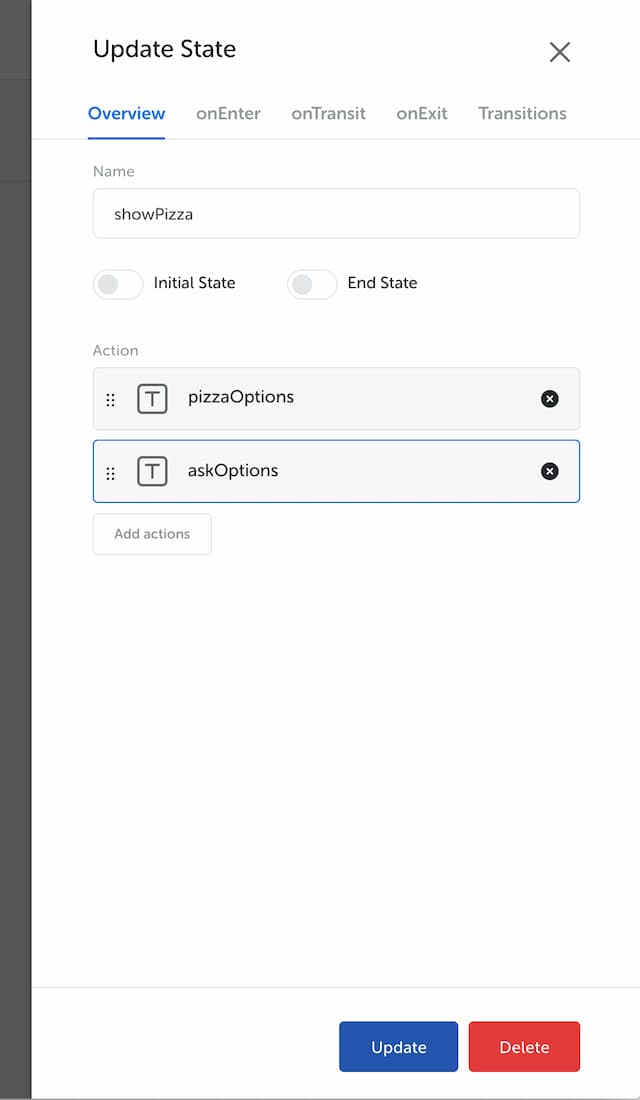
Then, remove all actions in the state by clicking “x” on each action.

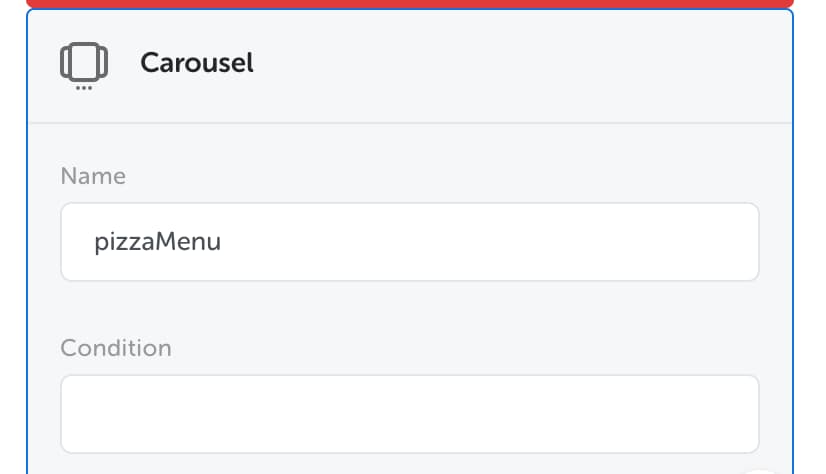
After removing available actions, we will create an action called pizzaMenu as Carousel action type.
Click on “Add” actions button then click on “+” button to create a new action. Choose Carousel action type to continue.


Enter pizzaMenu as name

Fill in the carousel content by clicking “Add carousel” button, then click on “Add action” button to define the label and type. Next, click on Add Payload button to enter key and value.
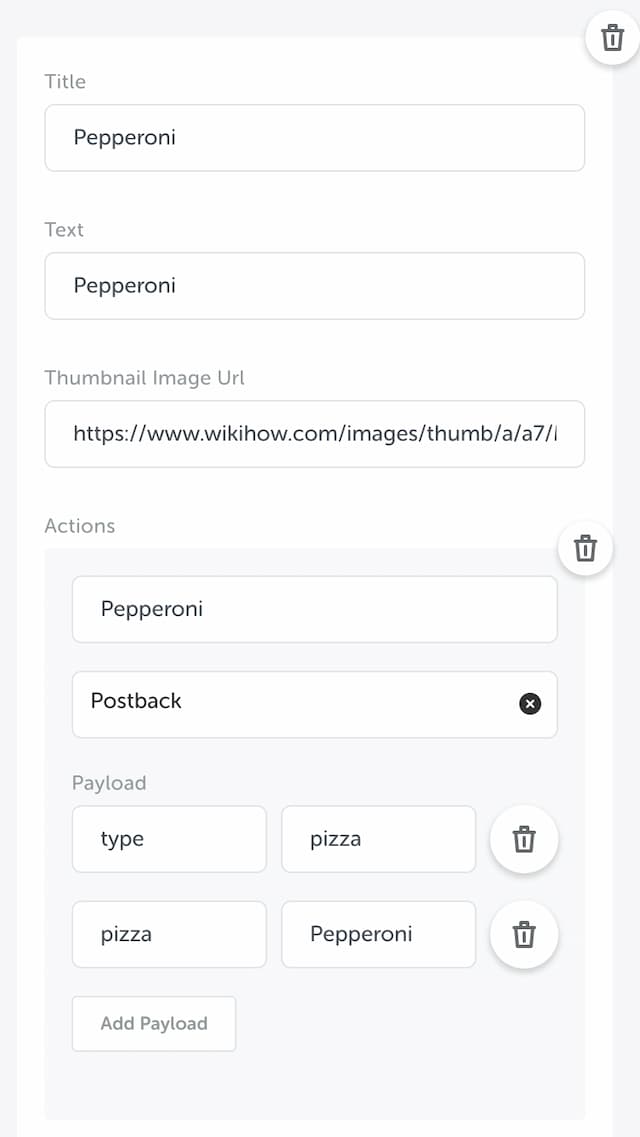
Fill in first carousel with this data
Title: Pepperoni
Text: This is the favorite of Peps
Thumbnail Image Url: https://www.wikihow.com/images/thumb/a/a7/Make-Pepperoni-Pizza-Step-19-Version-2.jpg/aid1074004-v4-728px-Make-Pepperoni-Pizza-Step-19-Version-2.jpg.webp
Actions:
  Label: Pepperoni
  Type: Postback
  Payload:
    - key: type
      value: pizza
    - key: pizza
      value: Pepperoni
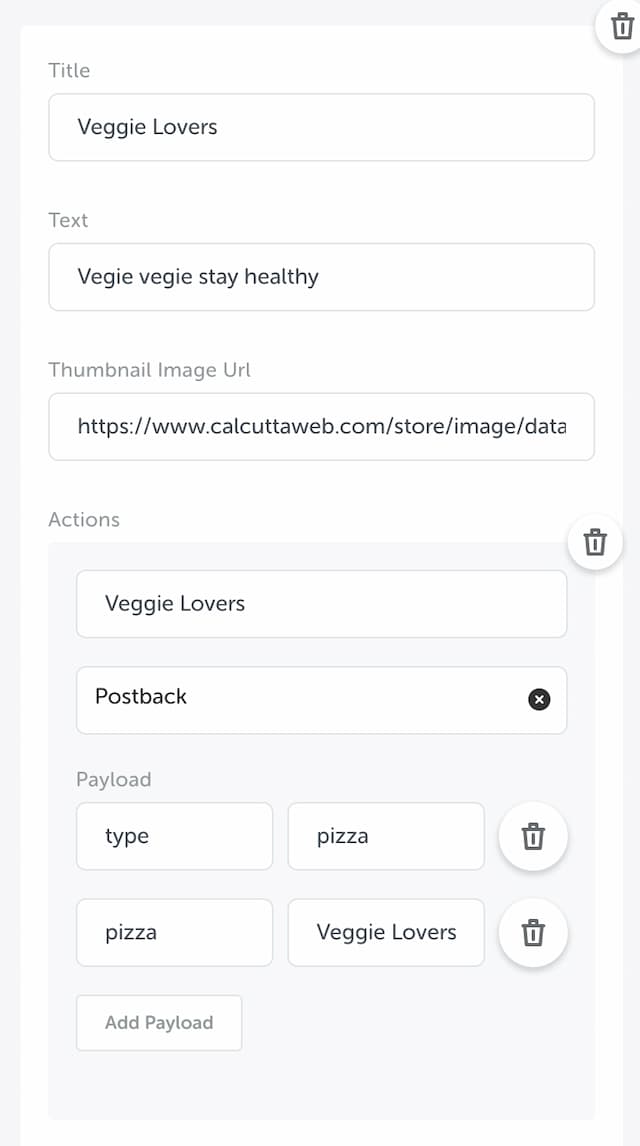
Fill in second carousel with this data
Title: Veggie Lovers
Text: Vegie vegie stay healthy
Thumbnail Image Url: https://www.calcuttaweb.com/store/image/data/calcutta/pizza/veggie-lovers-pizza-pihu-7.jpg
Actions:
  Label: Veggie Lovers
  Type: Postback
  Payload:
    - key: type
      value: pizza
    - key: pizza
      value: Veggie Lovers
Your first form should look like this

Your second form should look like this

Finalize this step by clicking “Create Action.”
It should look like this

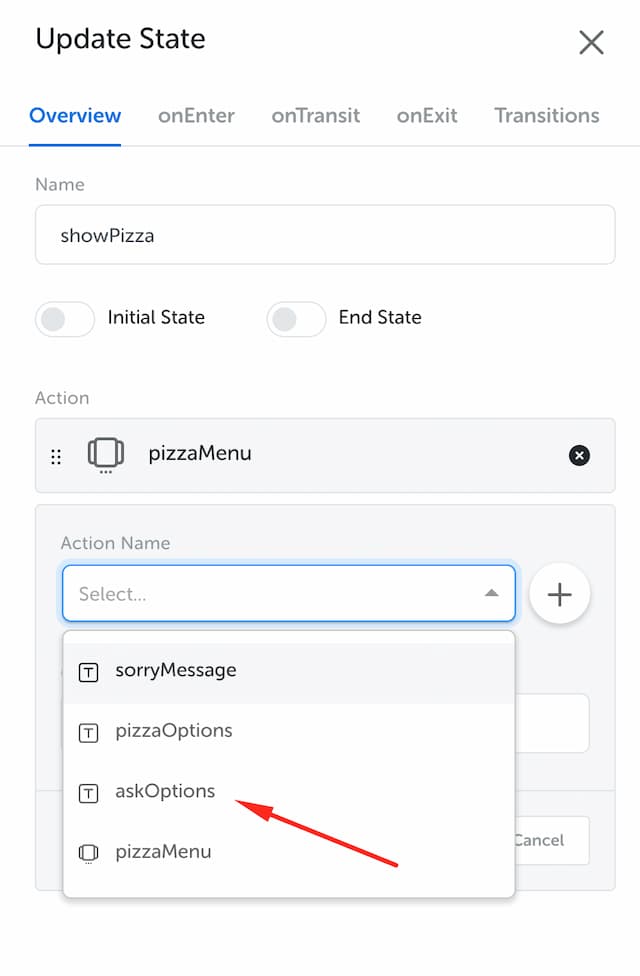
Once the bot displays a carousel containing the type for pizza menu, its next step is to ask user to select the pizza. Click “Add actions” button to trigger drop-down list, then choose askOptions
After you select askOptions action click “Create Action” button to finalize this step.
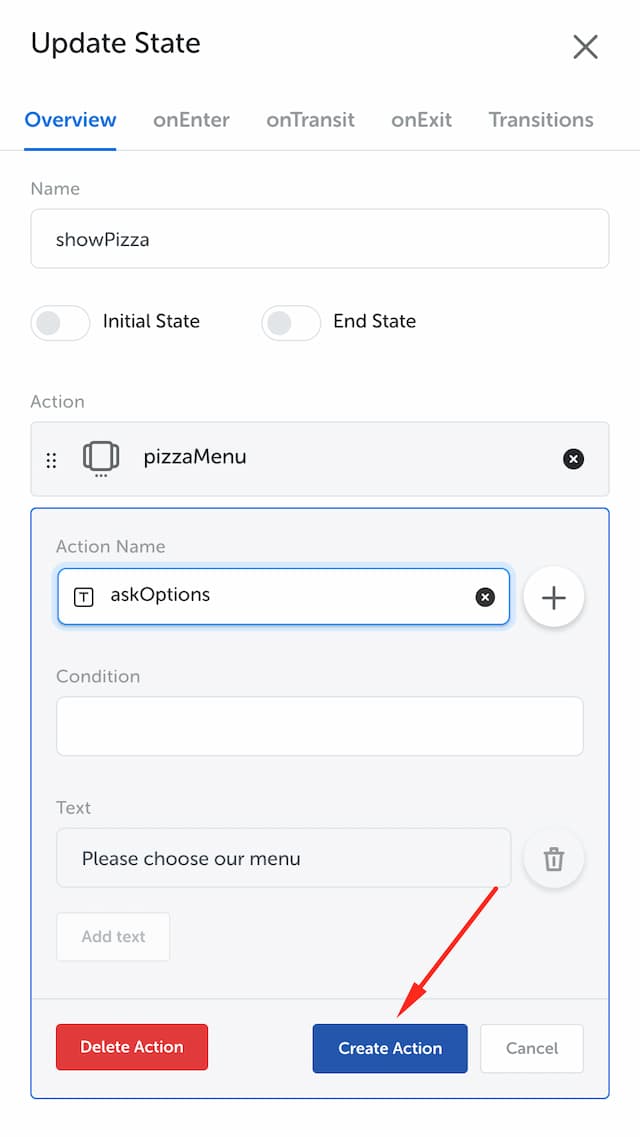
Your form should look like this

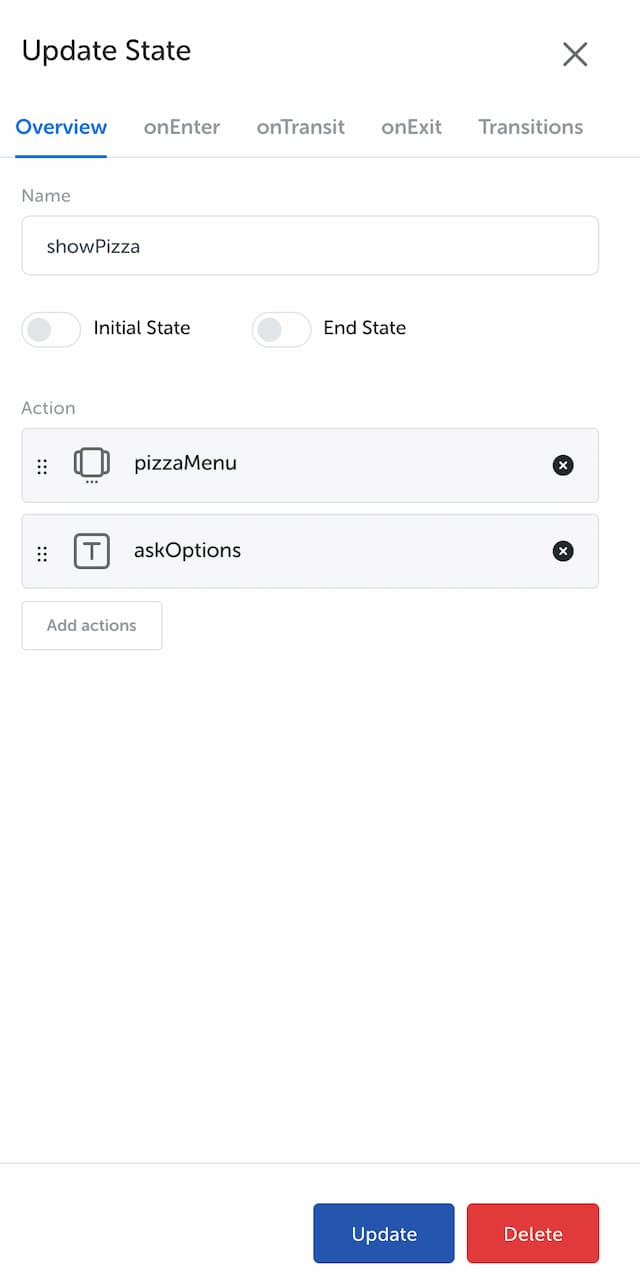
Click “Update” to update the state.
Create Intent to Choose A Pizza
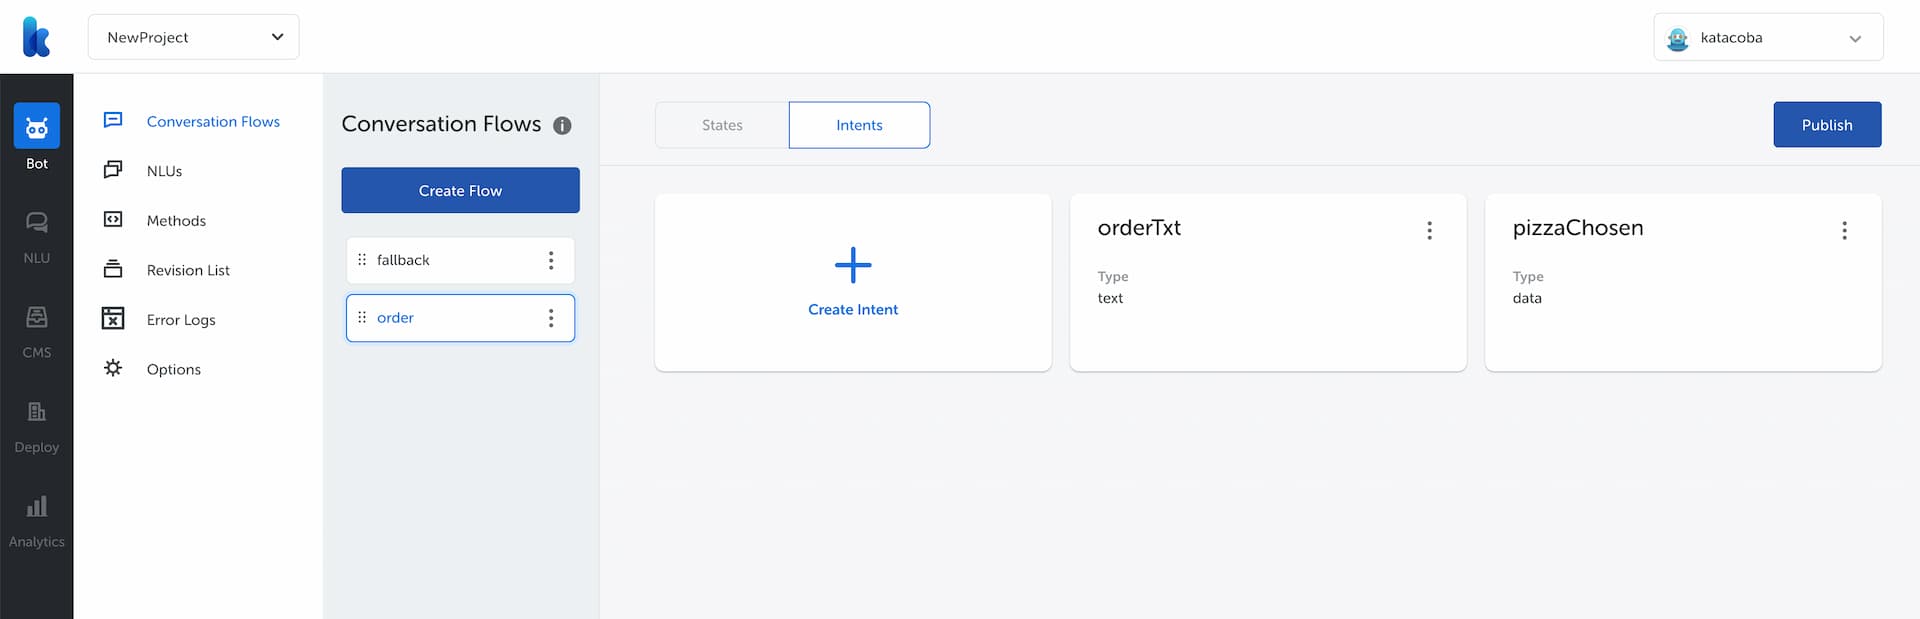
Now we have to create an intent called pizzaChosen to handle user's input after they have selected a pizza type. Click on Intent menu in order flow.

Click on Create Intent and create intent as follow

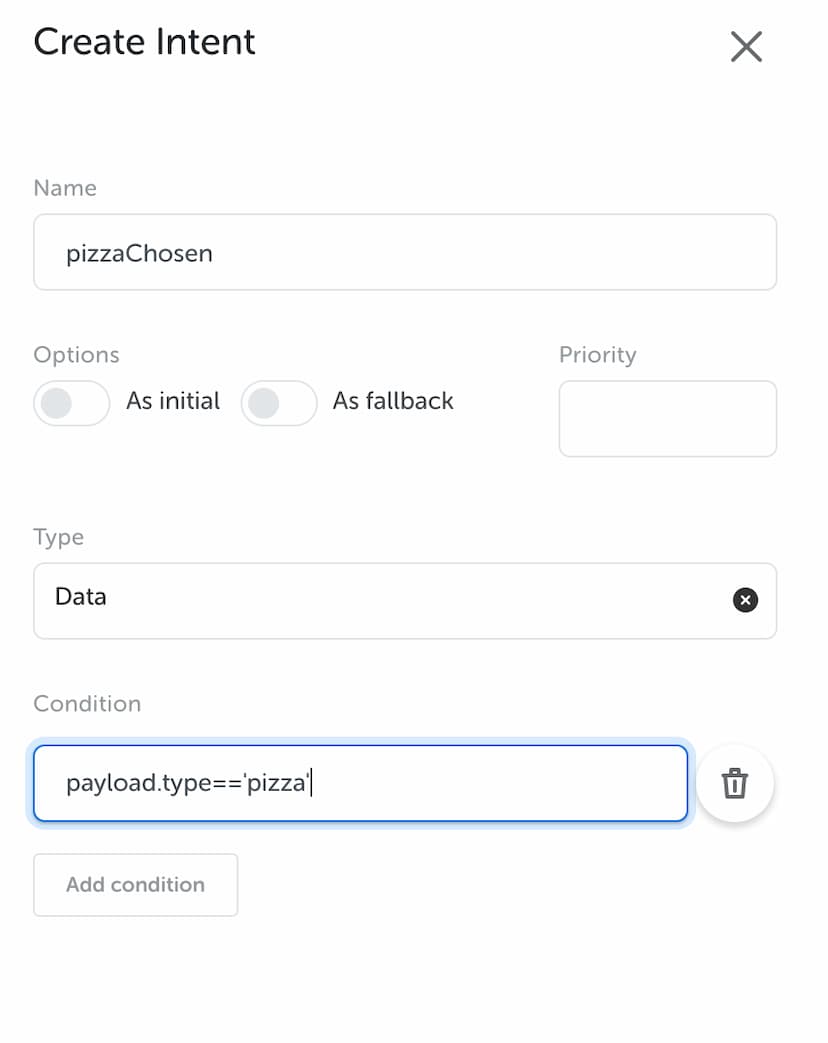
Successfully created intent looks like this

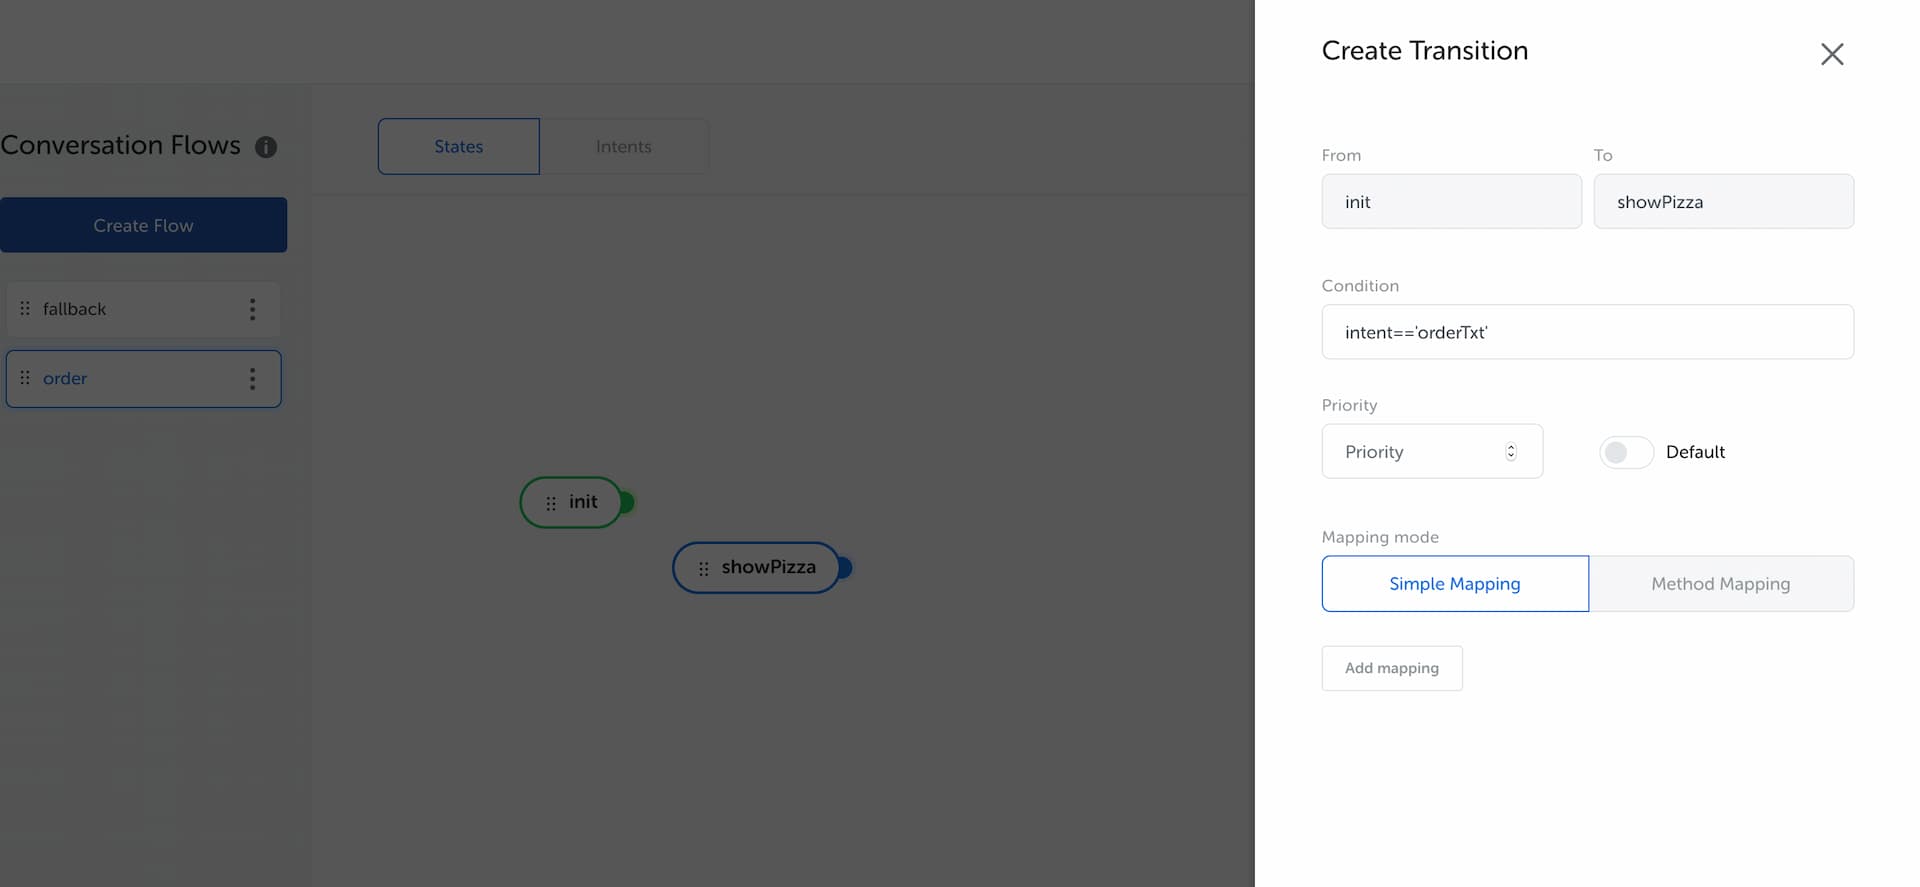
Create Transition between init and showPizza
Now, we will create a transition between two states that we have created before.
Click the green dot on init state, and a connector line will appear. Connect that line to showPizza state. If you do it right, a Create Transition form will appear.

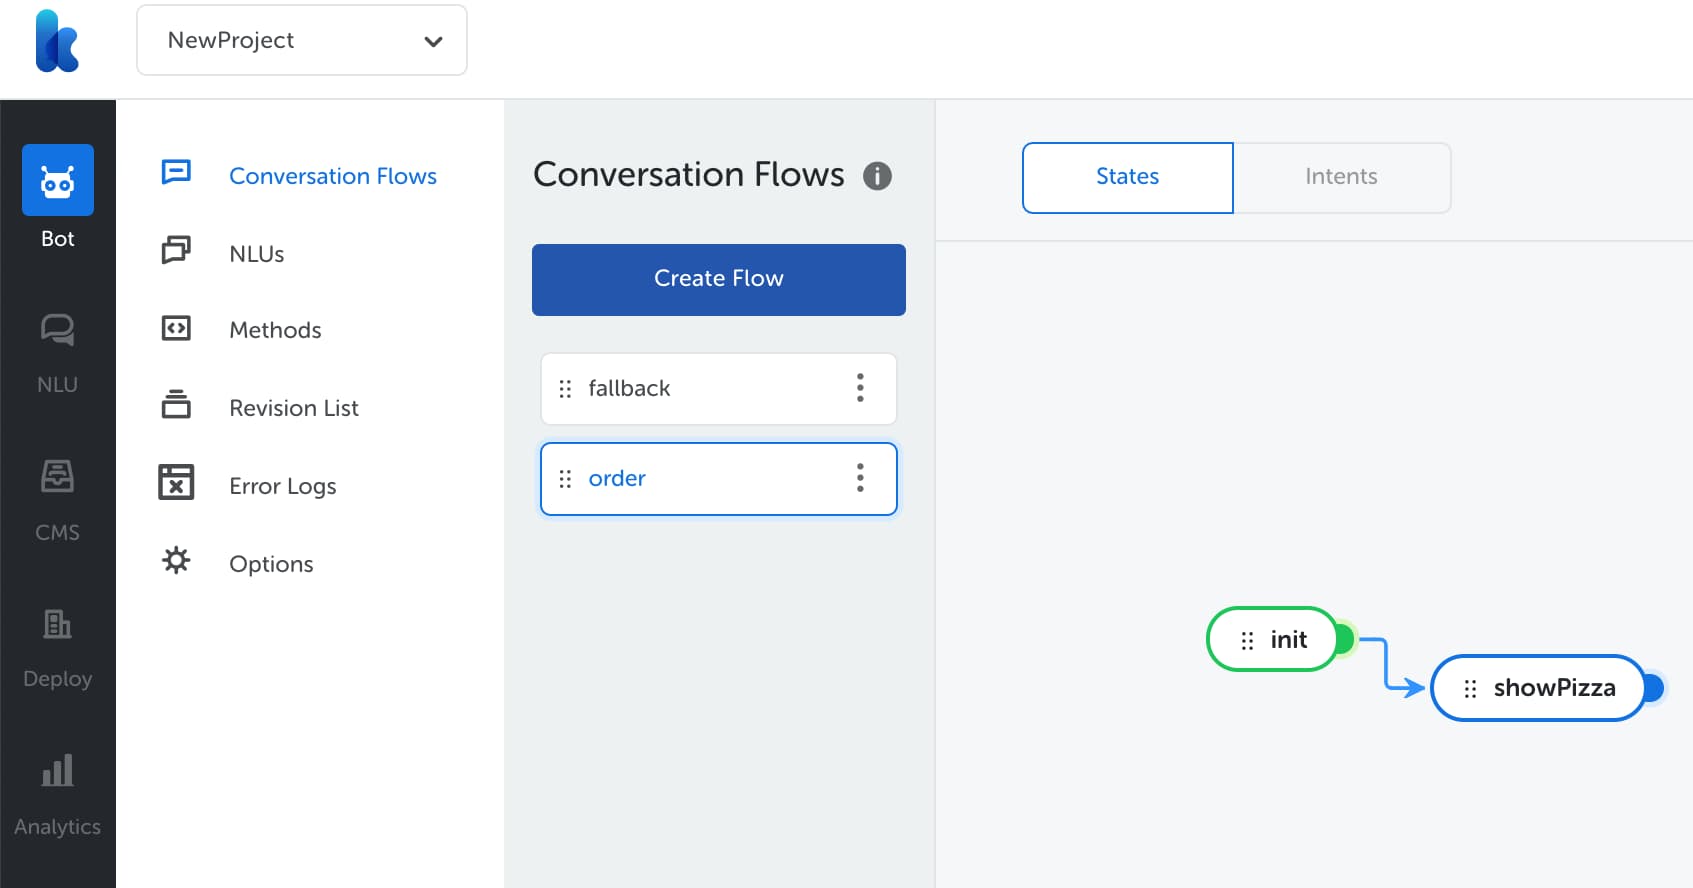
Fill in the form with these data, and click “Create”

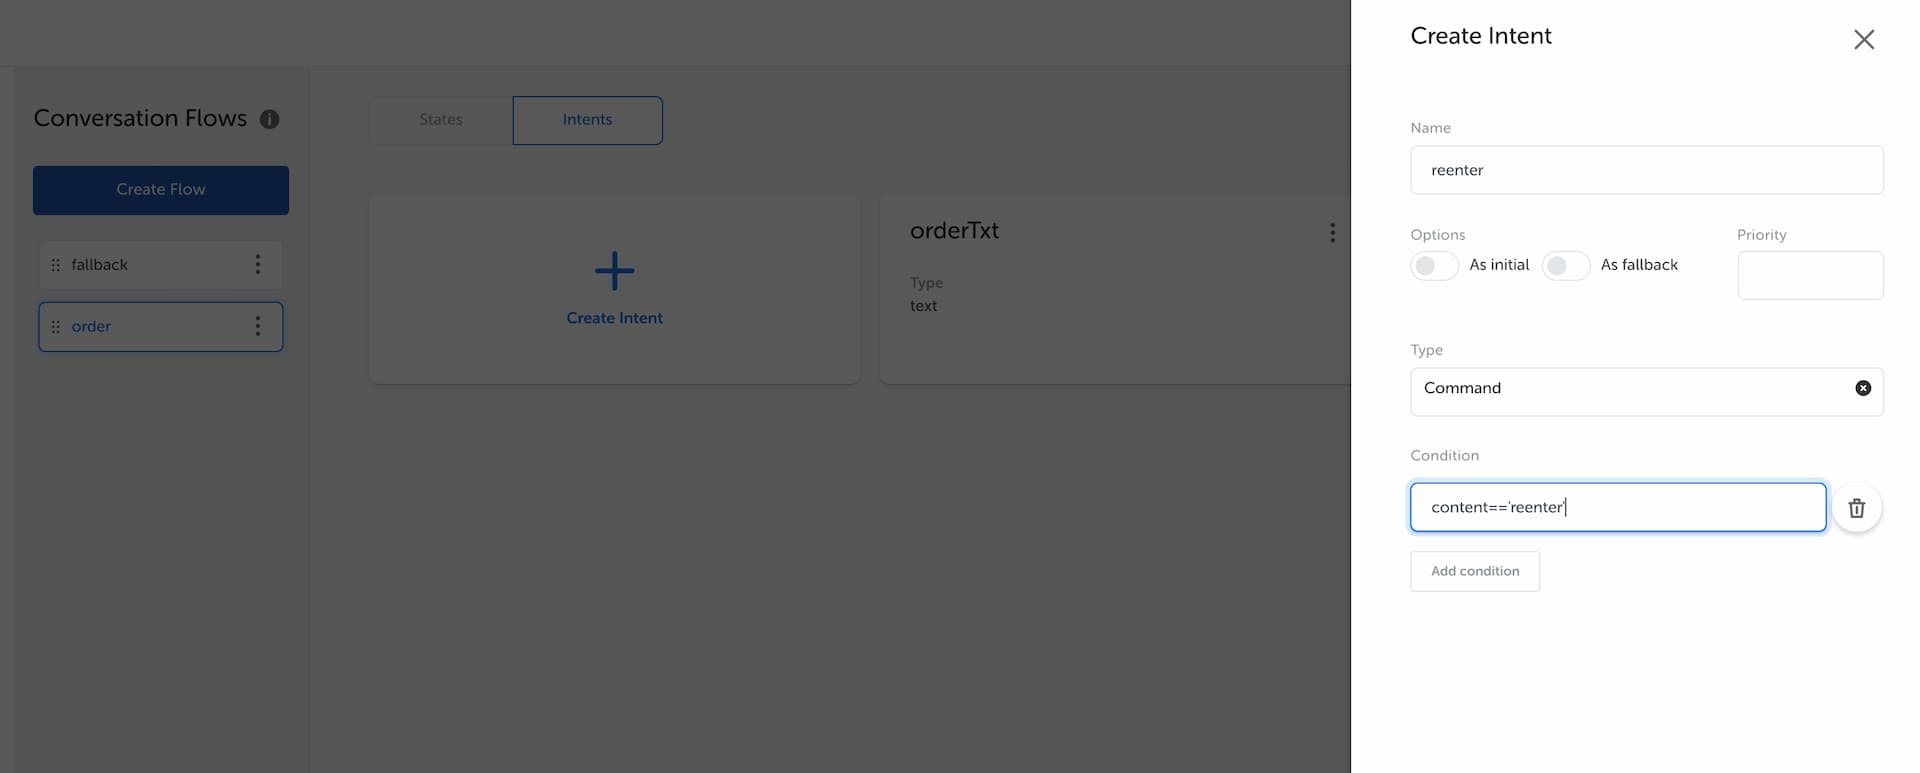
Create 'reenter' intent
Next, we will add reenter intent so the bot can return to its previous state after triggering fallback state. Create the intent in order flow.

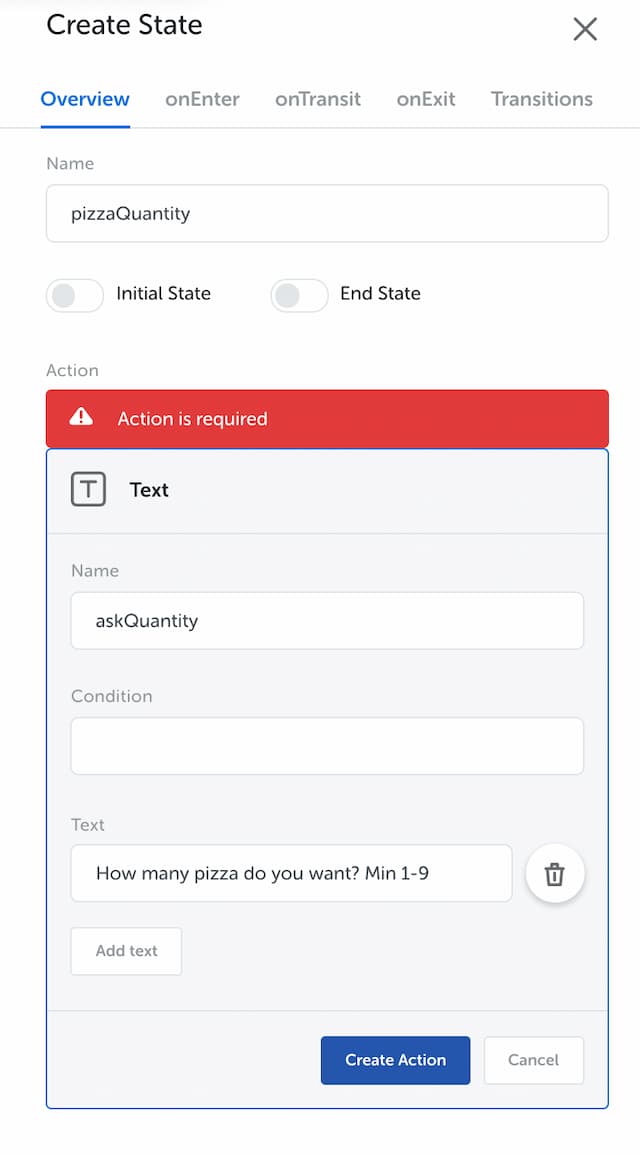
Create Action for Asking Pizza Quantity
In this step we will learn how to create “Ask quantity” state.
Create pizzaQuantity state
In this step we will create pizzaQuantity state to handle order quantity. The type of action we will use is in this state is Text. Click on “+” button on order flow and fill the form as follows

Then you have to make self-transition in Transition tab as follow
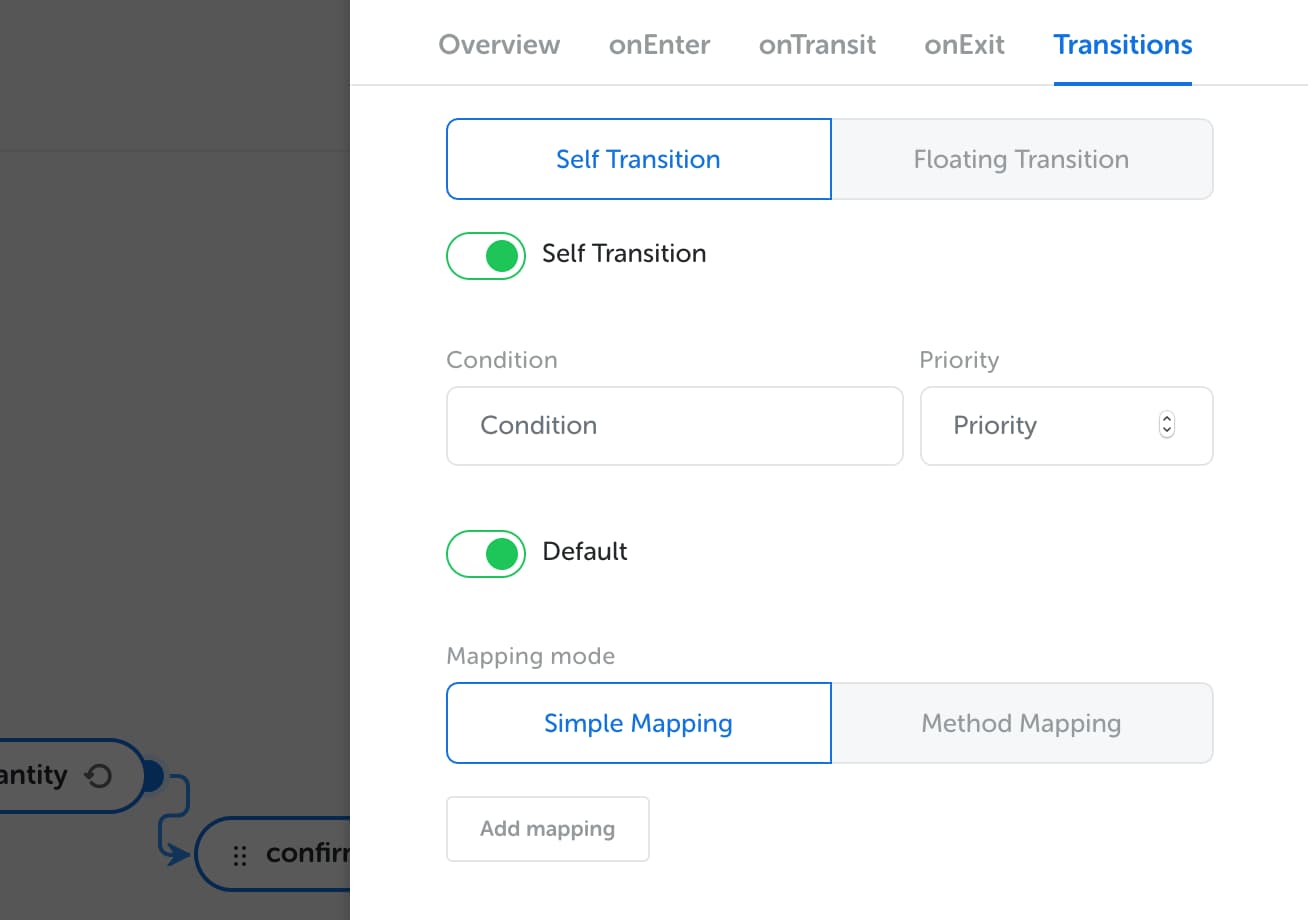
Result:

Create NLUs quantity
Afterwards, we have to handle user's input with NLUs. Because we only allowed number from 1 to 9, we will create a limitation in regex format. Click on Create NLUs and follow this screenshot

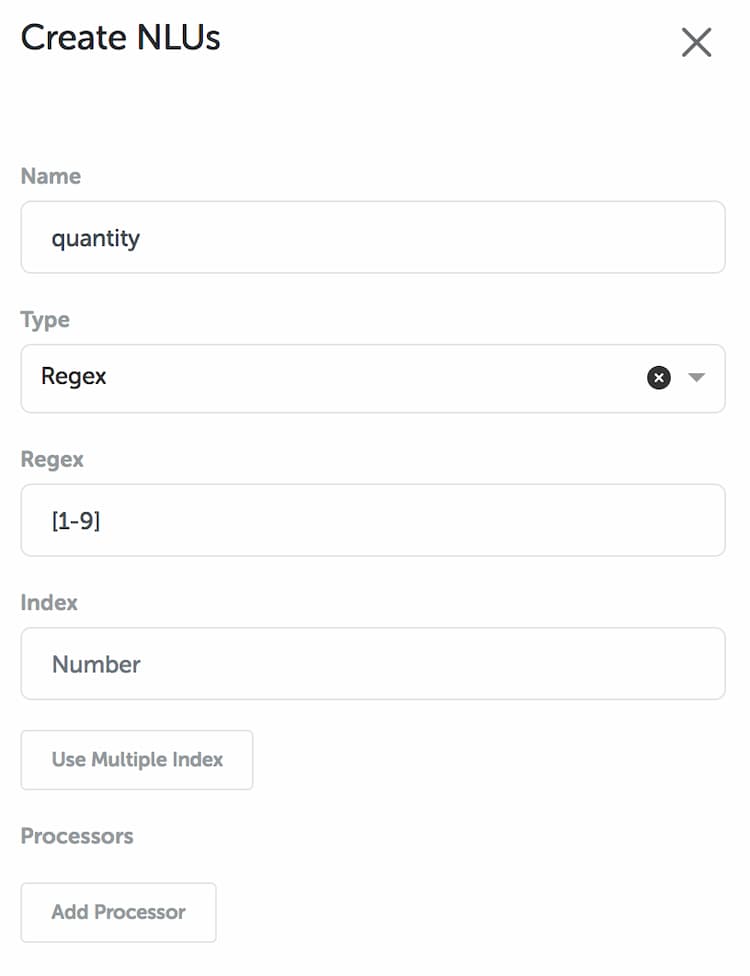
Successfully created NLU will be shown like this

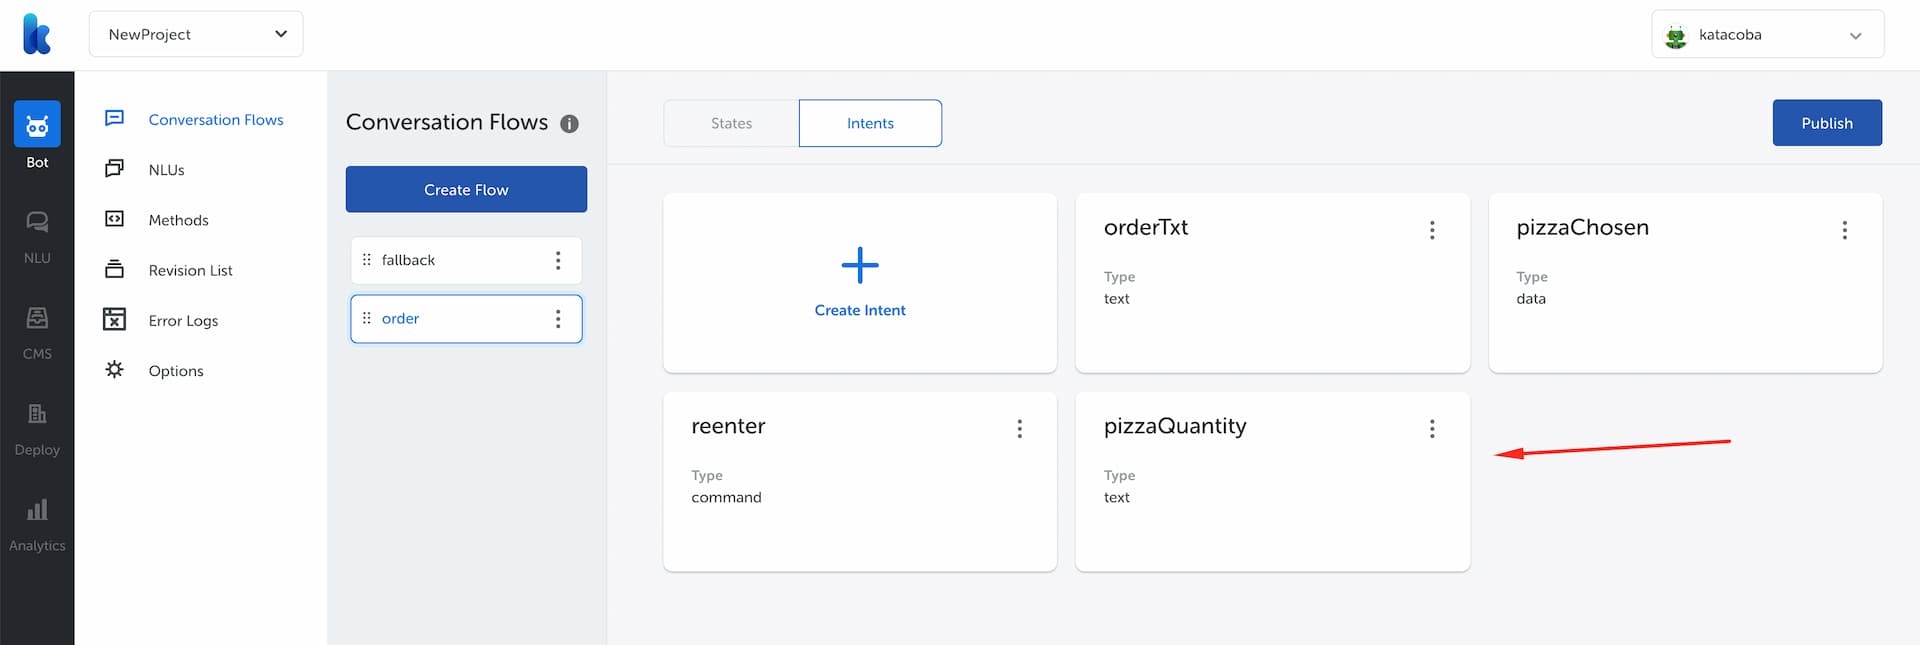
Create Intent quantity
After we created the NLU, we will add an intent to respond user's input. In order flow, click on Create Intent and fill in the form


Successfully created intent will look like this

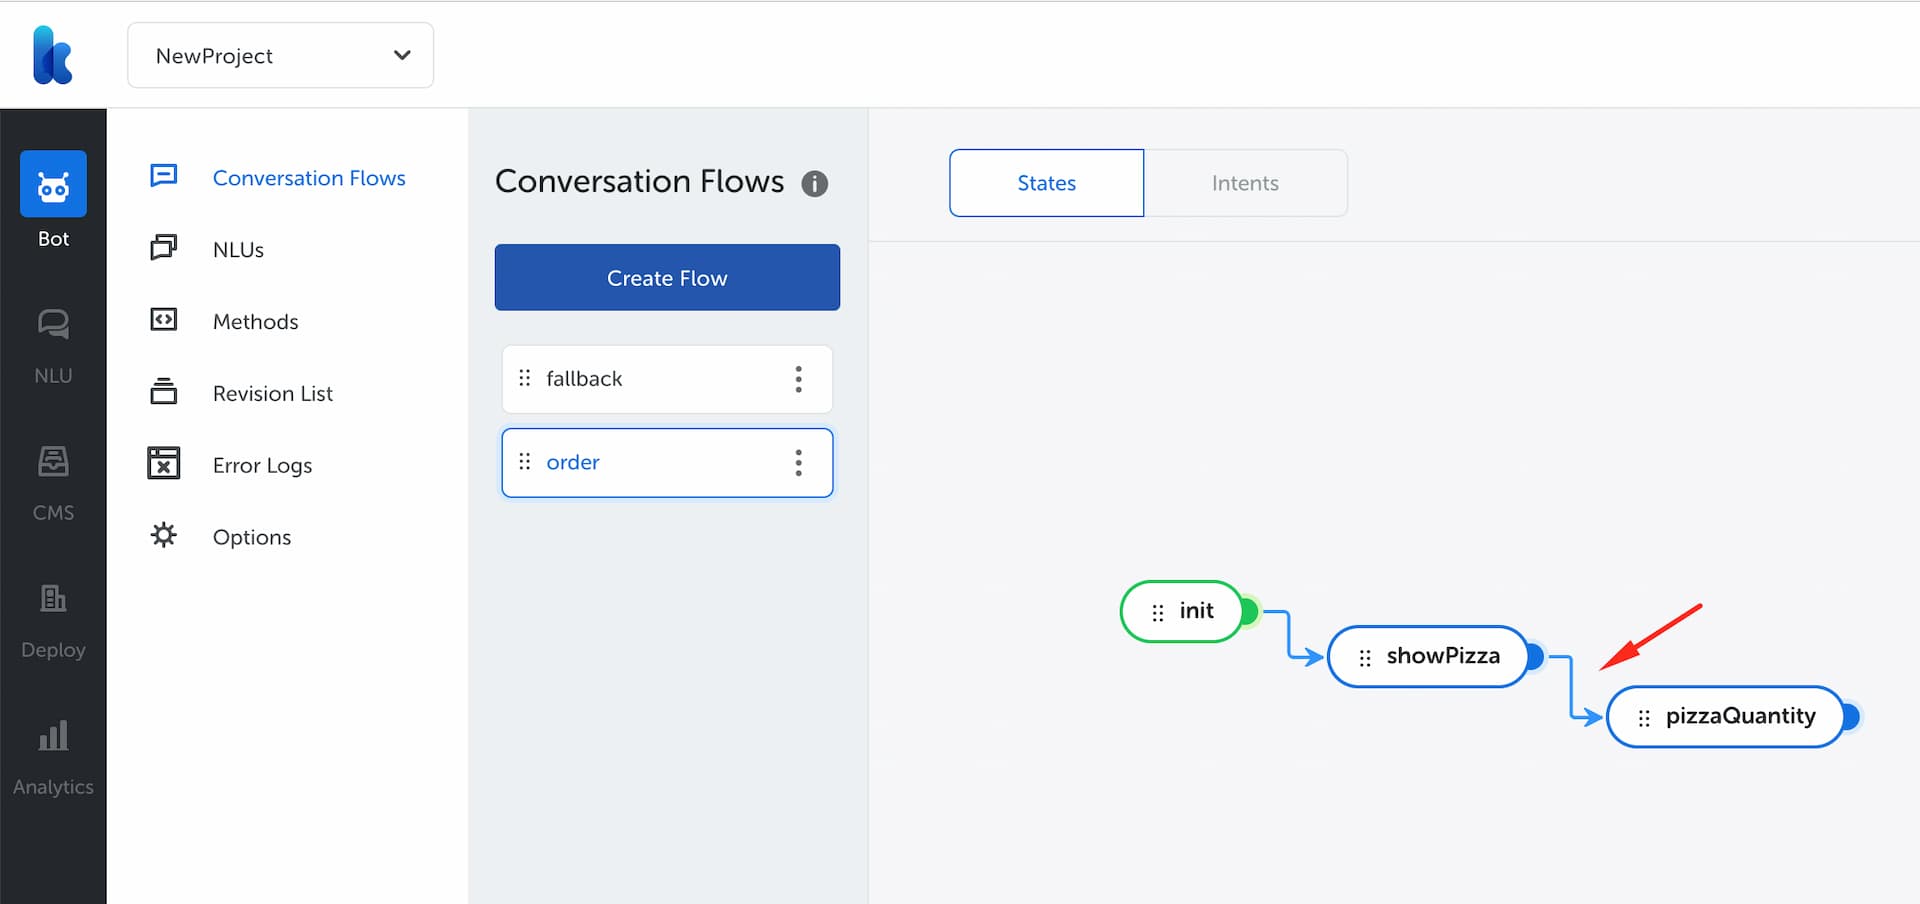
Create Transition between showPizza and pizzaQuantity
Now we have to create a transition between showPizzaand pizzaQuantity. We will also store payload.pizza value into context.pizza. Click on the blue dot on showPizza and drag the line to pizzaQuantity state to create the transition. Create Transition form will appear after you have successfully connected the states.

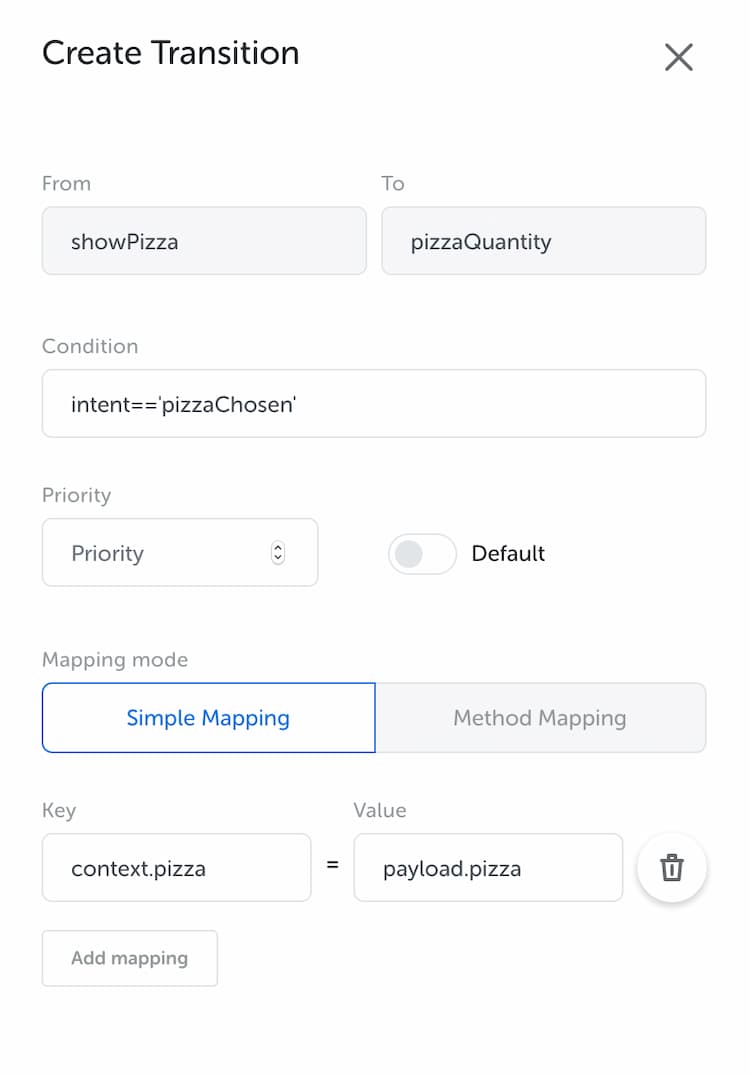
Created transition will look like this

Create Confirmation Action
Our next step is creating Ask confirmation state.
Create “YESNO” keyword NLUs
First, we will create a keyword NLU to handle yes and no. Click on Create NLUs and fill in as follows
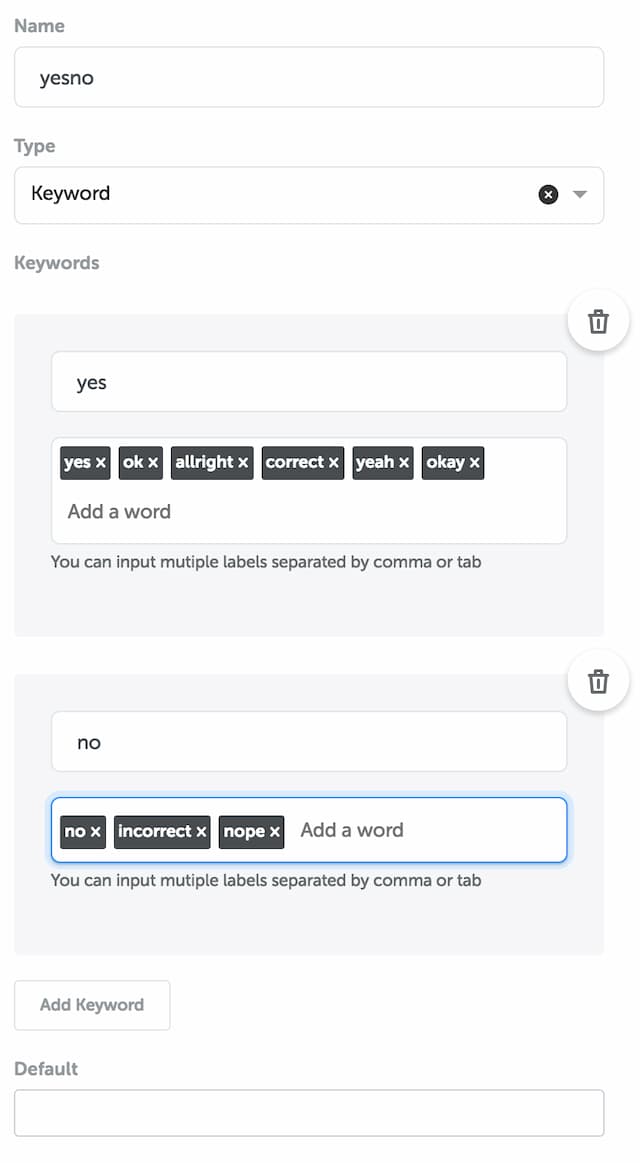
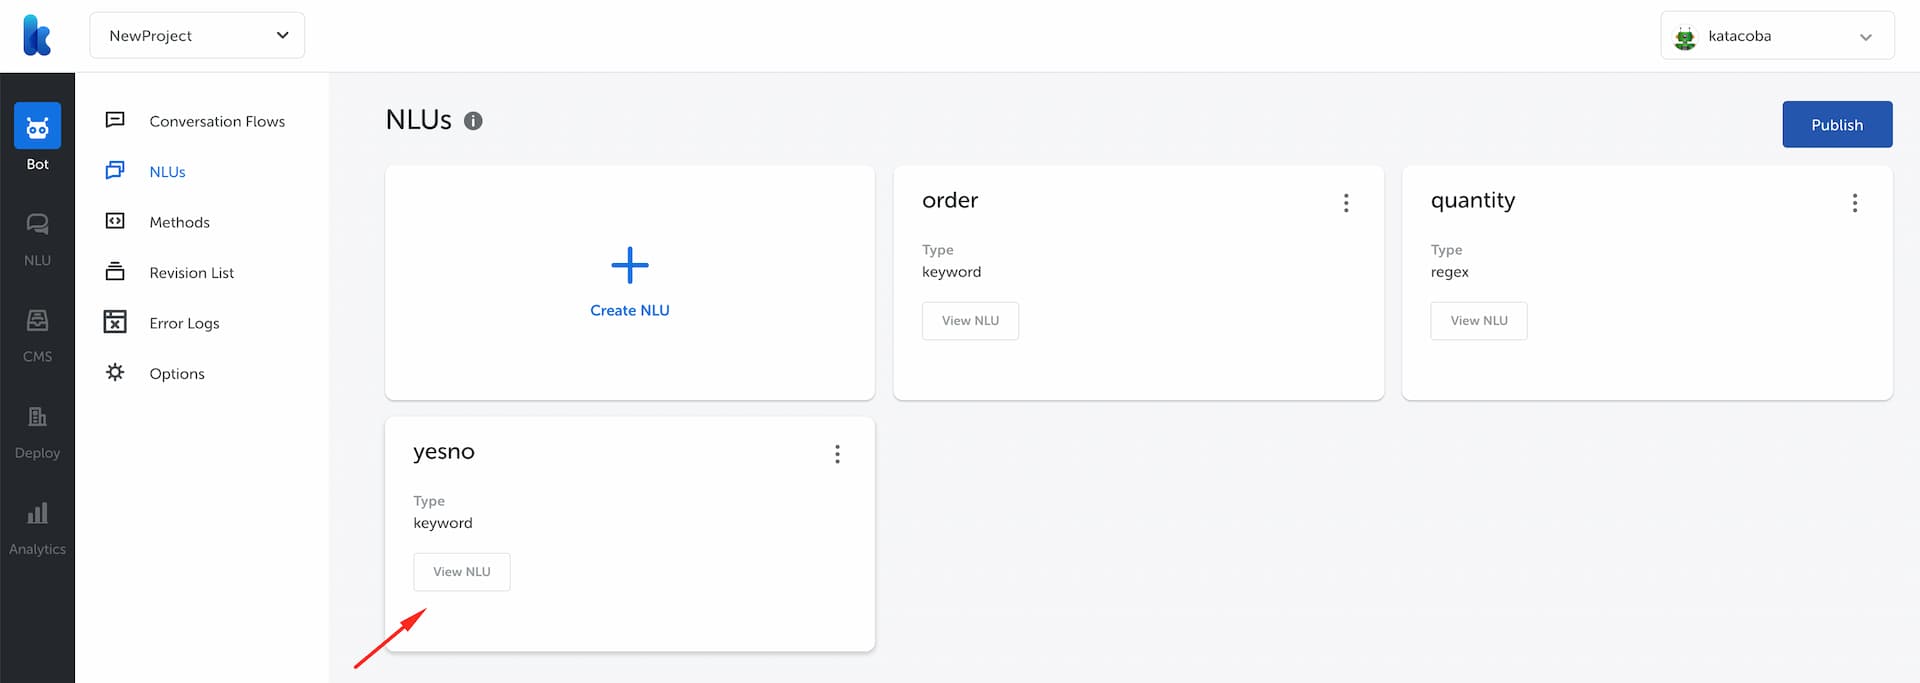
Successfully created NLU will look like this

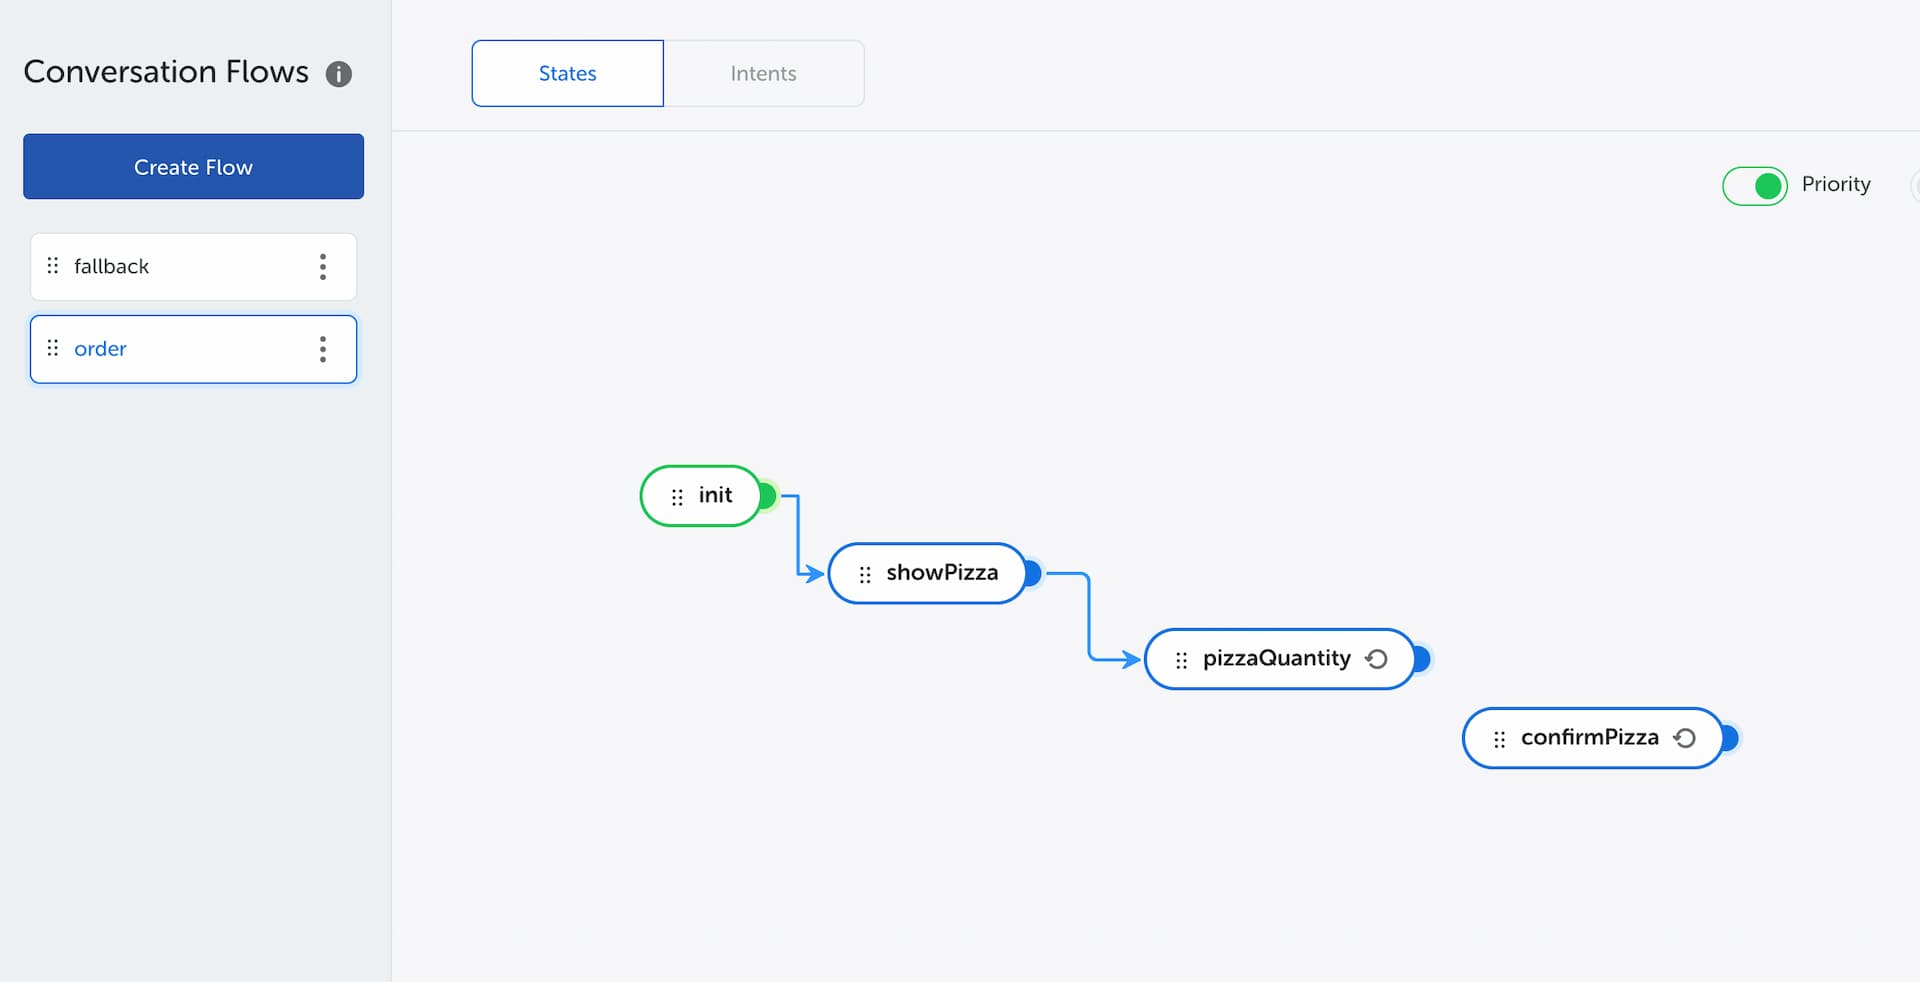
Create confirmPizza state
Now we will create confirmPizza state to handle order confirmation. We will also store chosen pizza & quantity information in this state. Select order flow and click on “+” button to create confirmPizza state.

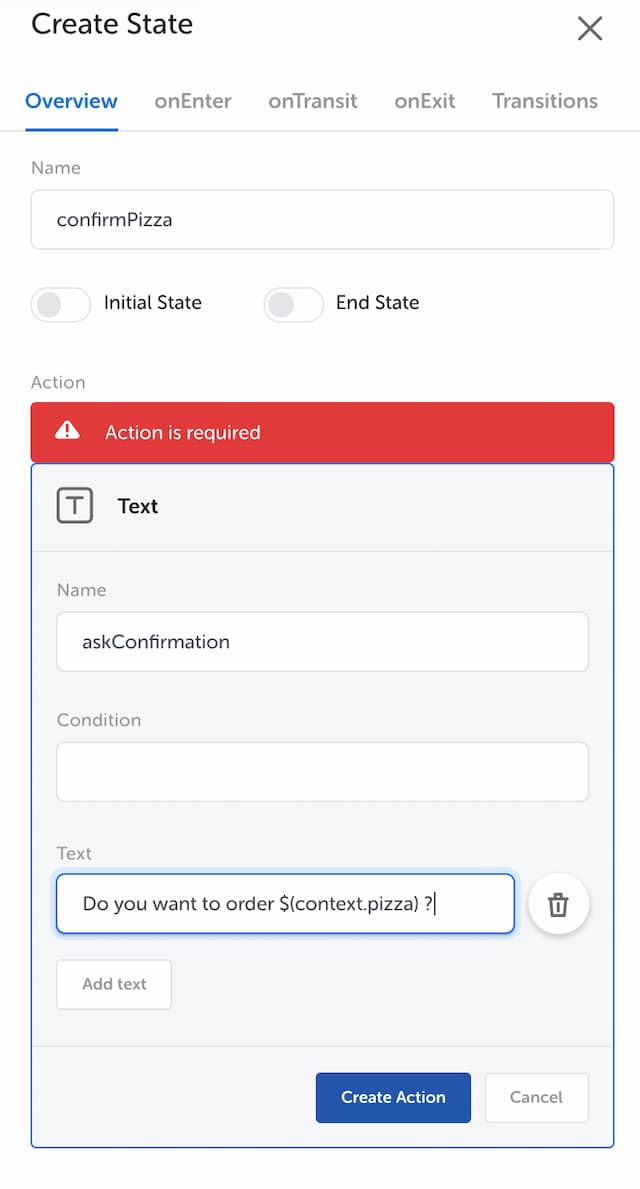
Add mapping in onTransit tab


Don't forget to add self-transition in a state. Click Create Action. Your screen should look like this

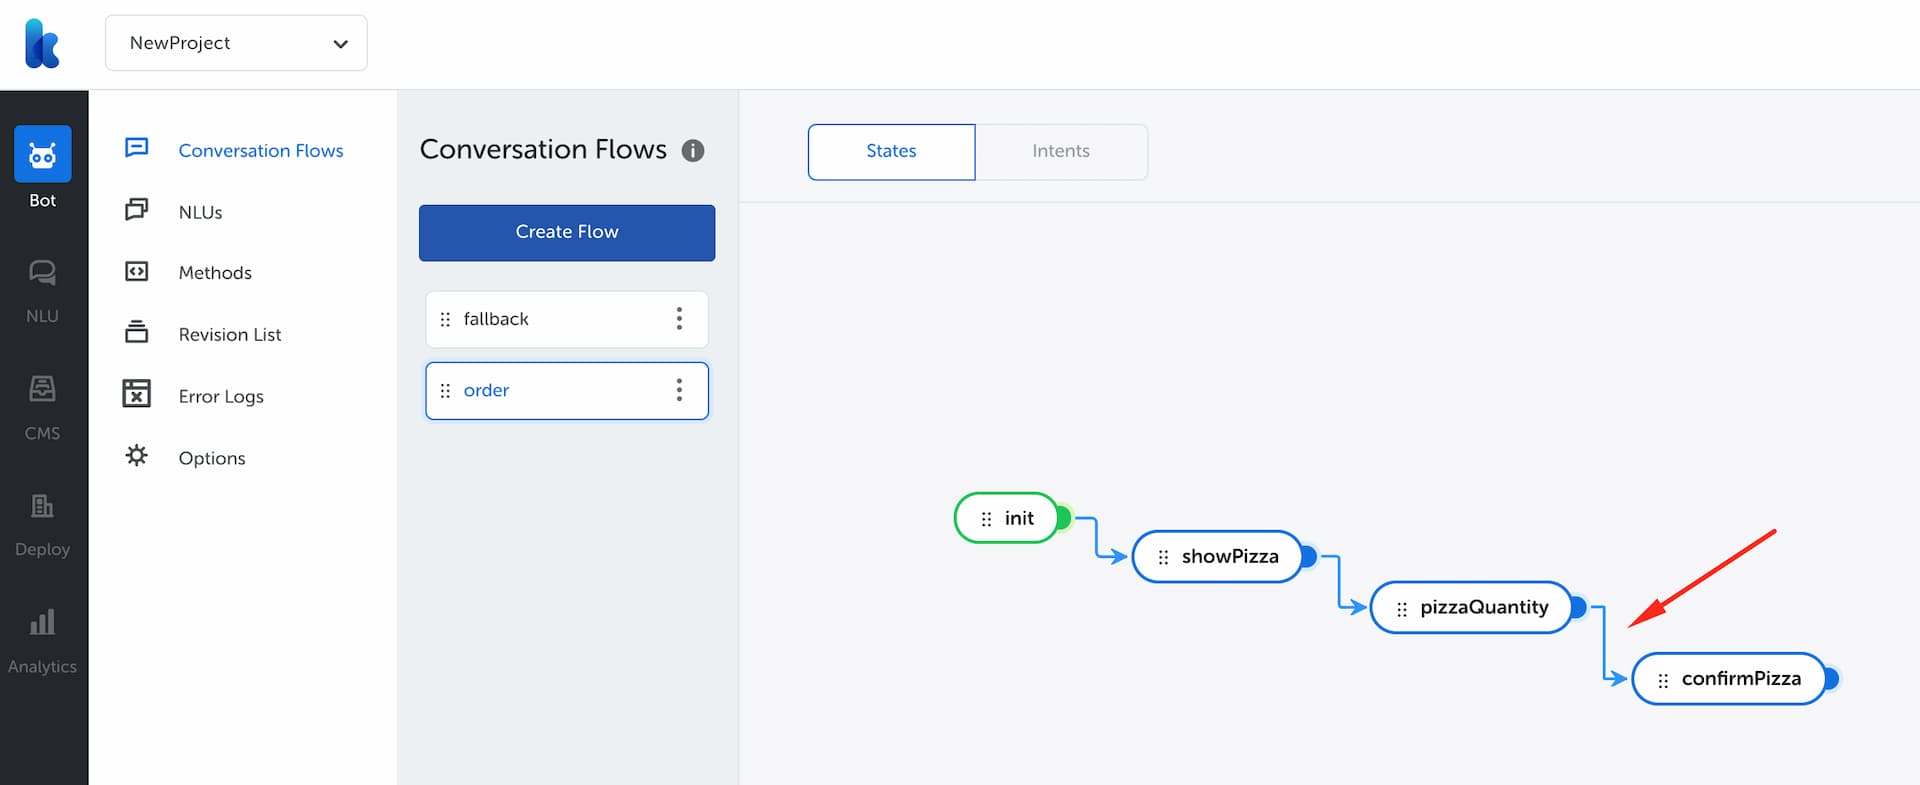
Create a transition from pizzaQuantity to confirmPizza
We will make a transition by storing value (mapping) from pizza quantity and chosen pizza type. Click the blue dot on pizzaQuantity and drag the line to confirmPizza state to create a transition. Create Transition form will appear after you successfully connected the states.

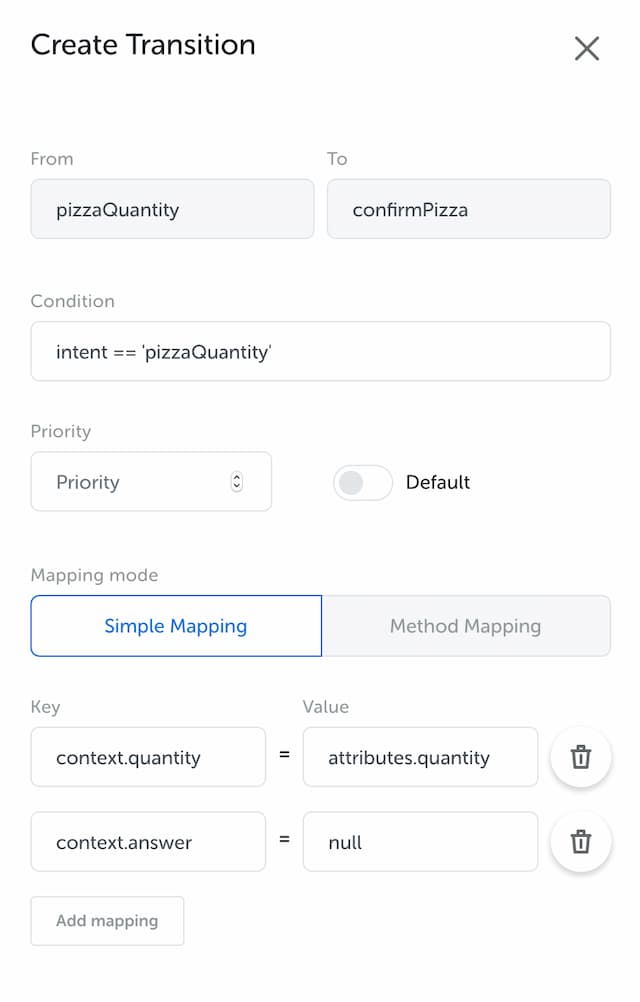
Result will be shown as follows

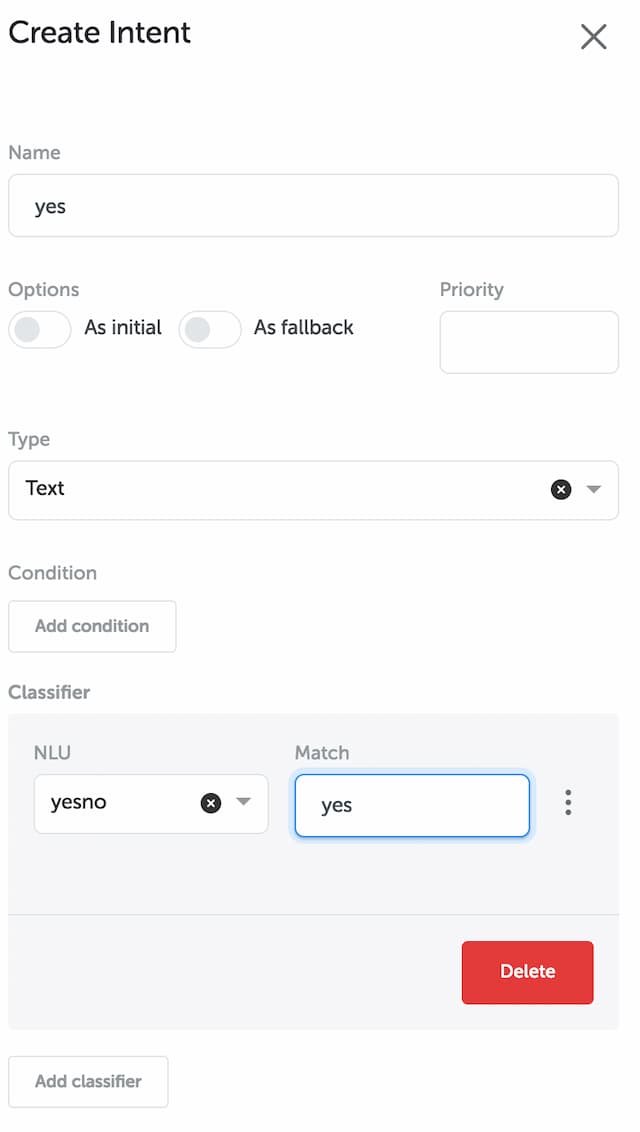
Create intent yesno
Previously, we already made an NLU containing yes and no keywords. We will use that NLU as a classifier on an intent.
First of all, we will create an intent in order flow for the keyword yes

Then, we will create an intent for keyword no

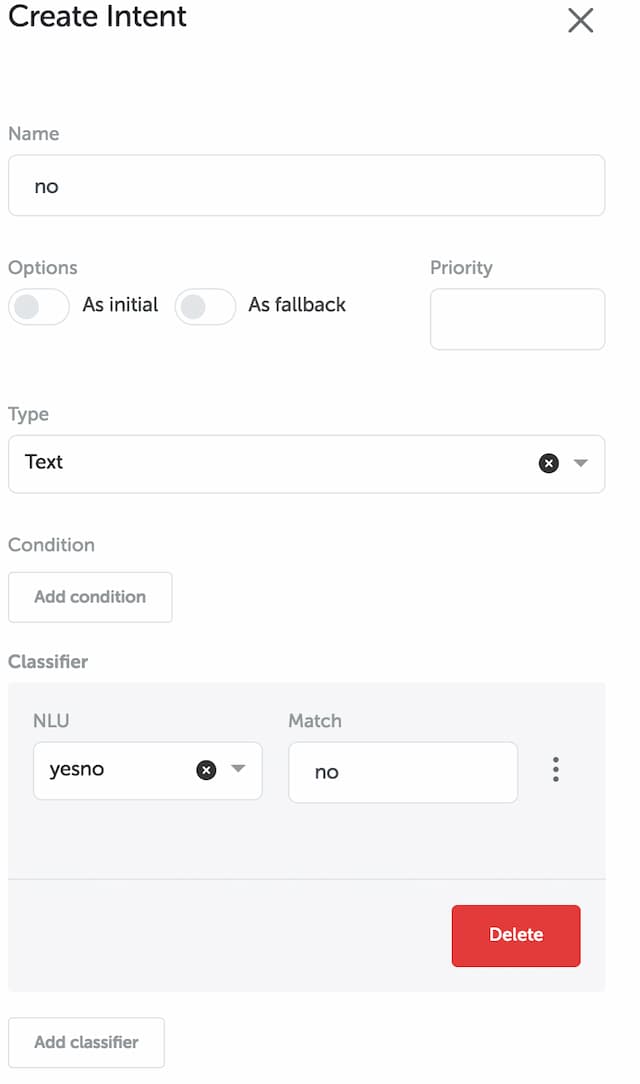
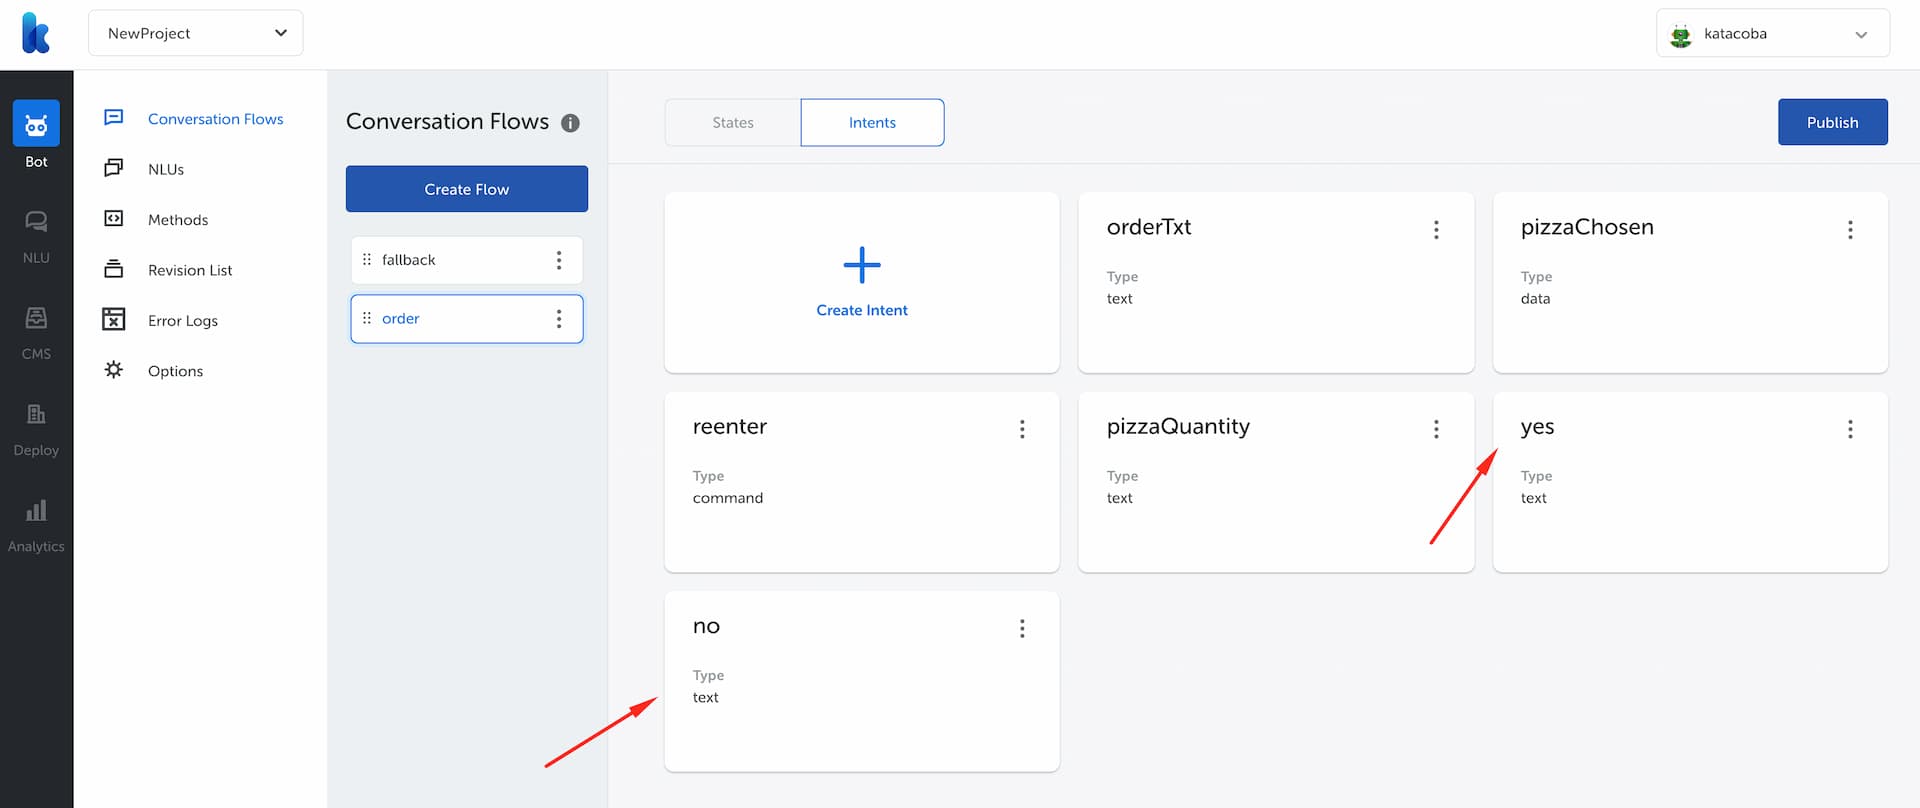
Both intent will appear as follows
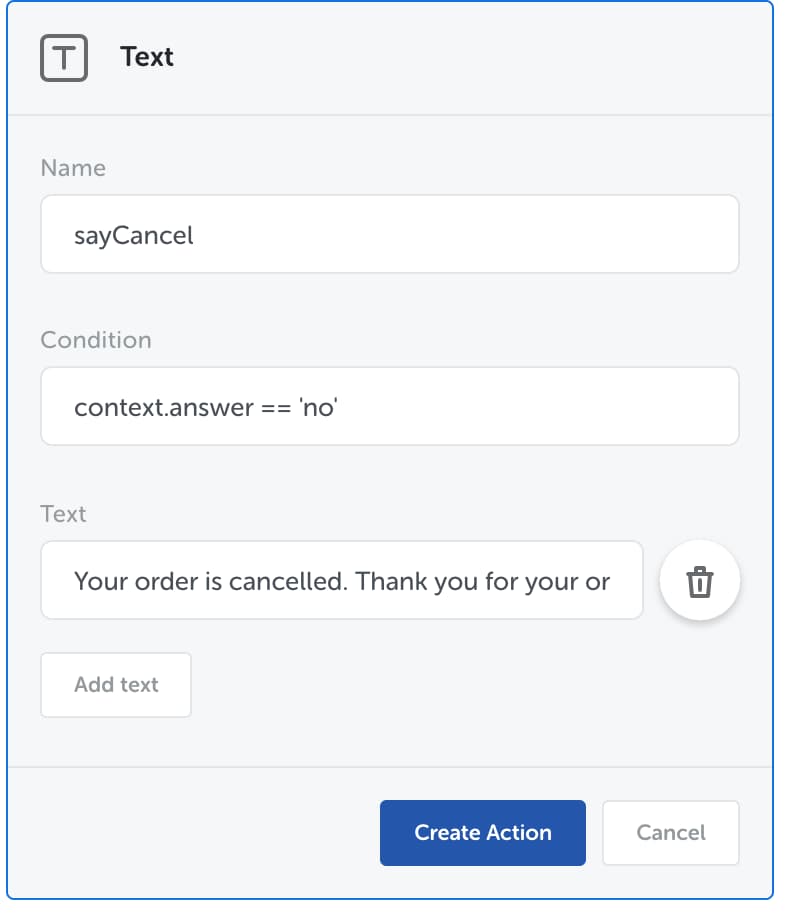
Create done state
In done state, we will complete the order by saying thank you and end the conversation. We will also set a condition when a user wants to cancel the order. So in this state we will create two actions: sayThanks and sayCancel.


Also, don't forget to add self transition in the state. Result:

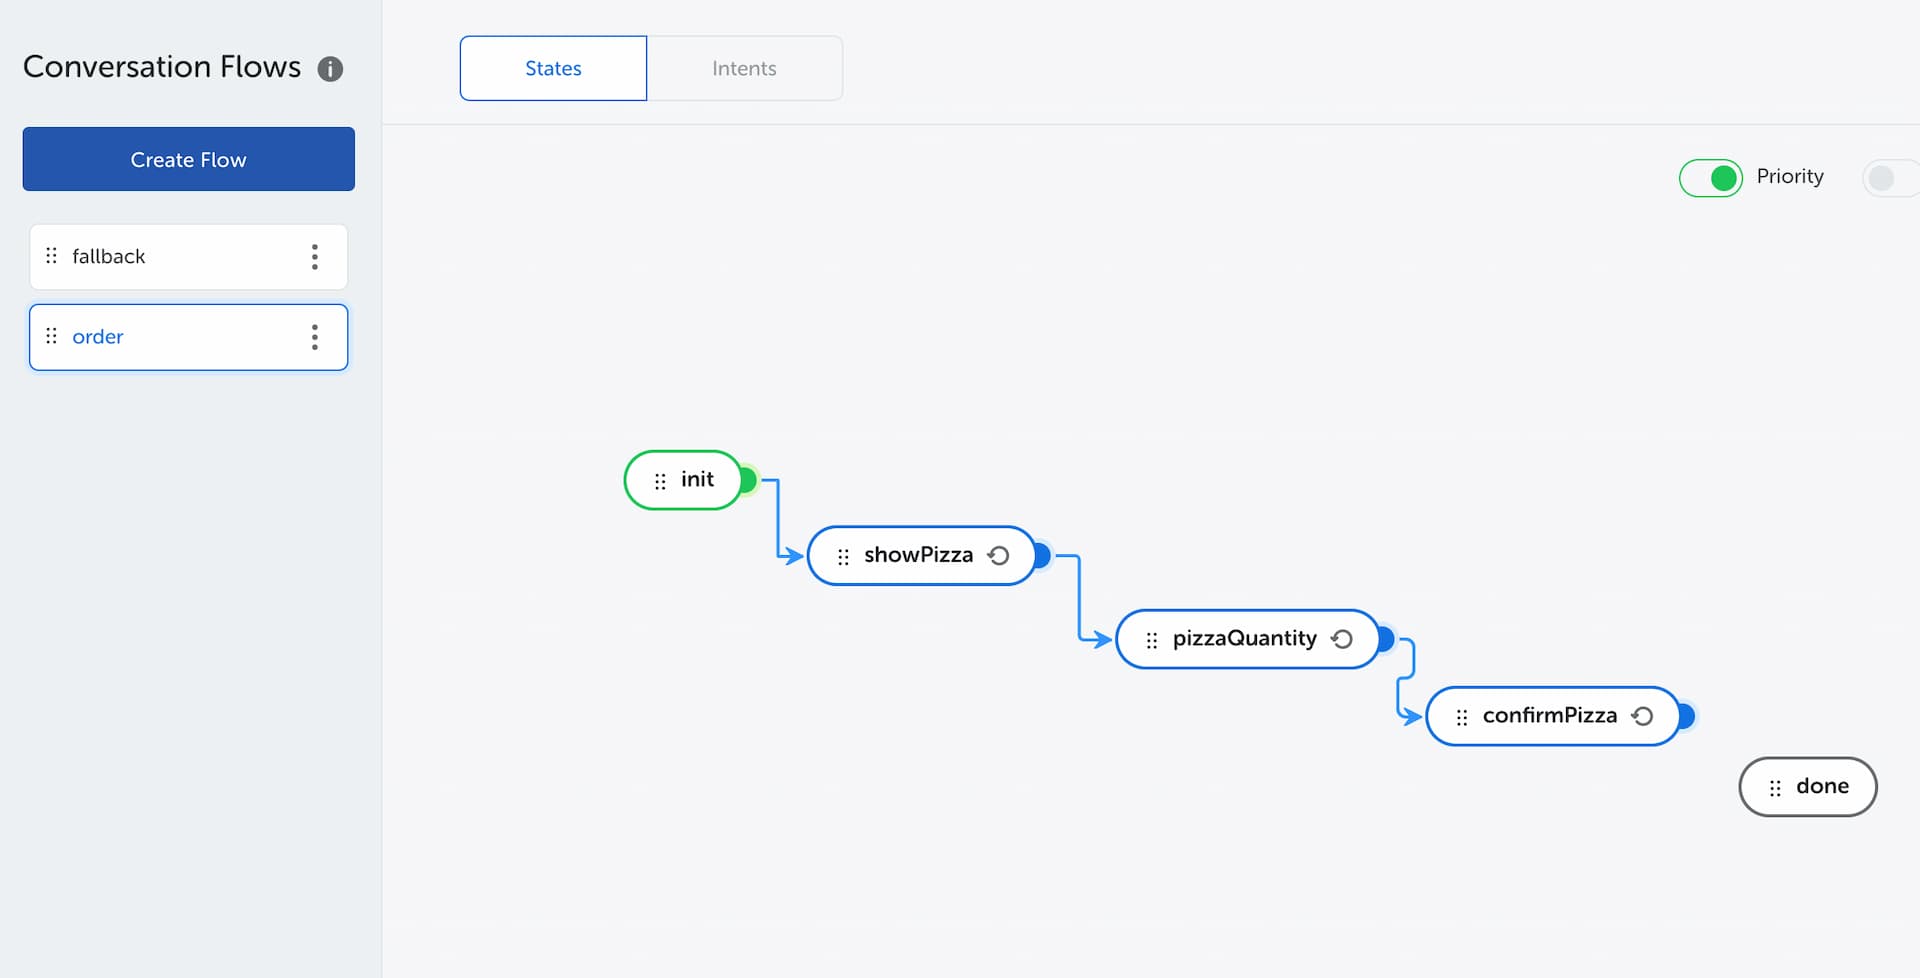
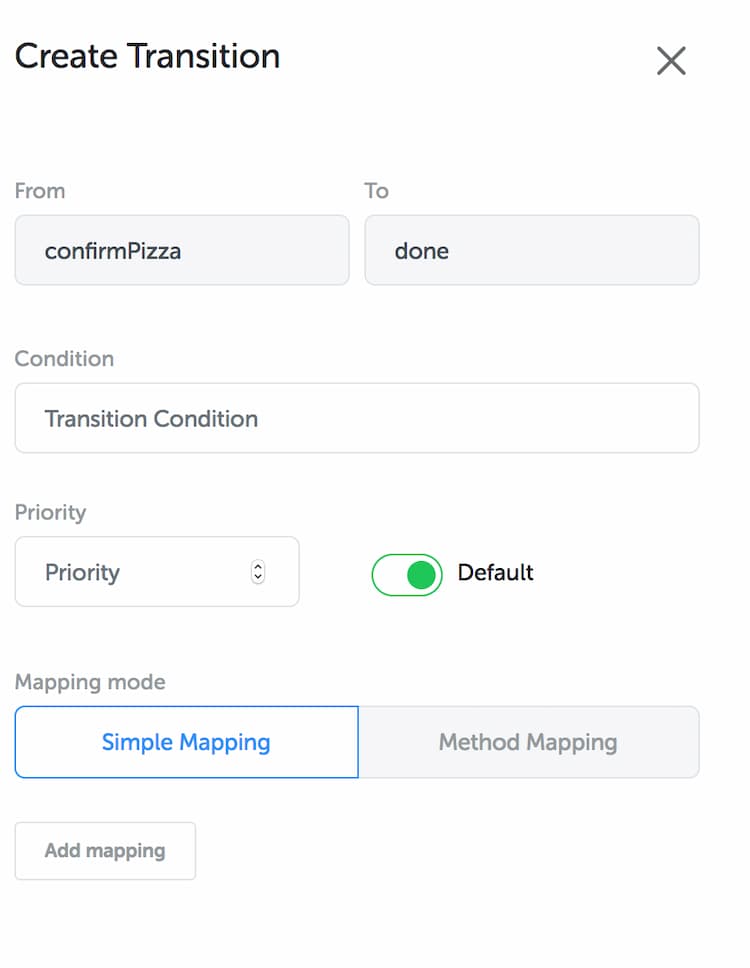
Create a transition from confirmPizza to done
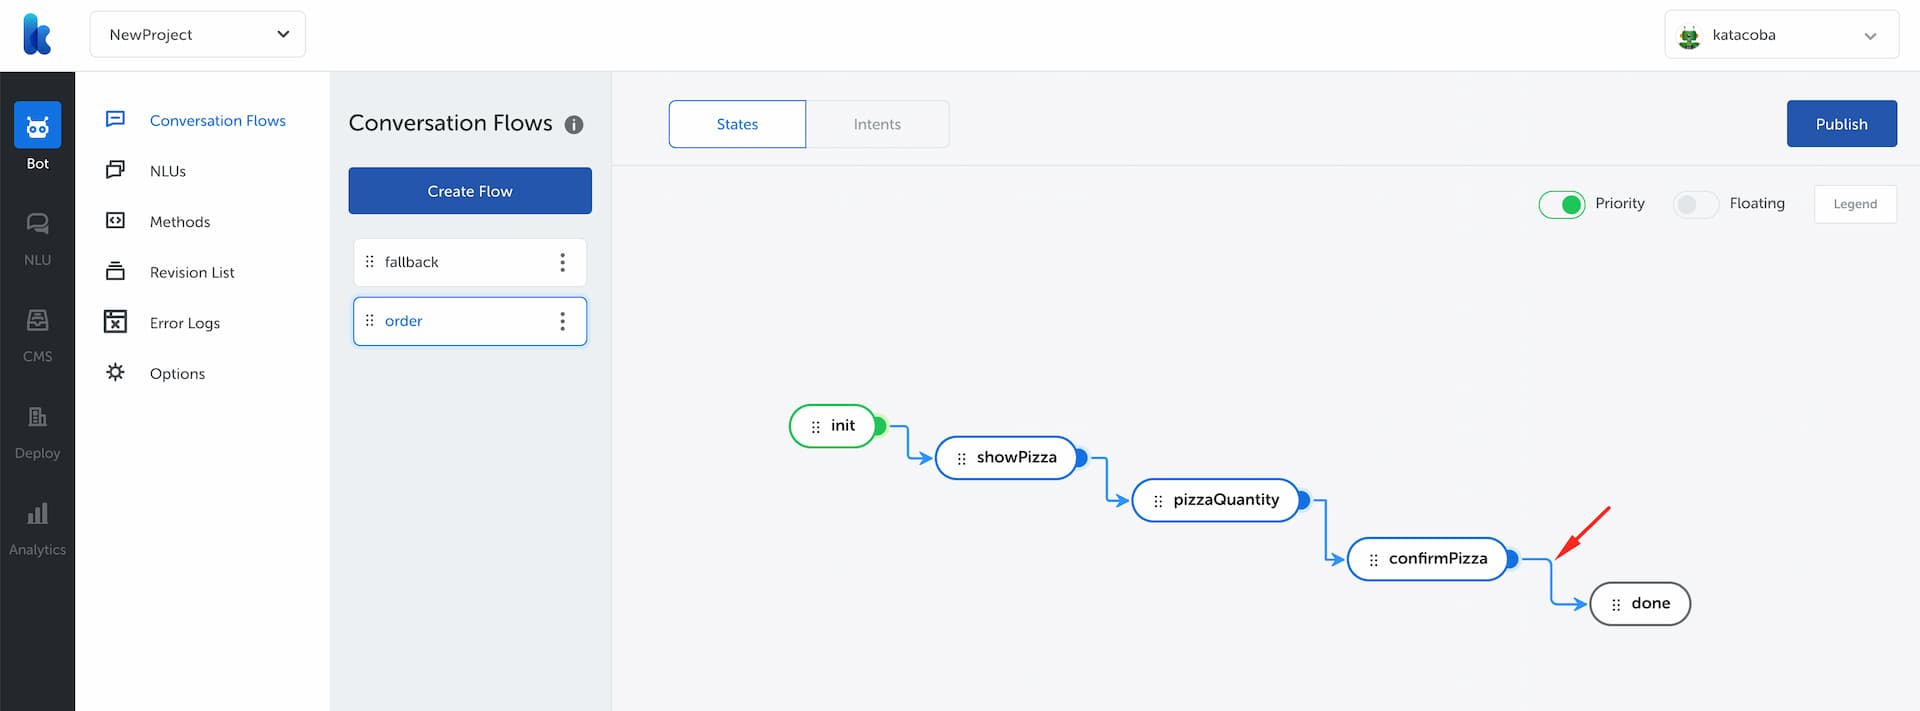
Next, we will connect confirmPizza state to done state. Because done is the last state, we will set it as default transition. Connect confirmPizza to done by clicking the blue dot and drag the line to connect the states. Create Transition form will appear after you have successfully connected the states.

Final flow:

Publish Your Bot
To save your work, click on Publish button located at the top right of your screen. Fill in the changelog as “initial version of pizza bot” for future reference. Click “Publish” to continue.


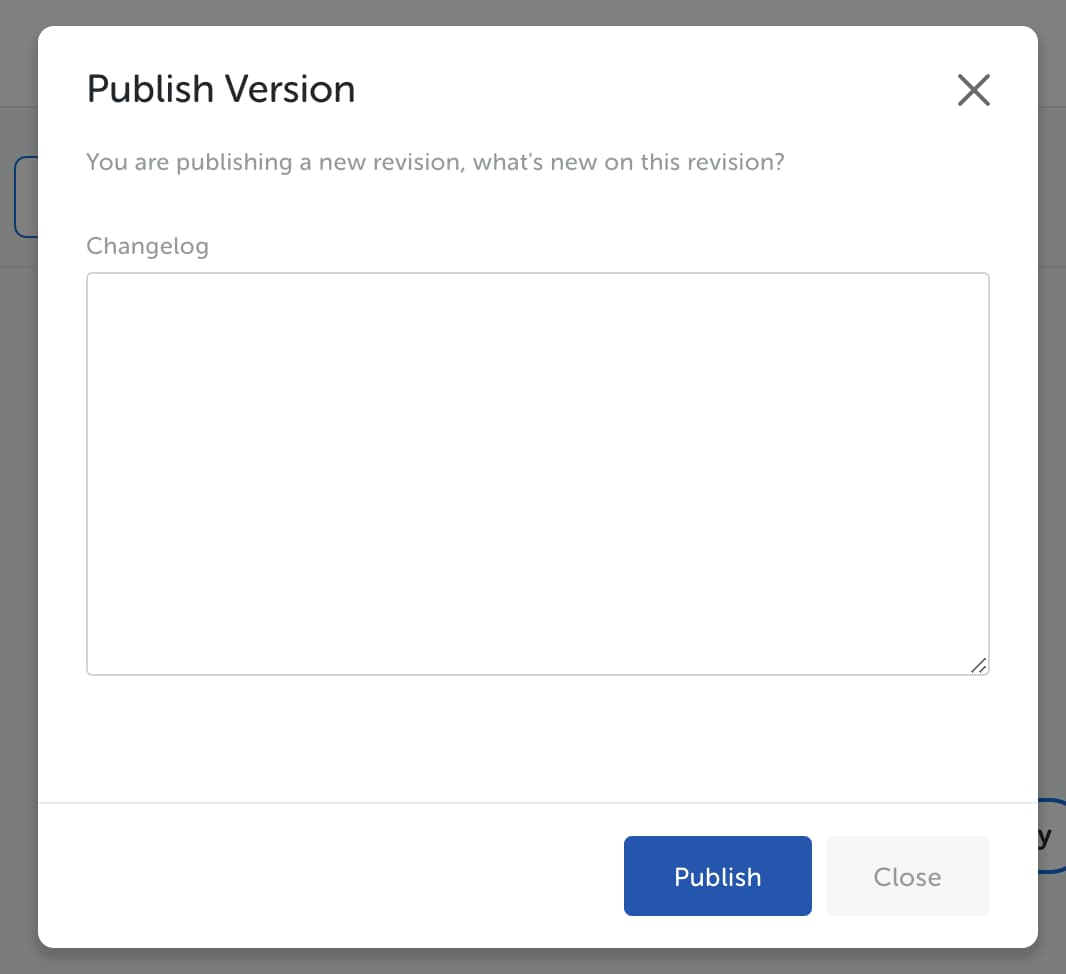
Every time you publish a bot, it will record a hash number (similar to Git's hash number) in Revision List.


Testing Your Chatbot
Click on Test Chatbot on Bot Studio then type “order” to initialize order flow.
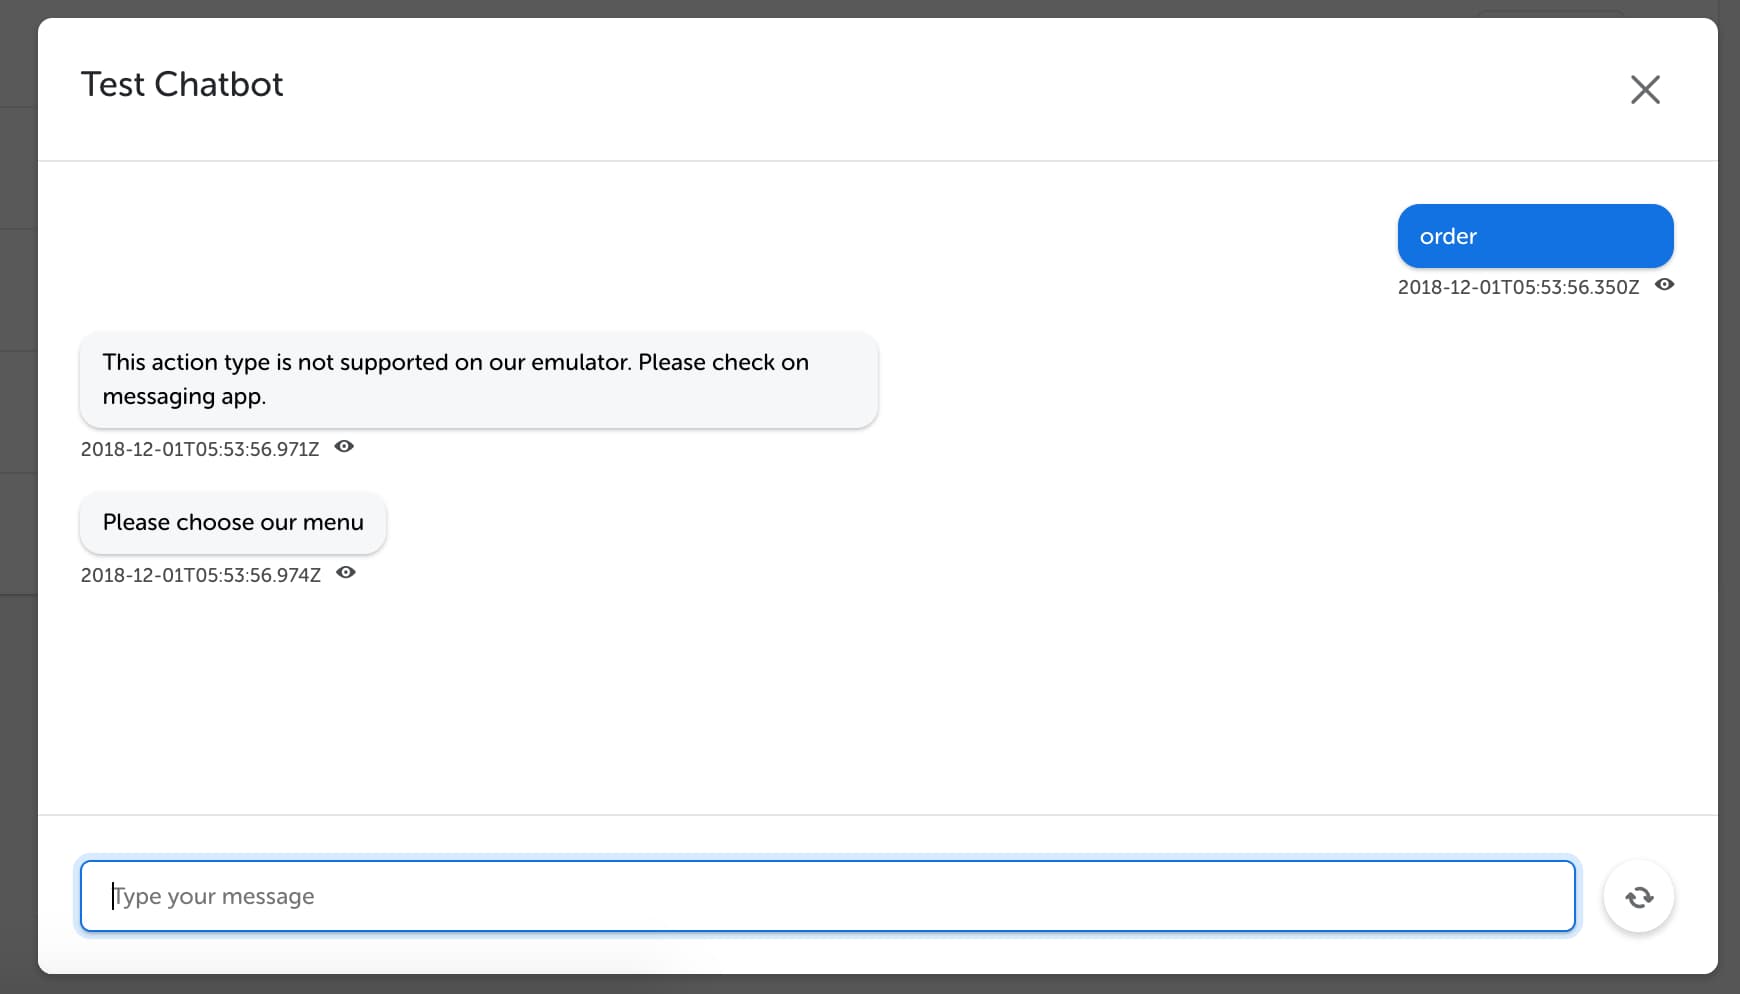
Check on the rest of the flow and make sure everything you've made works.
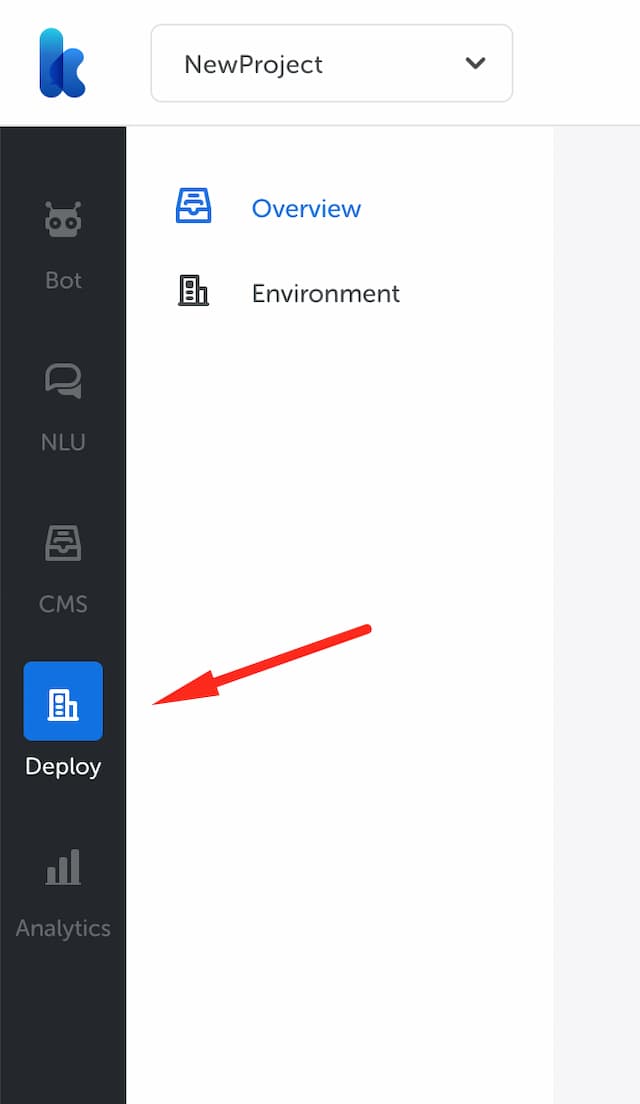
Deploy Your Chatbot
Now we will try to deploy our chatbot to LINE Messenger.
Create deployment
First of all, we have to create a deployment first. Find the “Deployment” menu on the left sidebar.

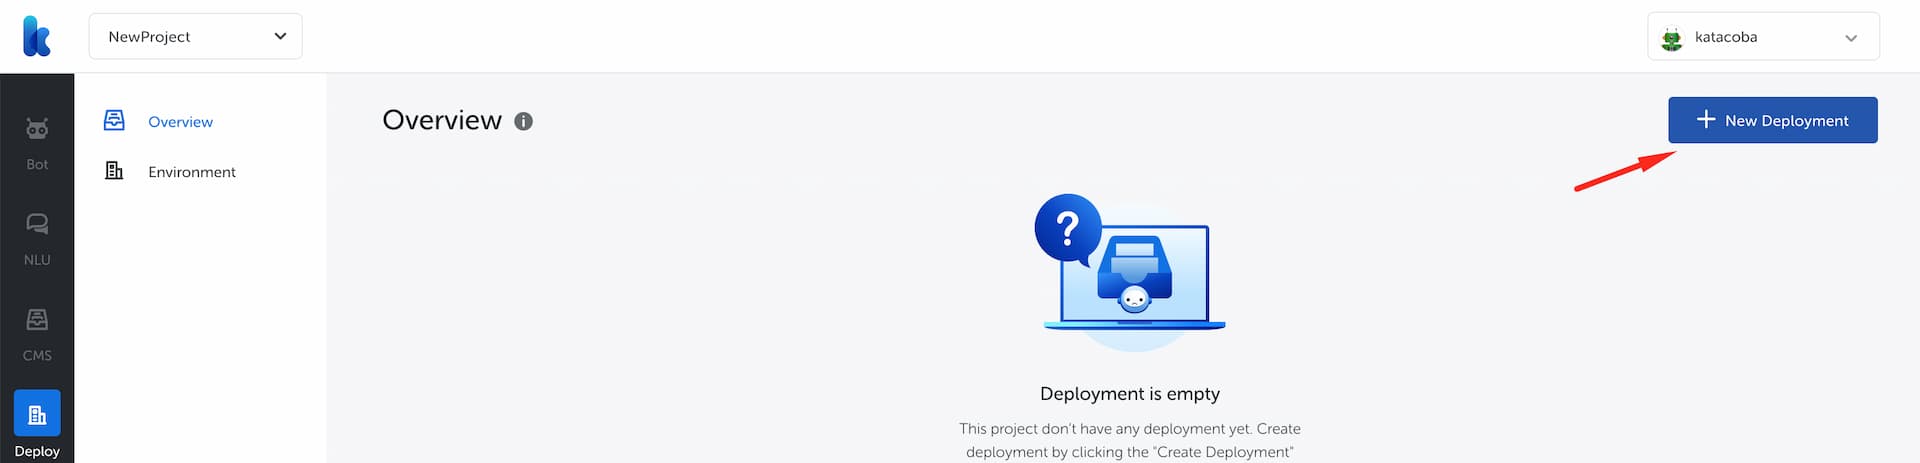
Click on Create Deployment button on top right

Choose Patch on Deployment Version.

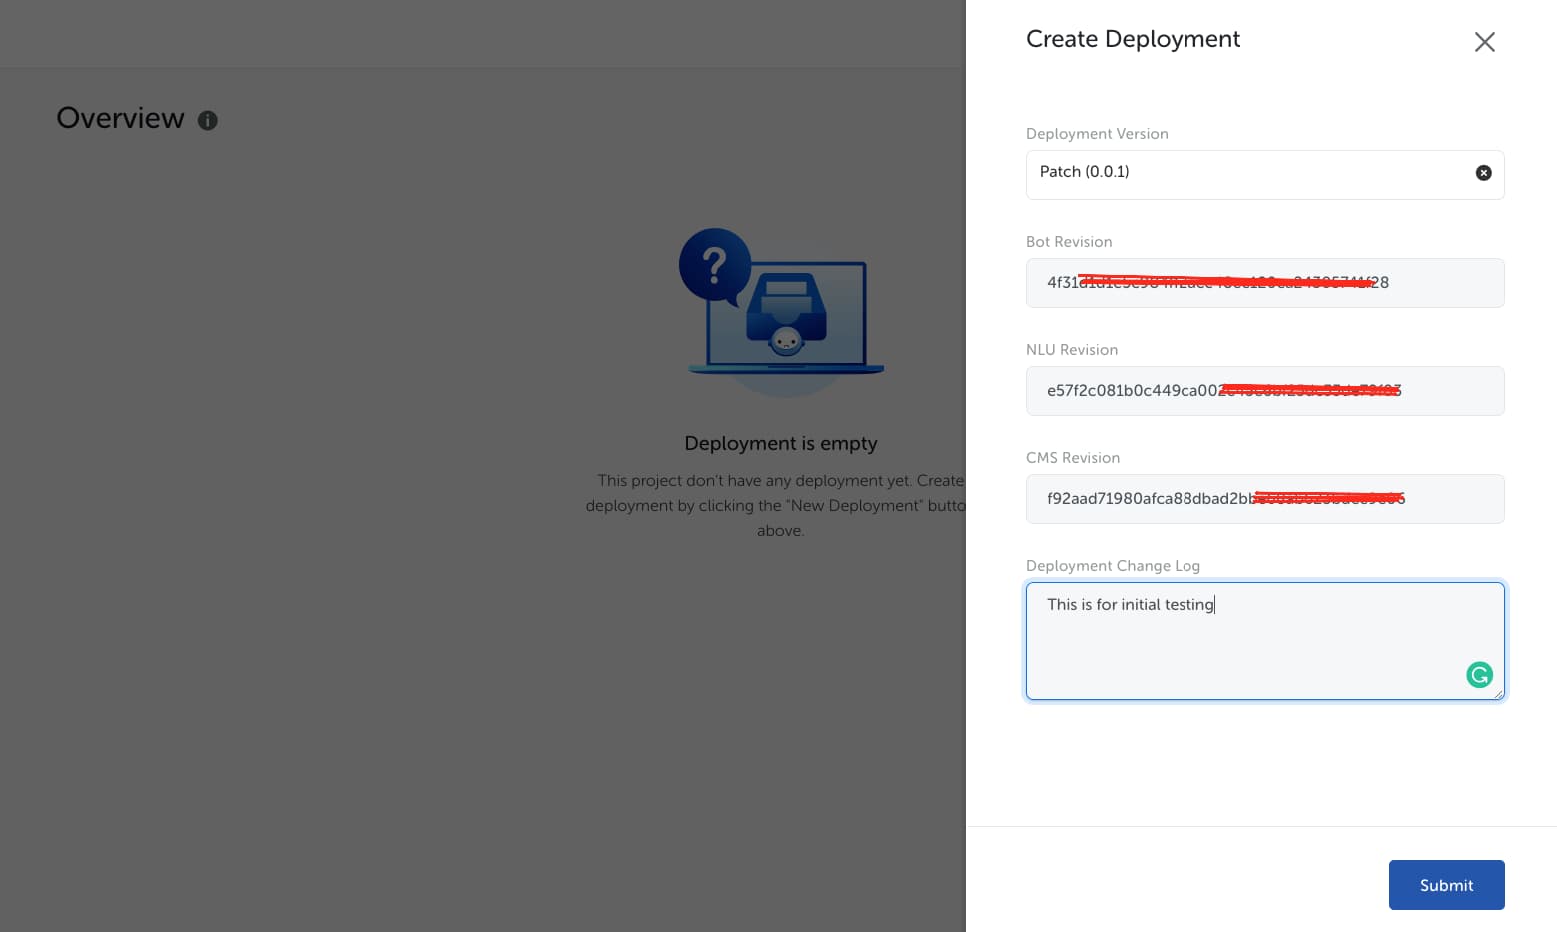
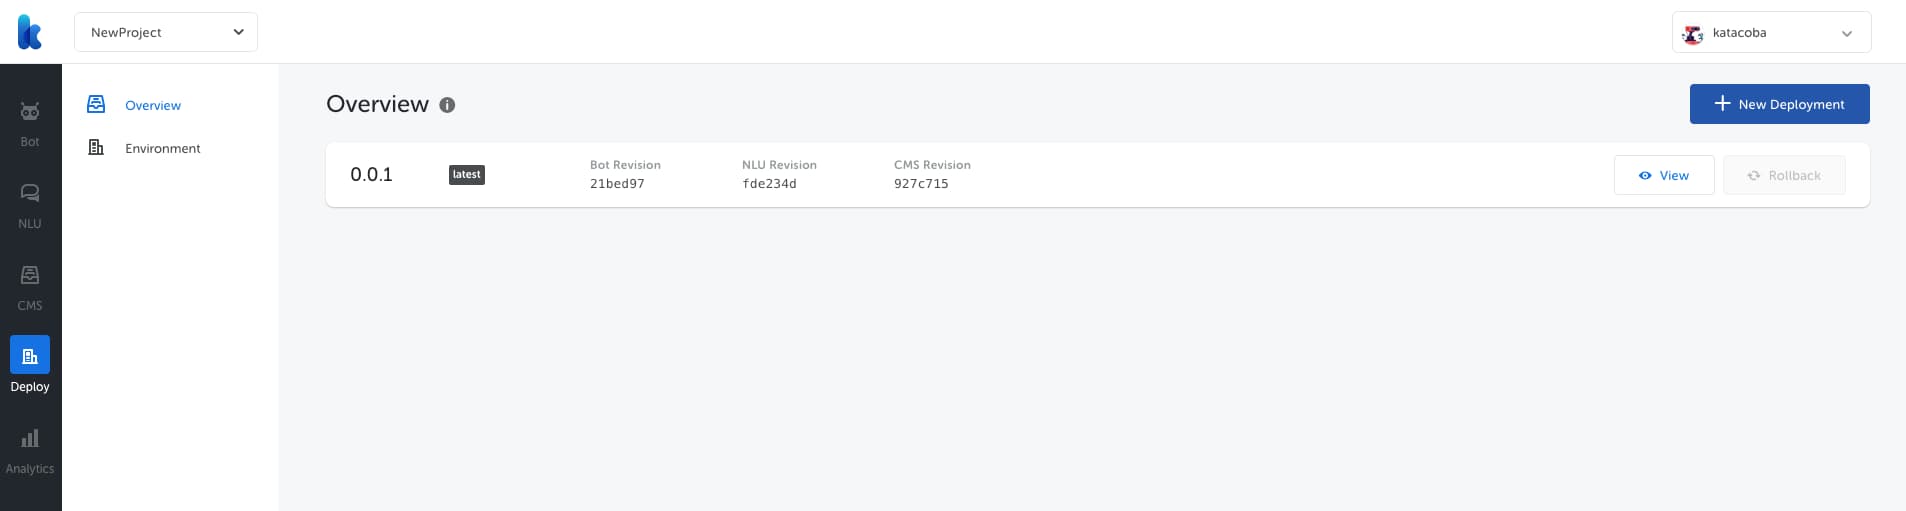
Succesfully created deployment looks like this.

Create Environment
Kata | Platform 3.0 allows you to set up 3 separate environments in your project: Development, Staging, and Production. Inside each environment, you can add as many messaging channel as you like. You have to setup environment first before integrating to messaging channel.
In this tutorial, we will try to setup Production environment. Click on Environment menu under Deploy and you will be shown 3 available environments.

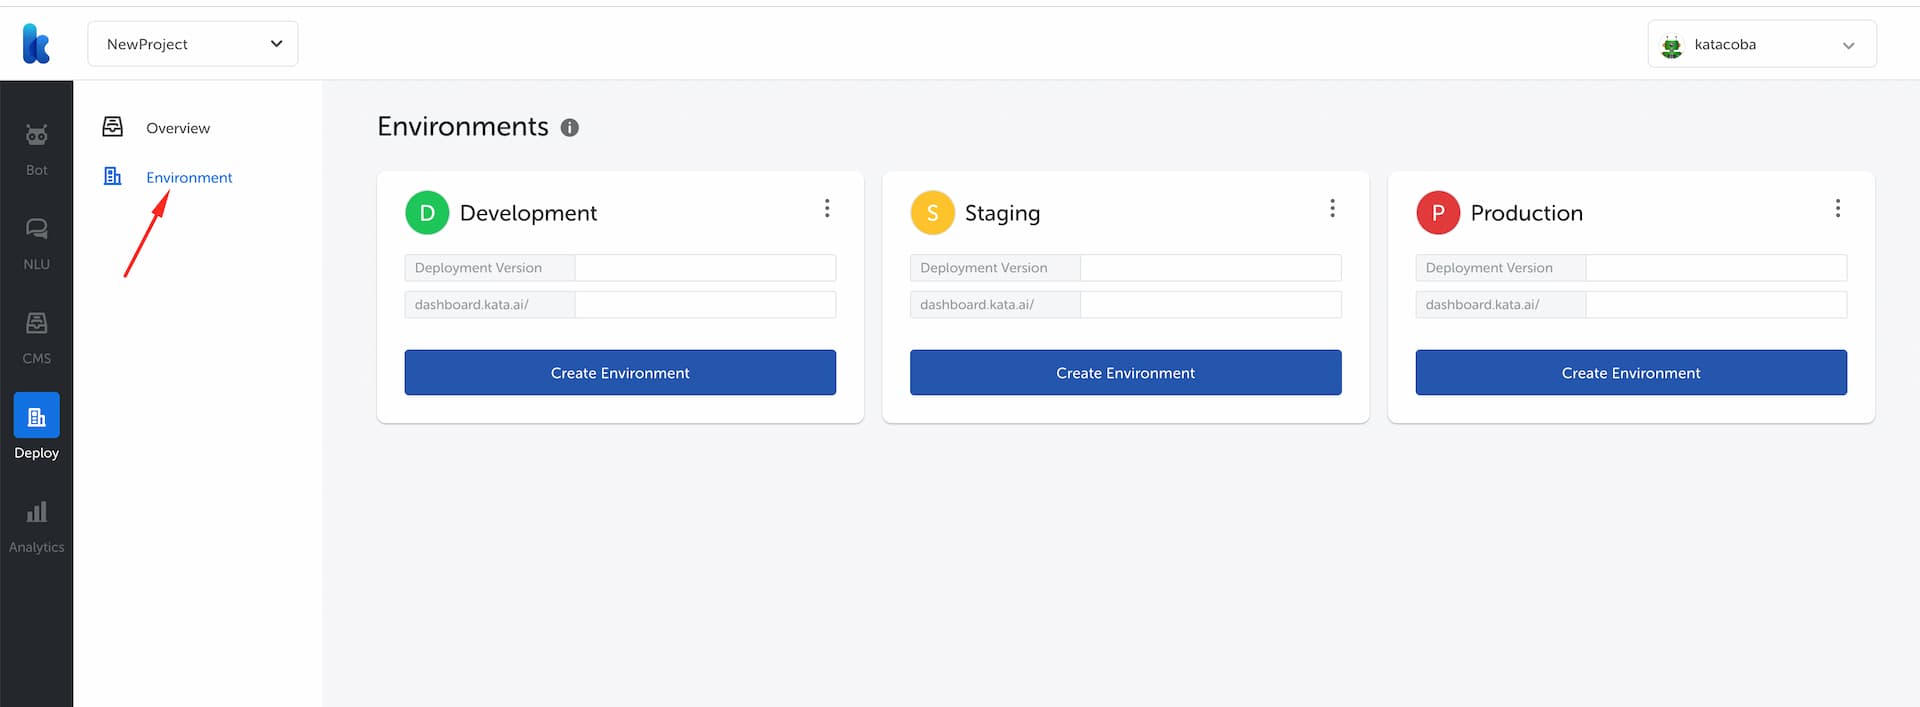
Click “Create Environment” button in Production.
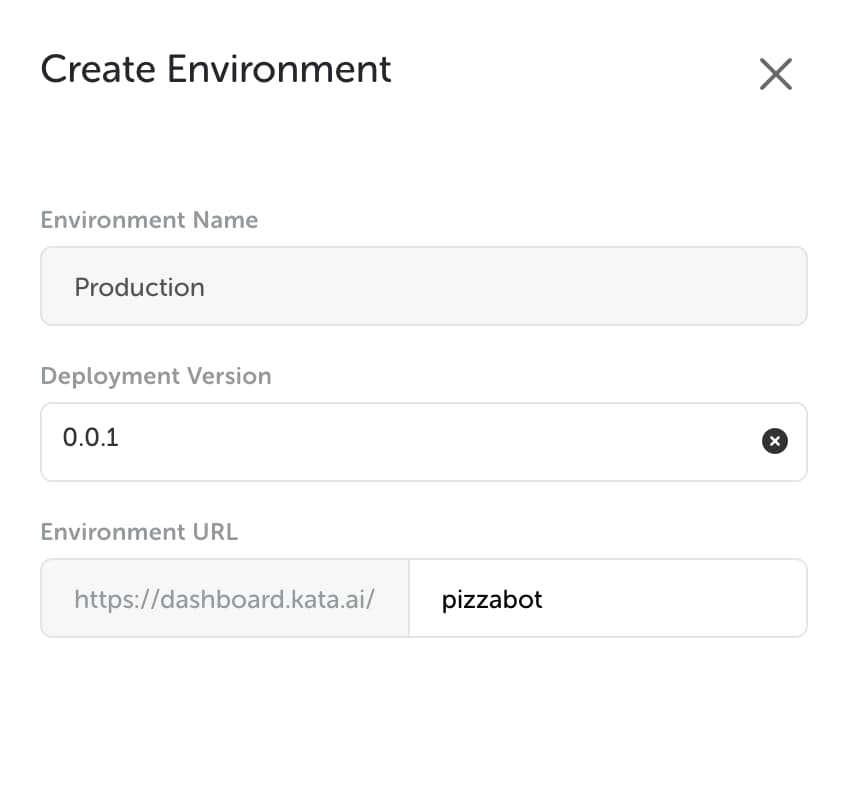
The first field we have to fill in is deployment version. Choose 0.0.1 (shown on the previous step) as deployment version in Production.
Another field we have to fill in is environment URL. This URL is used to access CMS Client later.

Successfully created environment will look like this

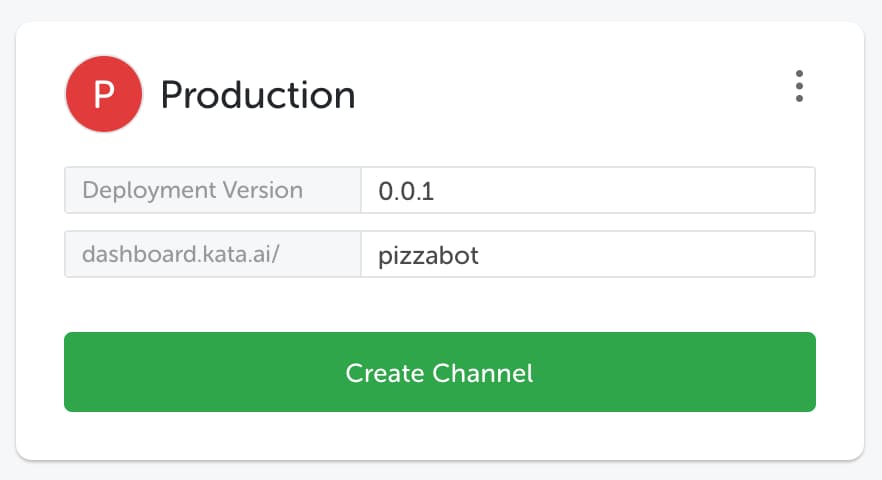
Next, we need to create channel inside the environment. Click on Create Channel on Production environment and you will be redirected to Create Channel page

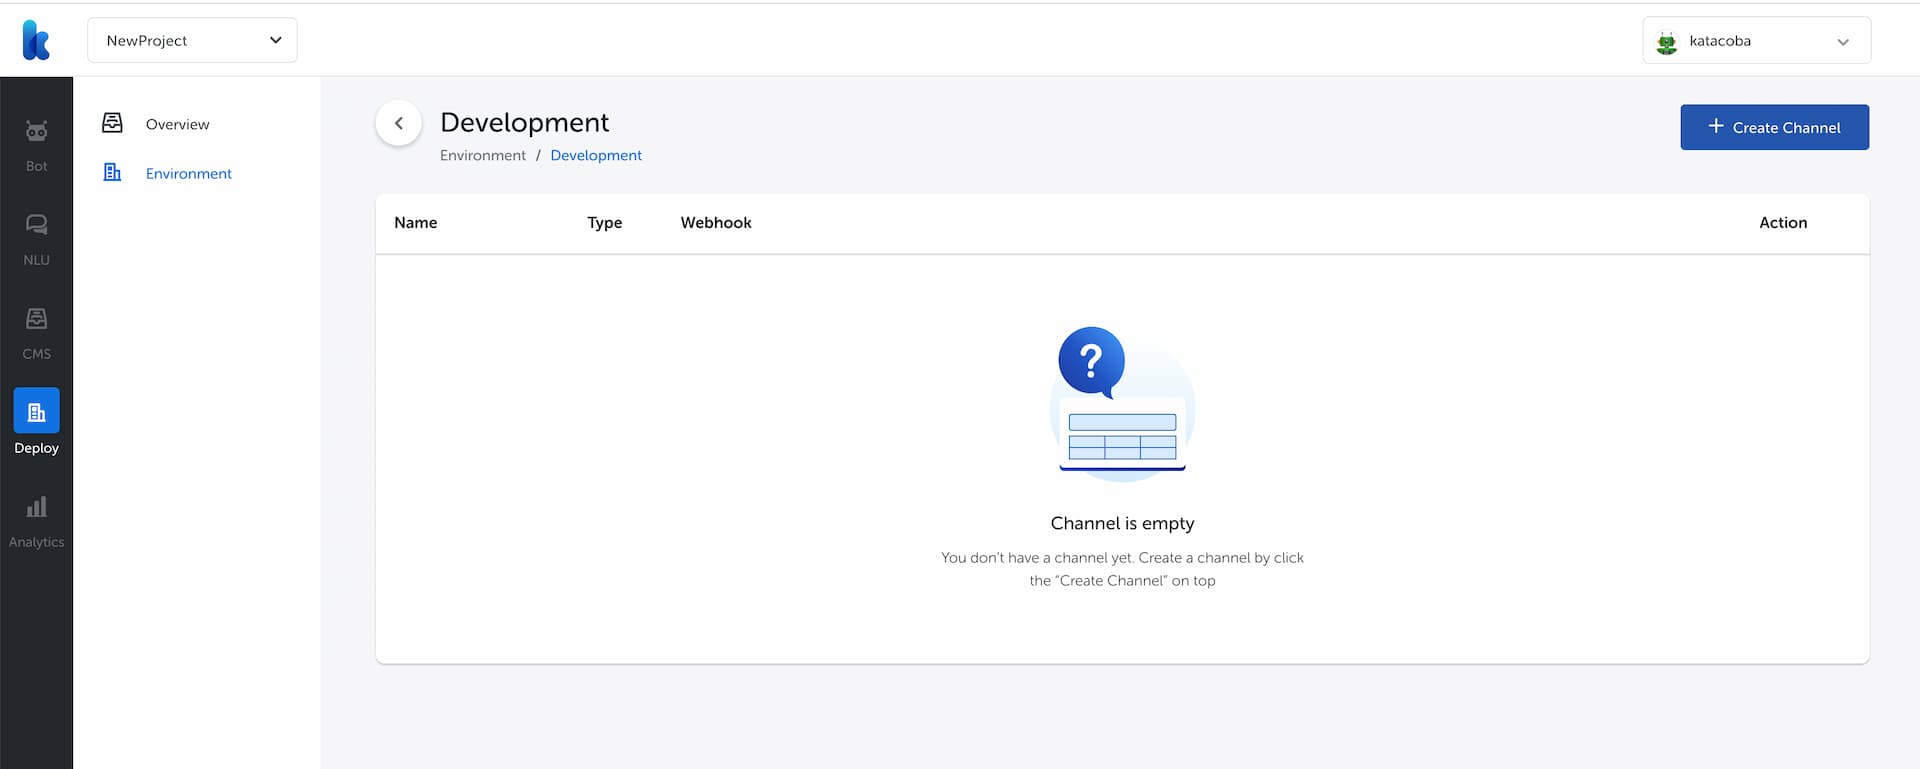
Next, click “Create Channel” and fill in as follows

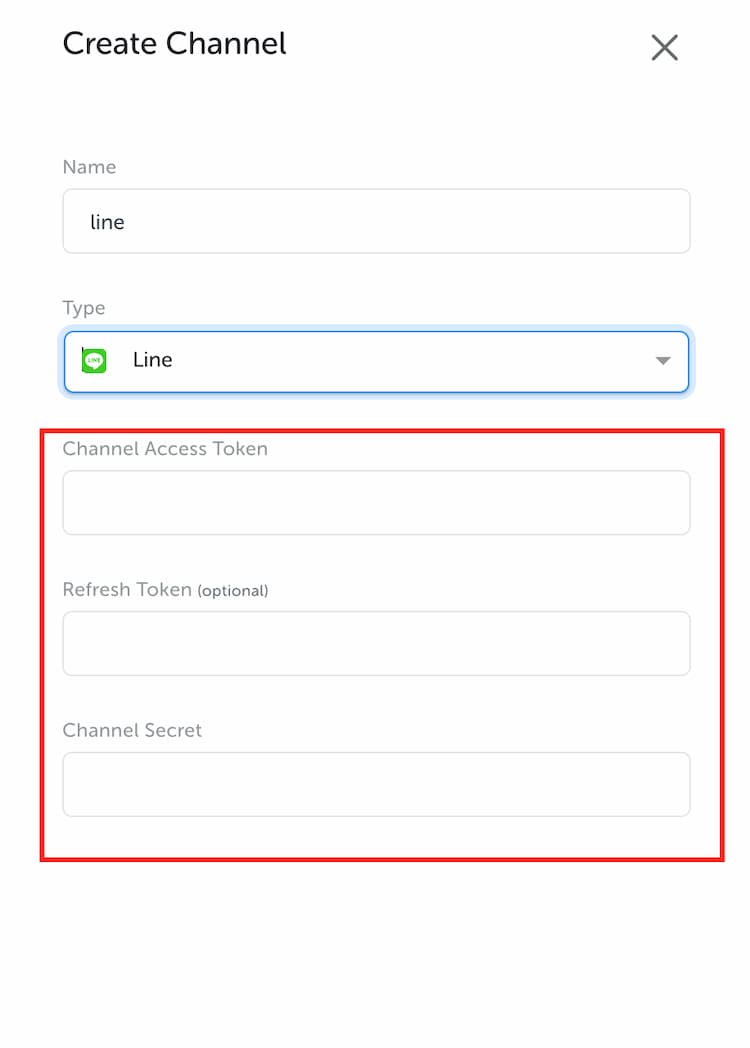
Let's setup LINE developer console so you can fill in fields highlighted with red box.
Registration to LINE Developer console
Create LINE account
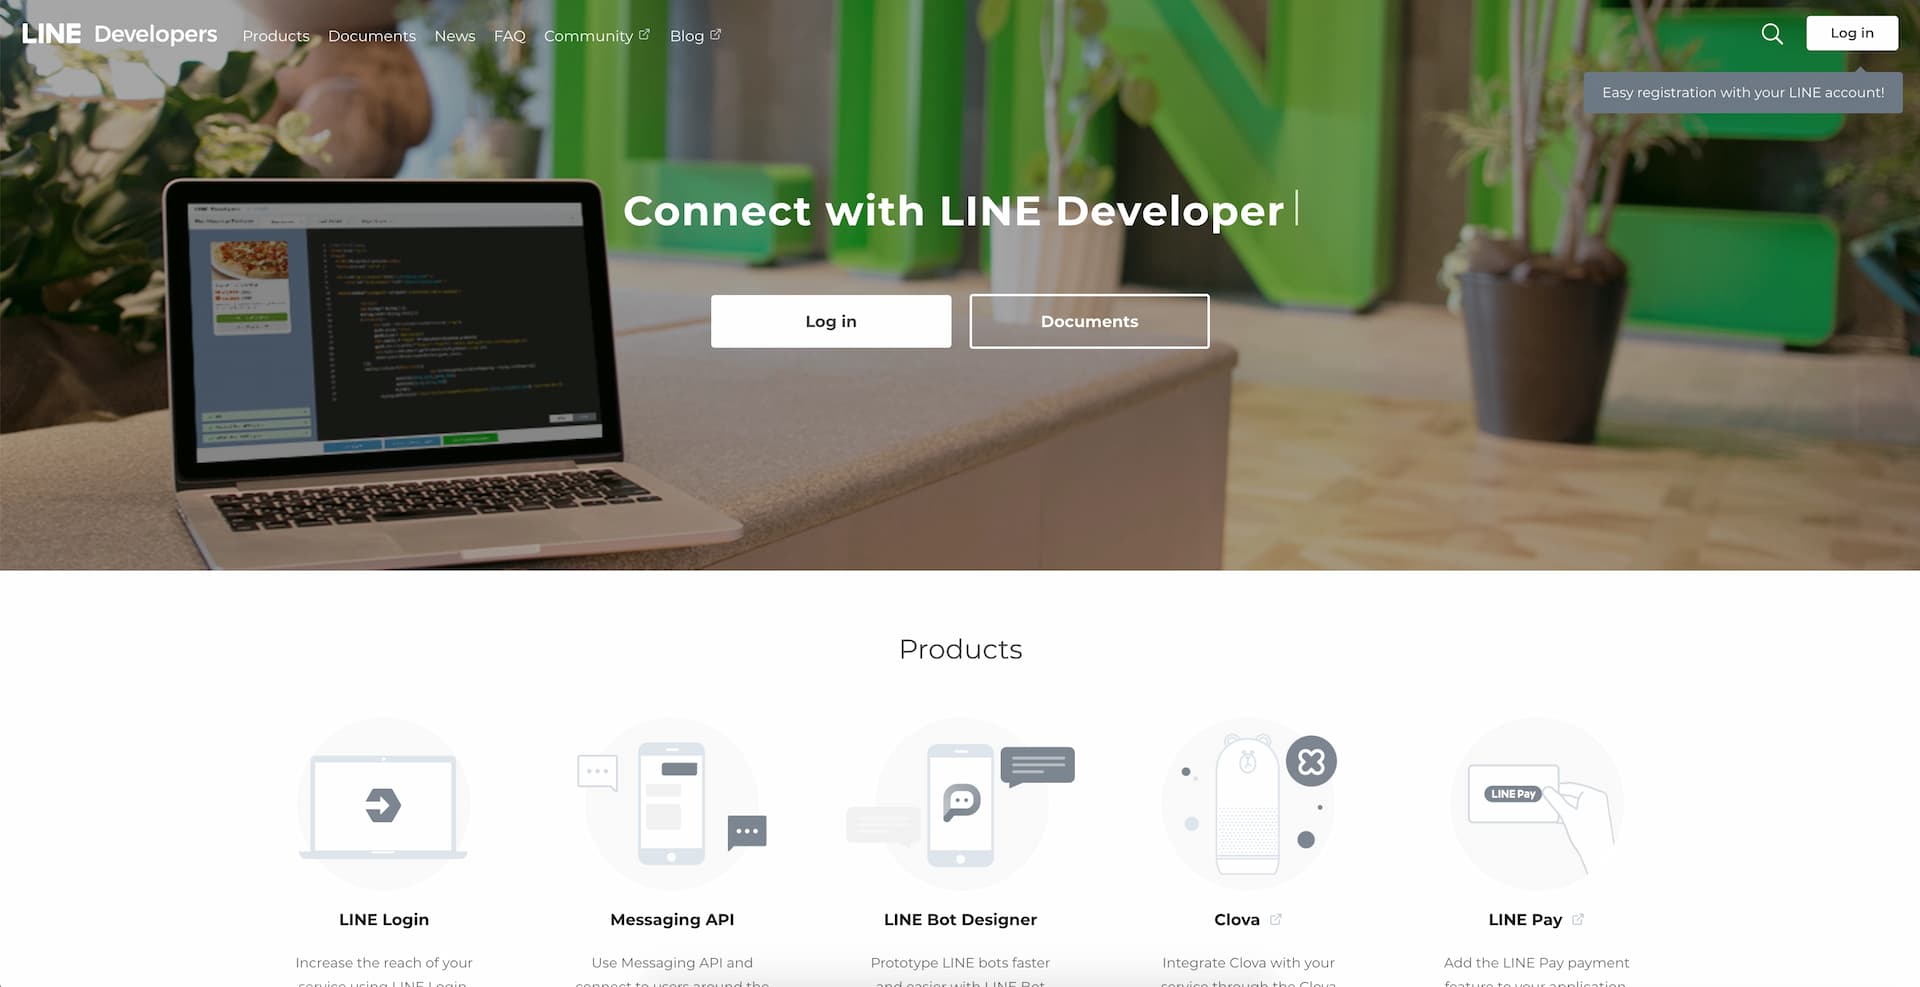
To sign up for a LINE developer account, you have to have a LINE account by installing LINE application, either desktop or mobile app. After you successfully registered, sign in to https://developers.line.biz/en/
In LINE Developer Console click Log In.
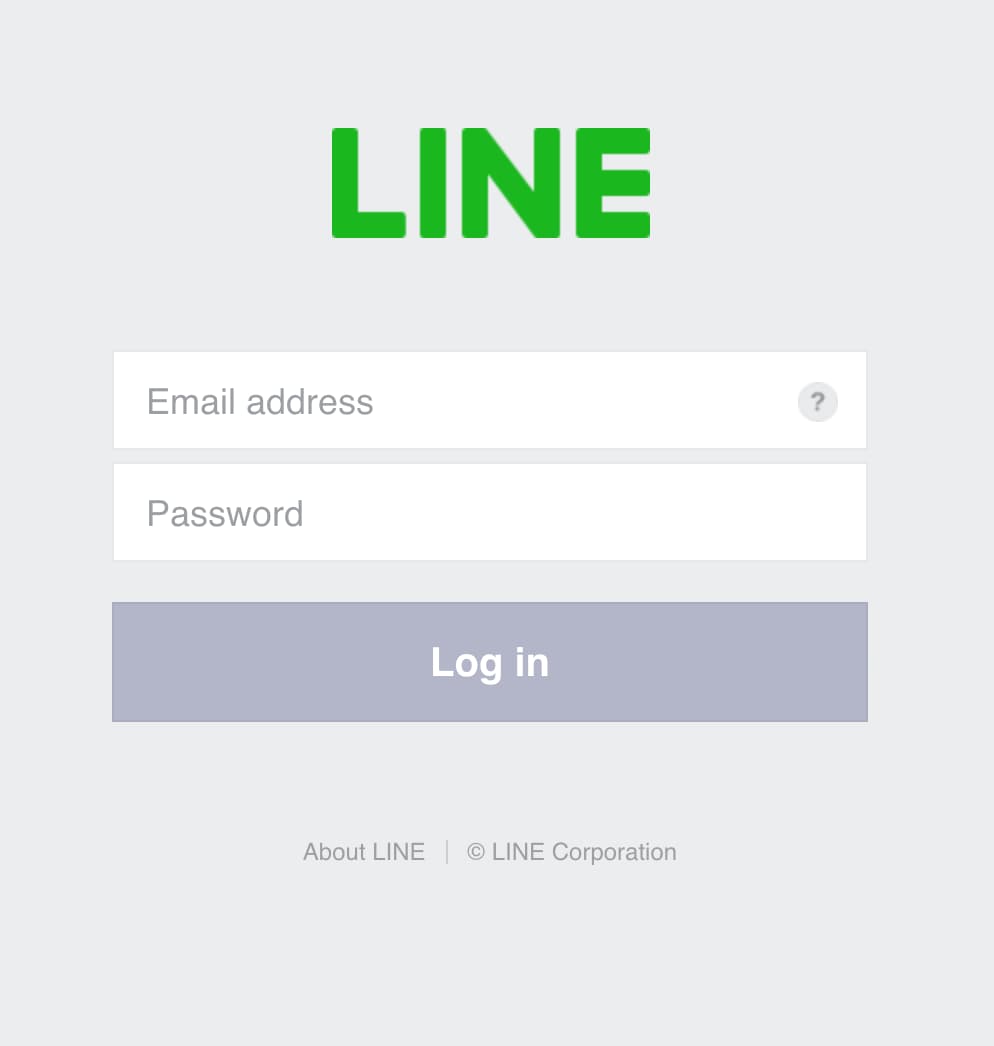
Click on Log in with LINE


Enter your email and password

After you successfully logged in, you will be redirected to provider list dashboard

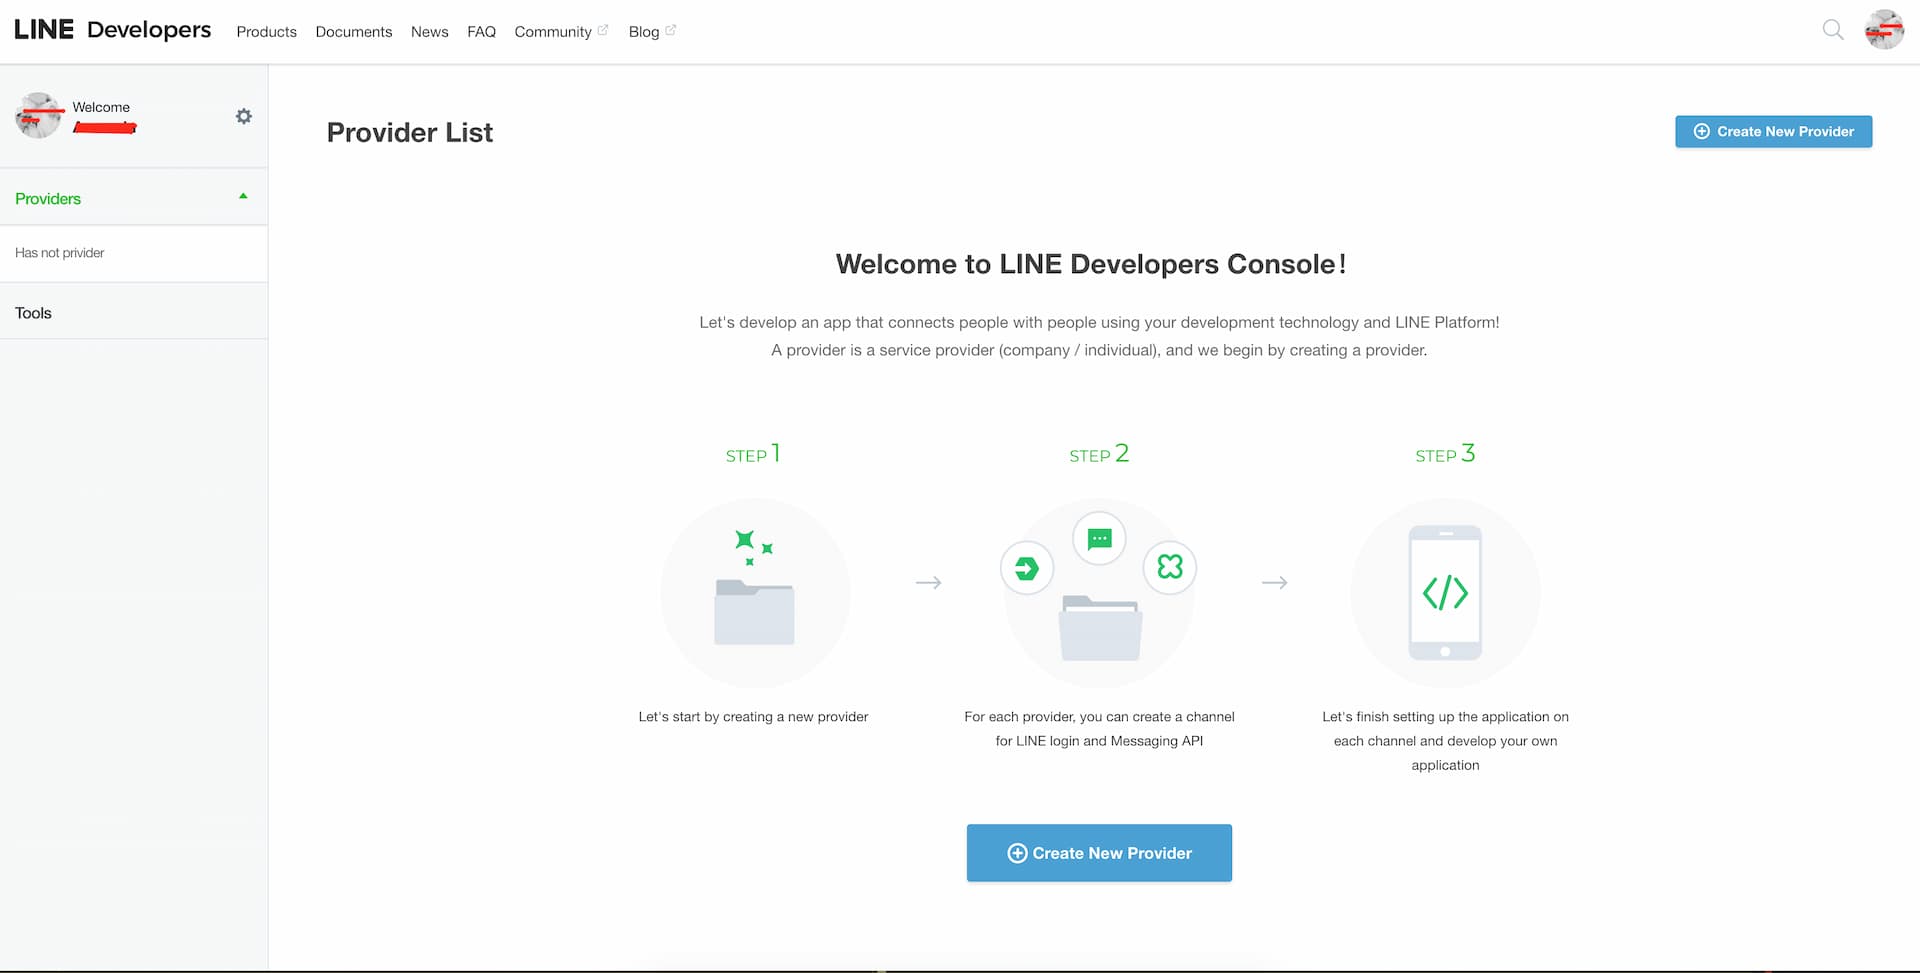
Create a Provider
Click “Create New Provider”

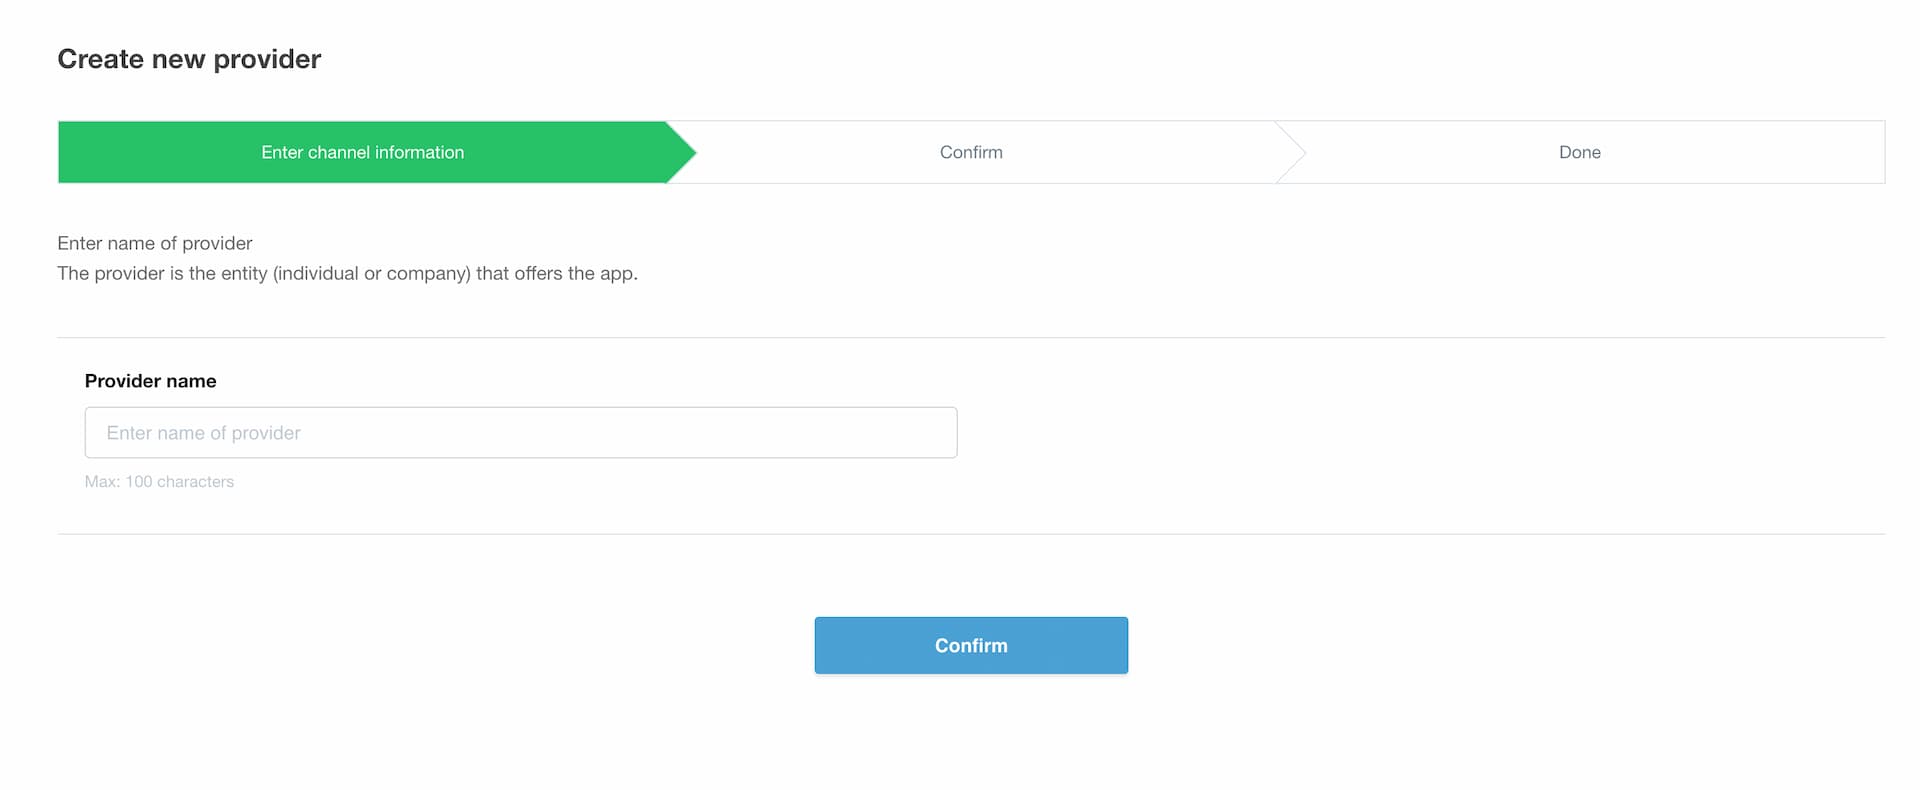
Fill in provider name
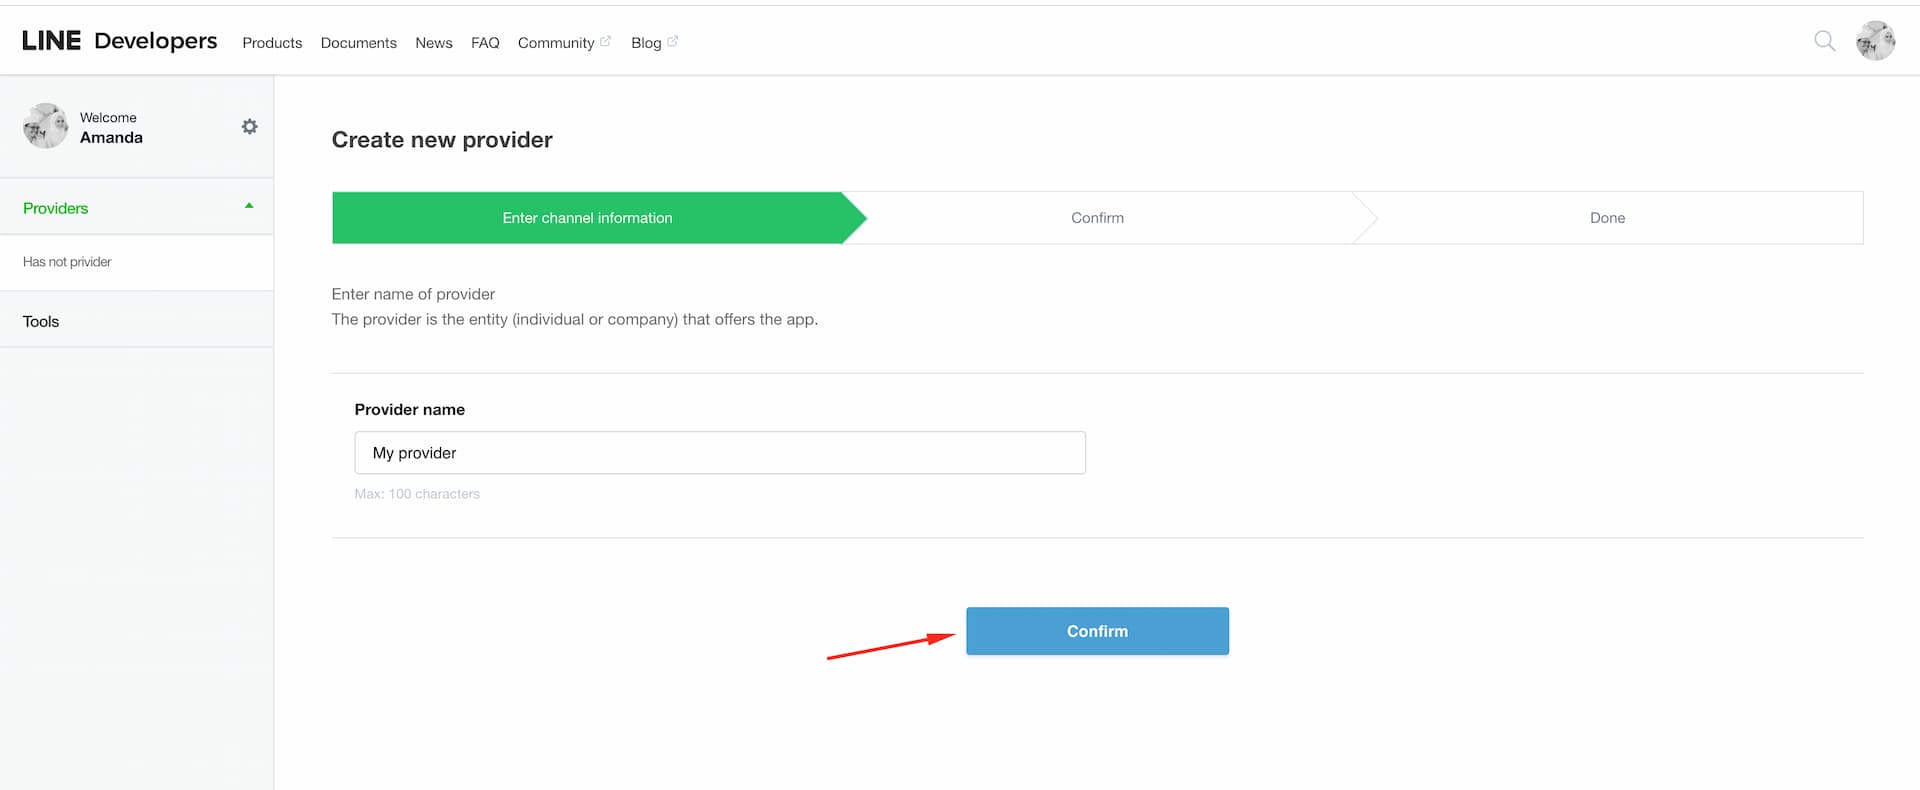
Click Confirm to continue. You will have to re-confirm the provider name since it cannot be changed later. Click “Create” to confirm.
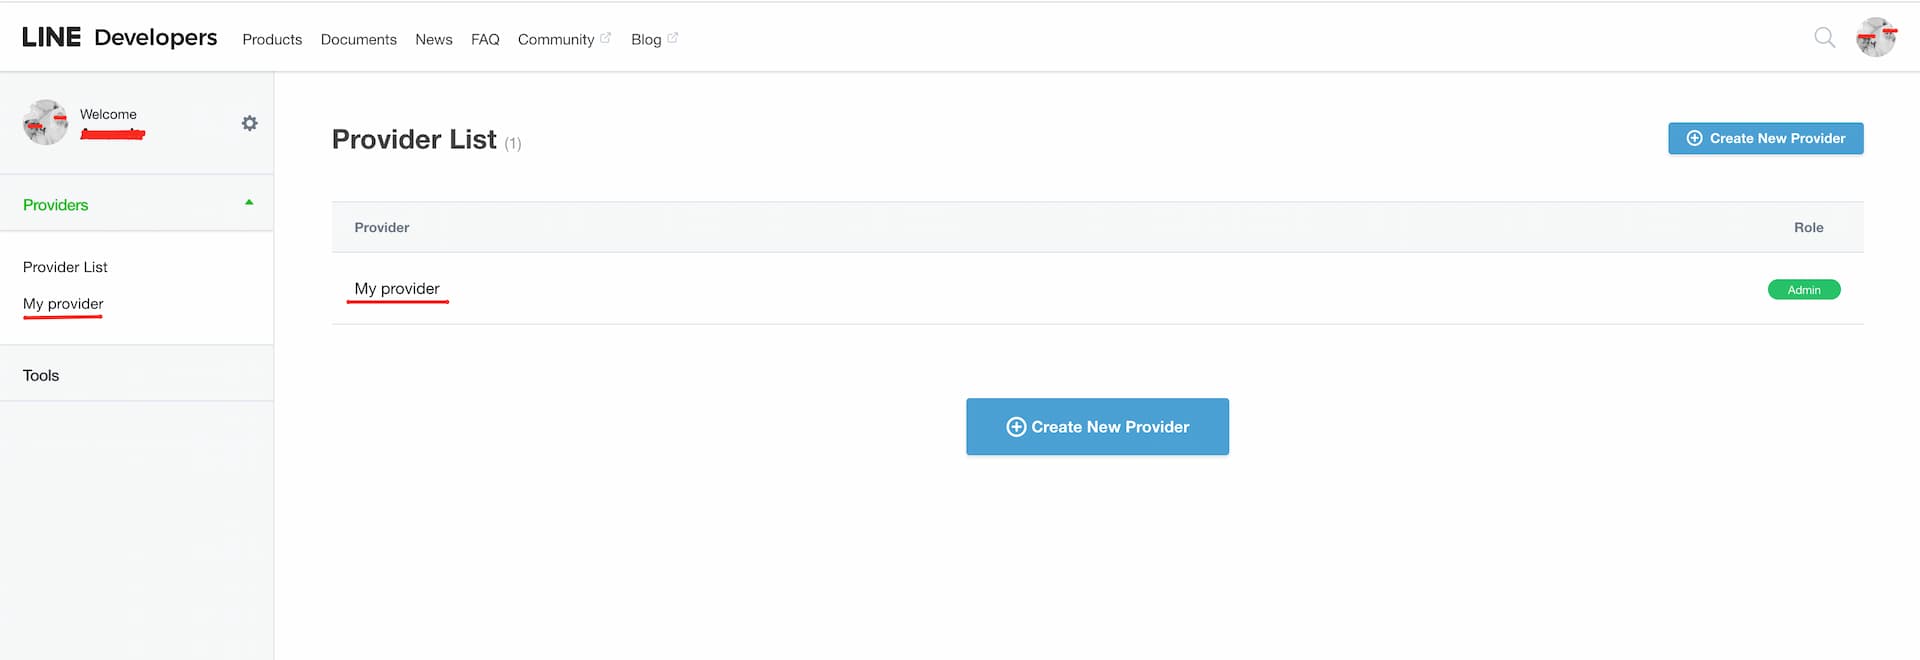
Setup Channel for LINE Integration
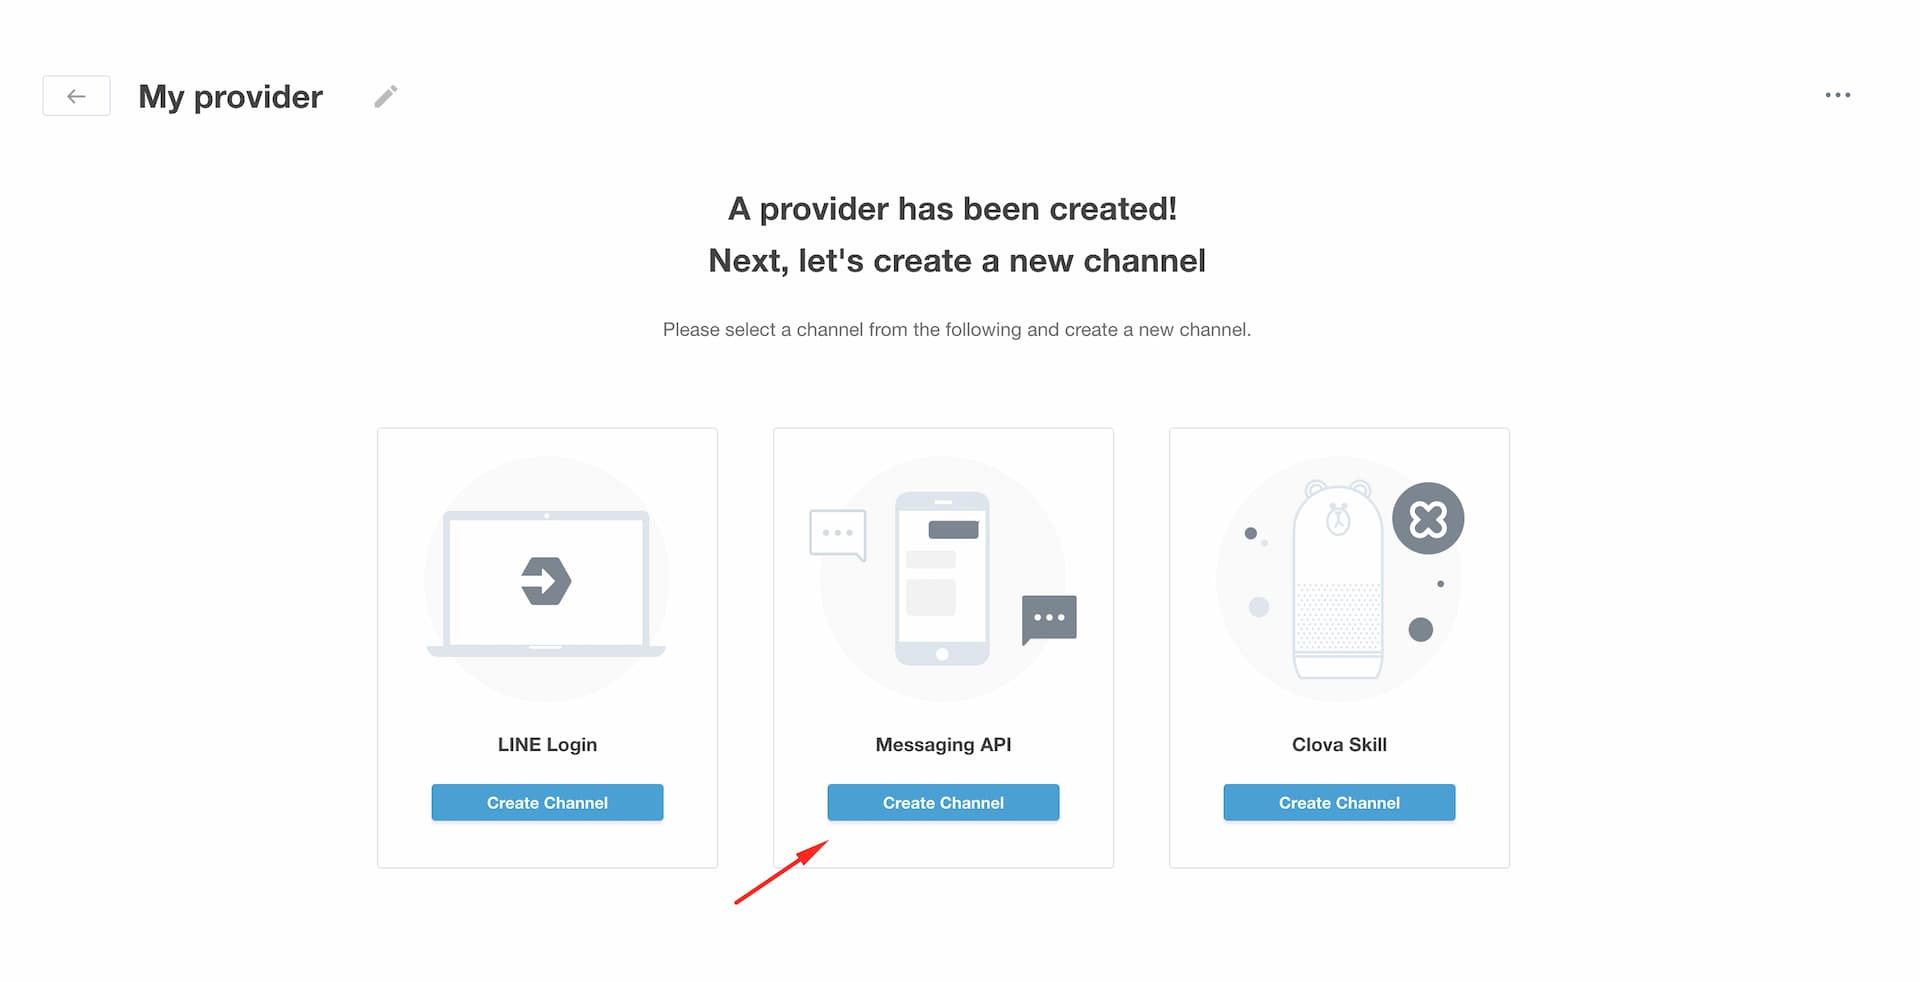
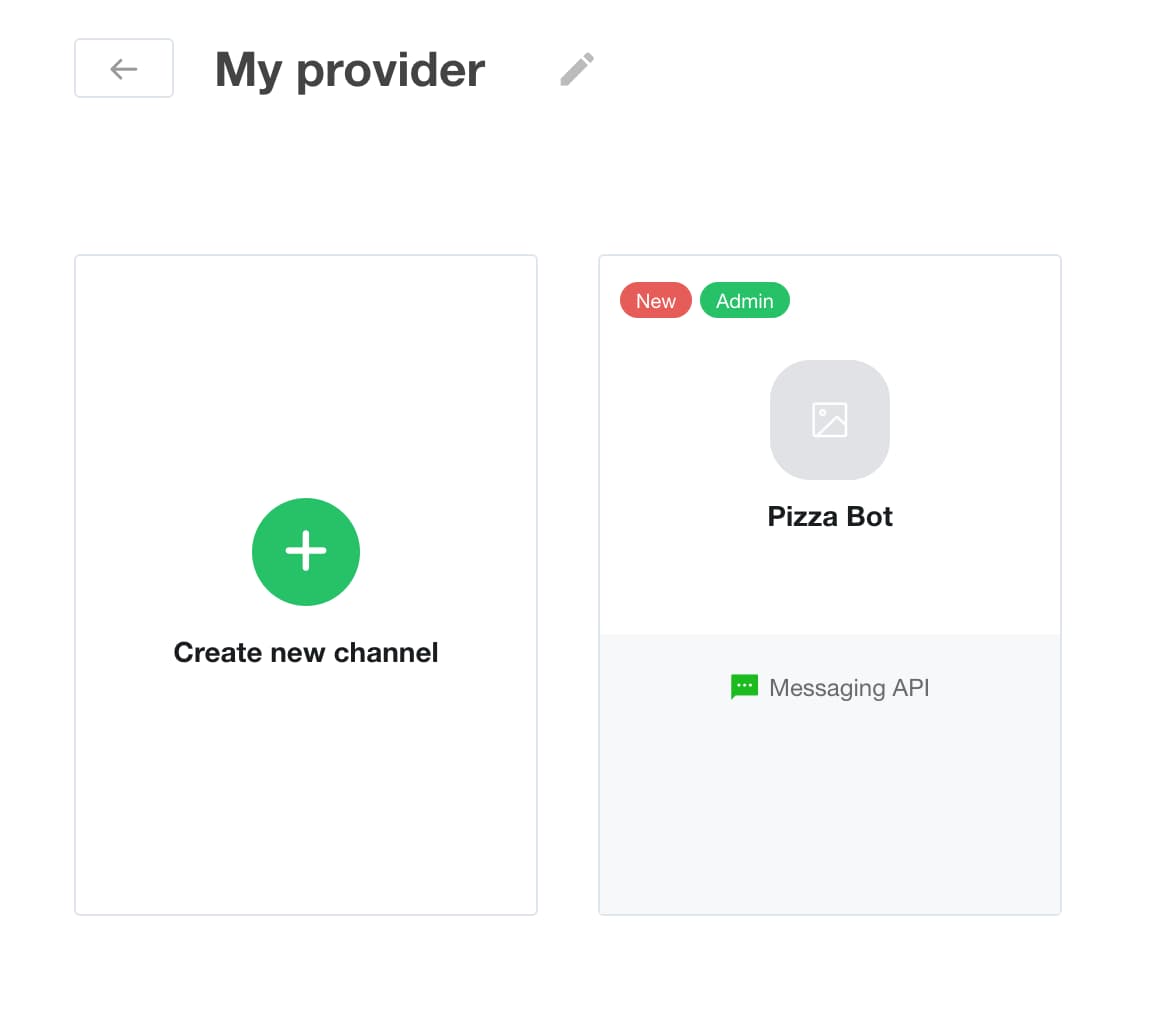
Setup channel in Messaging API by clicking Create Channel on Messaging API.
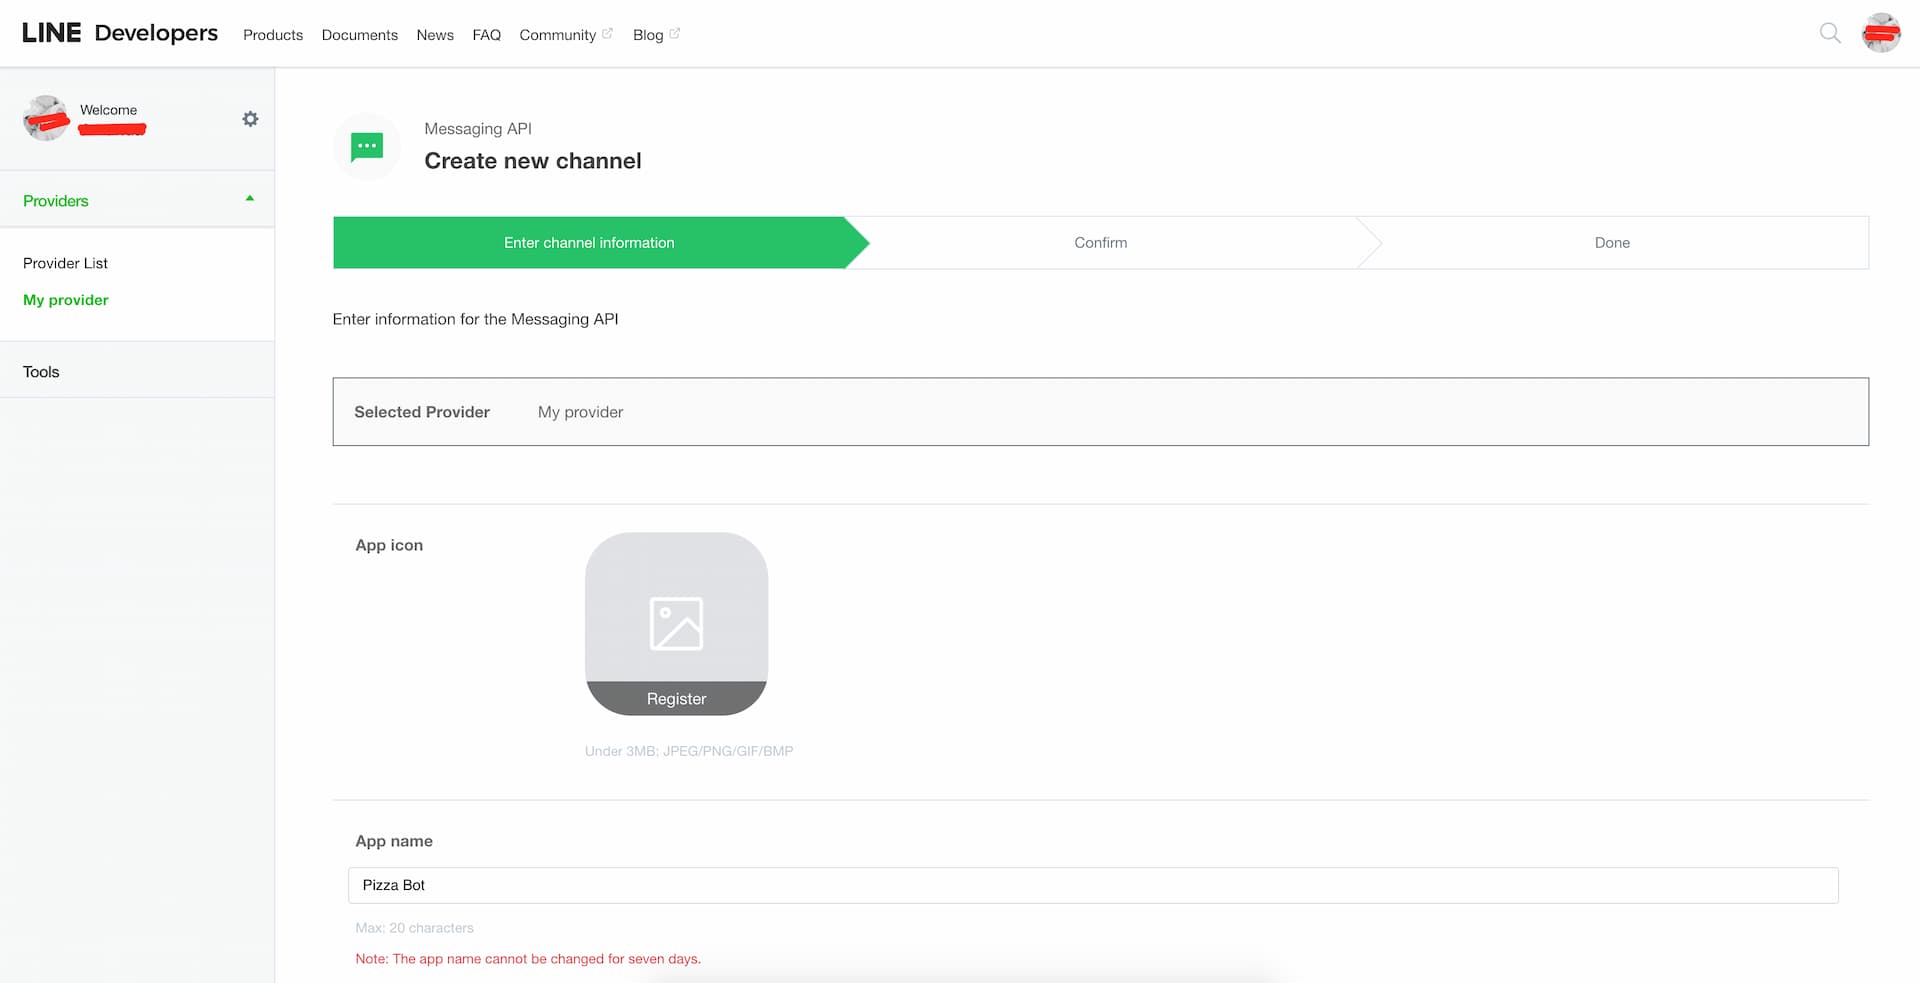
Fill in the form as follows


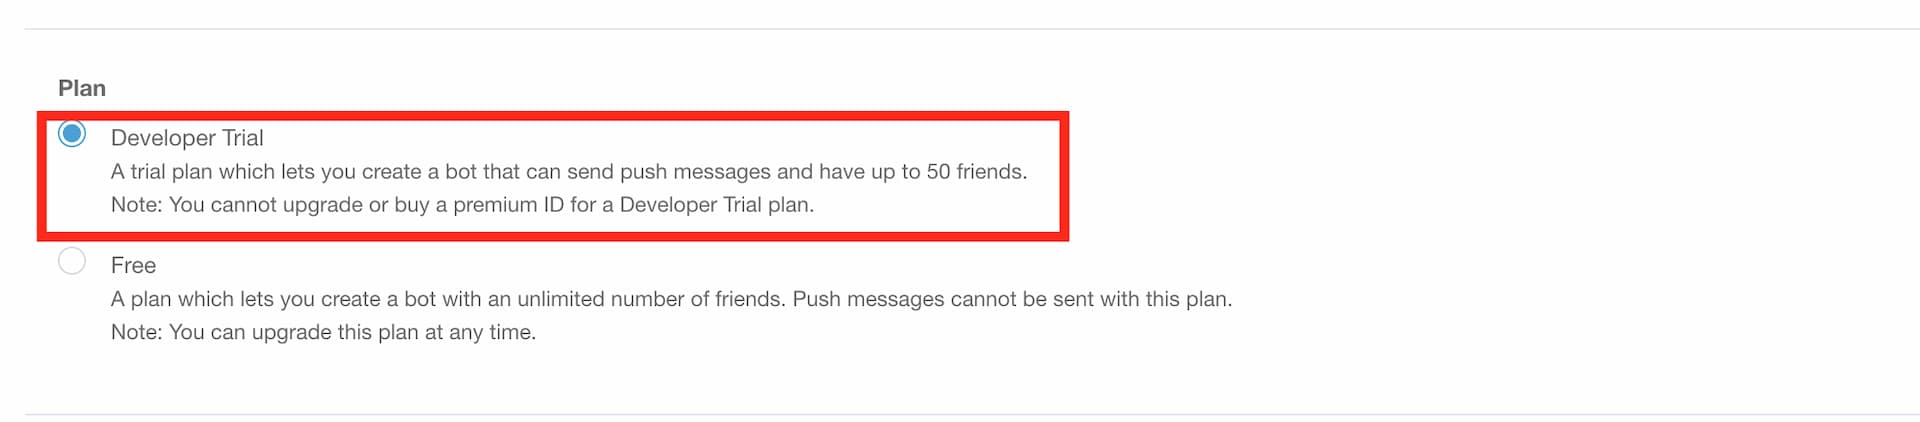
Next, you have to choose Developer Trial as Plan

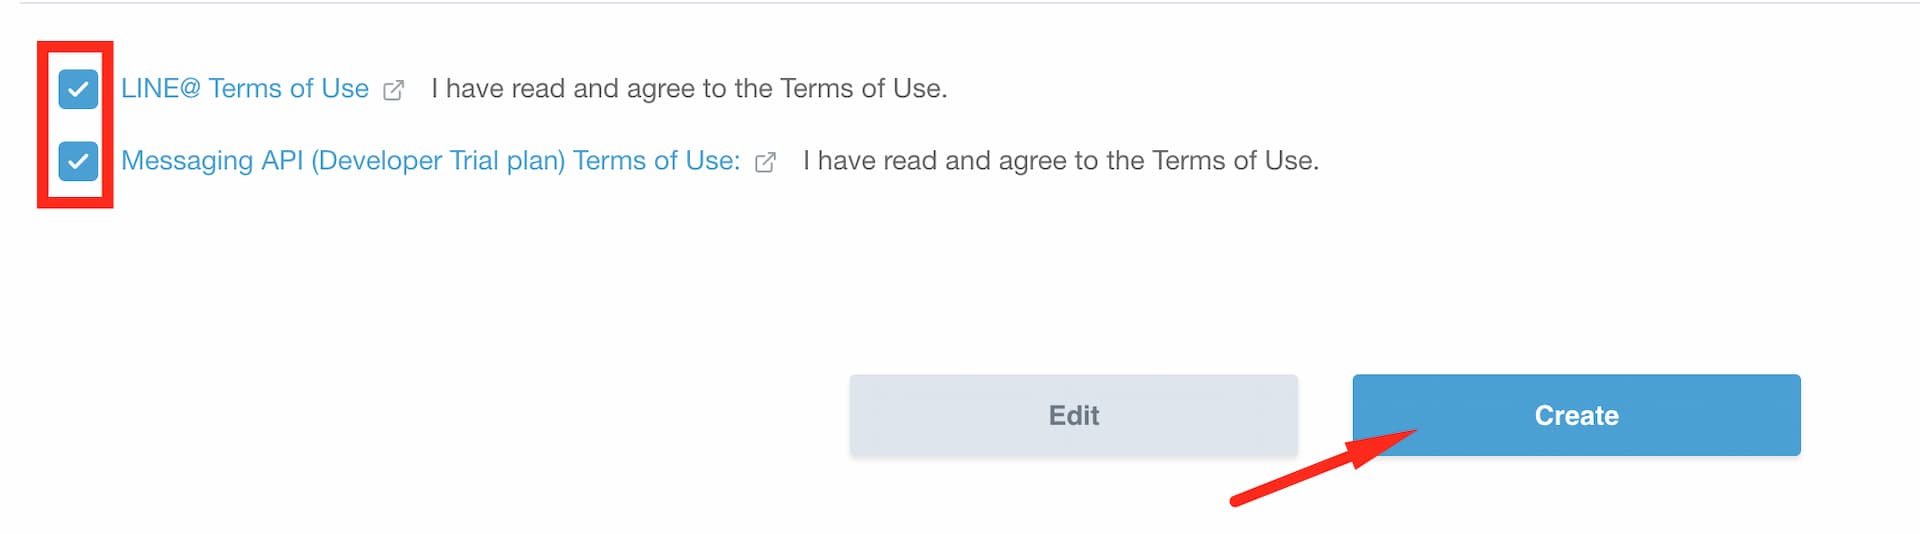
Accept Terms of Use from LINE then click Create

Successfuly created channel will look like this

Integration LINE and Your Chatbot
Click on created channel to fill in Channel Access Token and Channel Secret. Here is the guideline to fill in those fields
Fill in Channel Access Token field
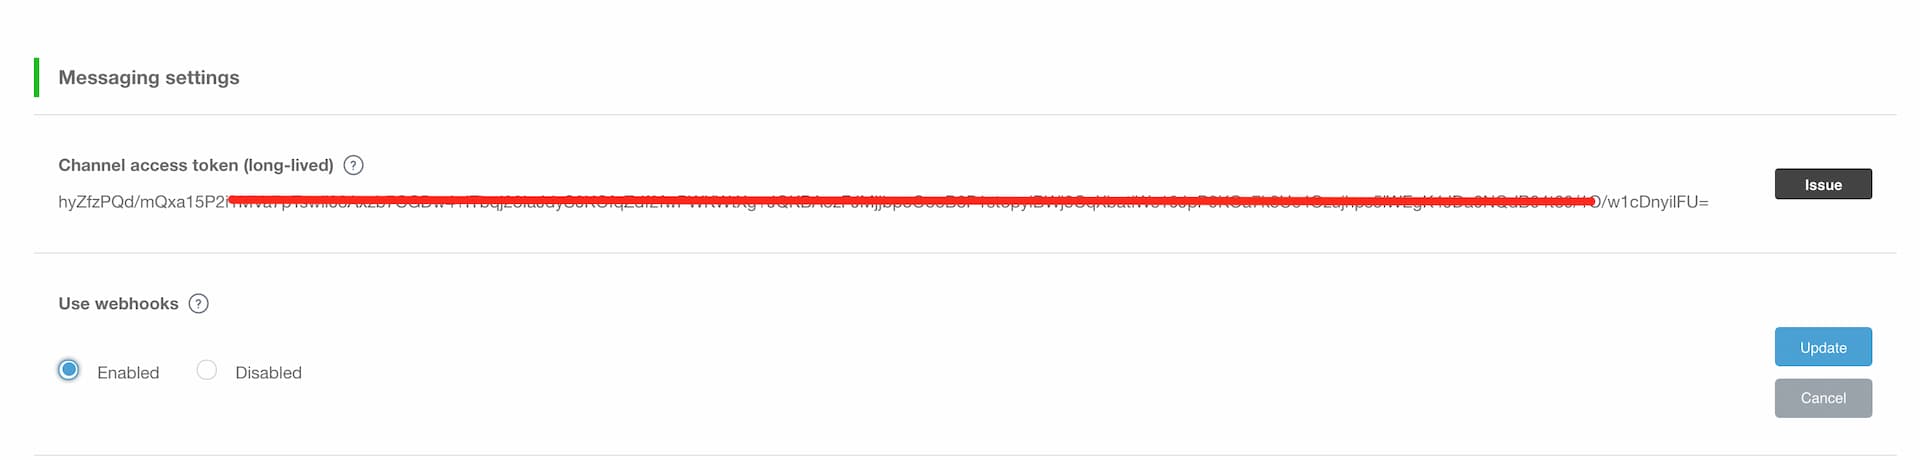
Click “Issue” in Messaging Settings section


Then, issue dialog will pop up. Click on Issue to continue

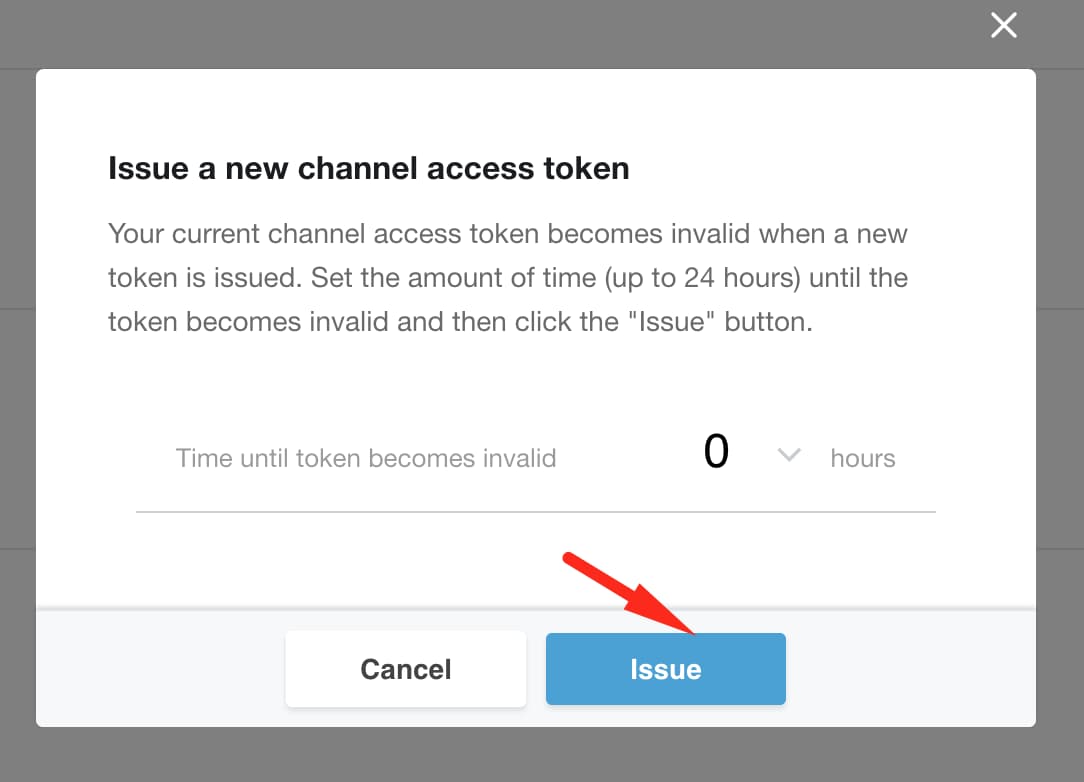
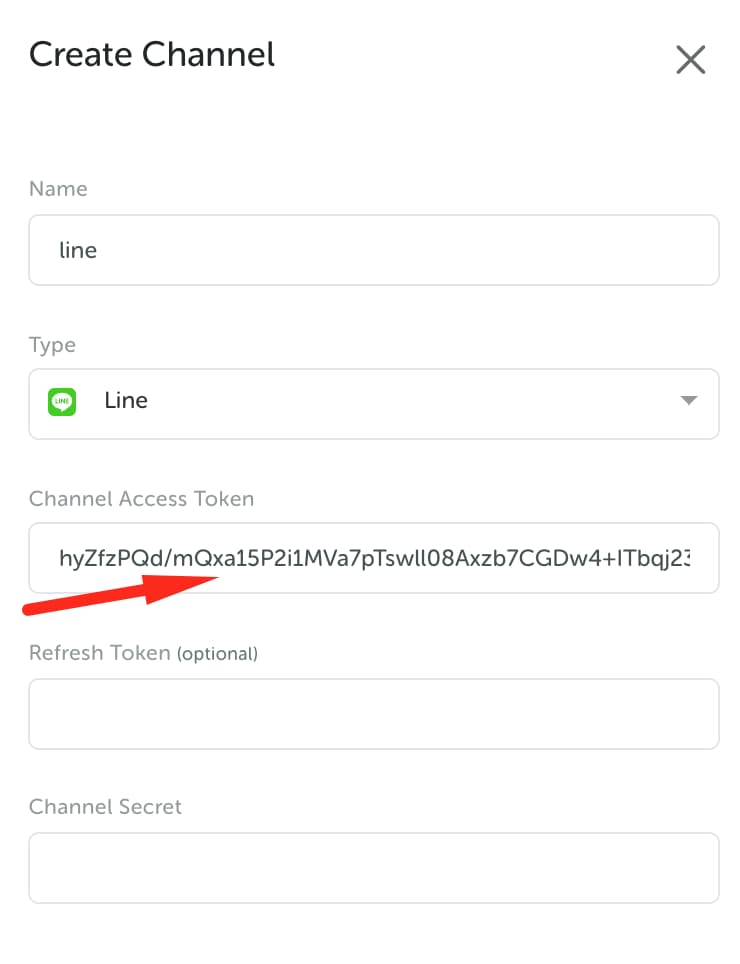
Then, copy Channel Access Token below and paste it on Create Channel form in Kata | Platform


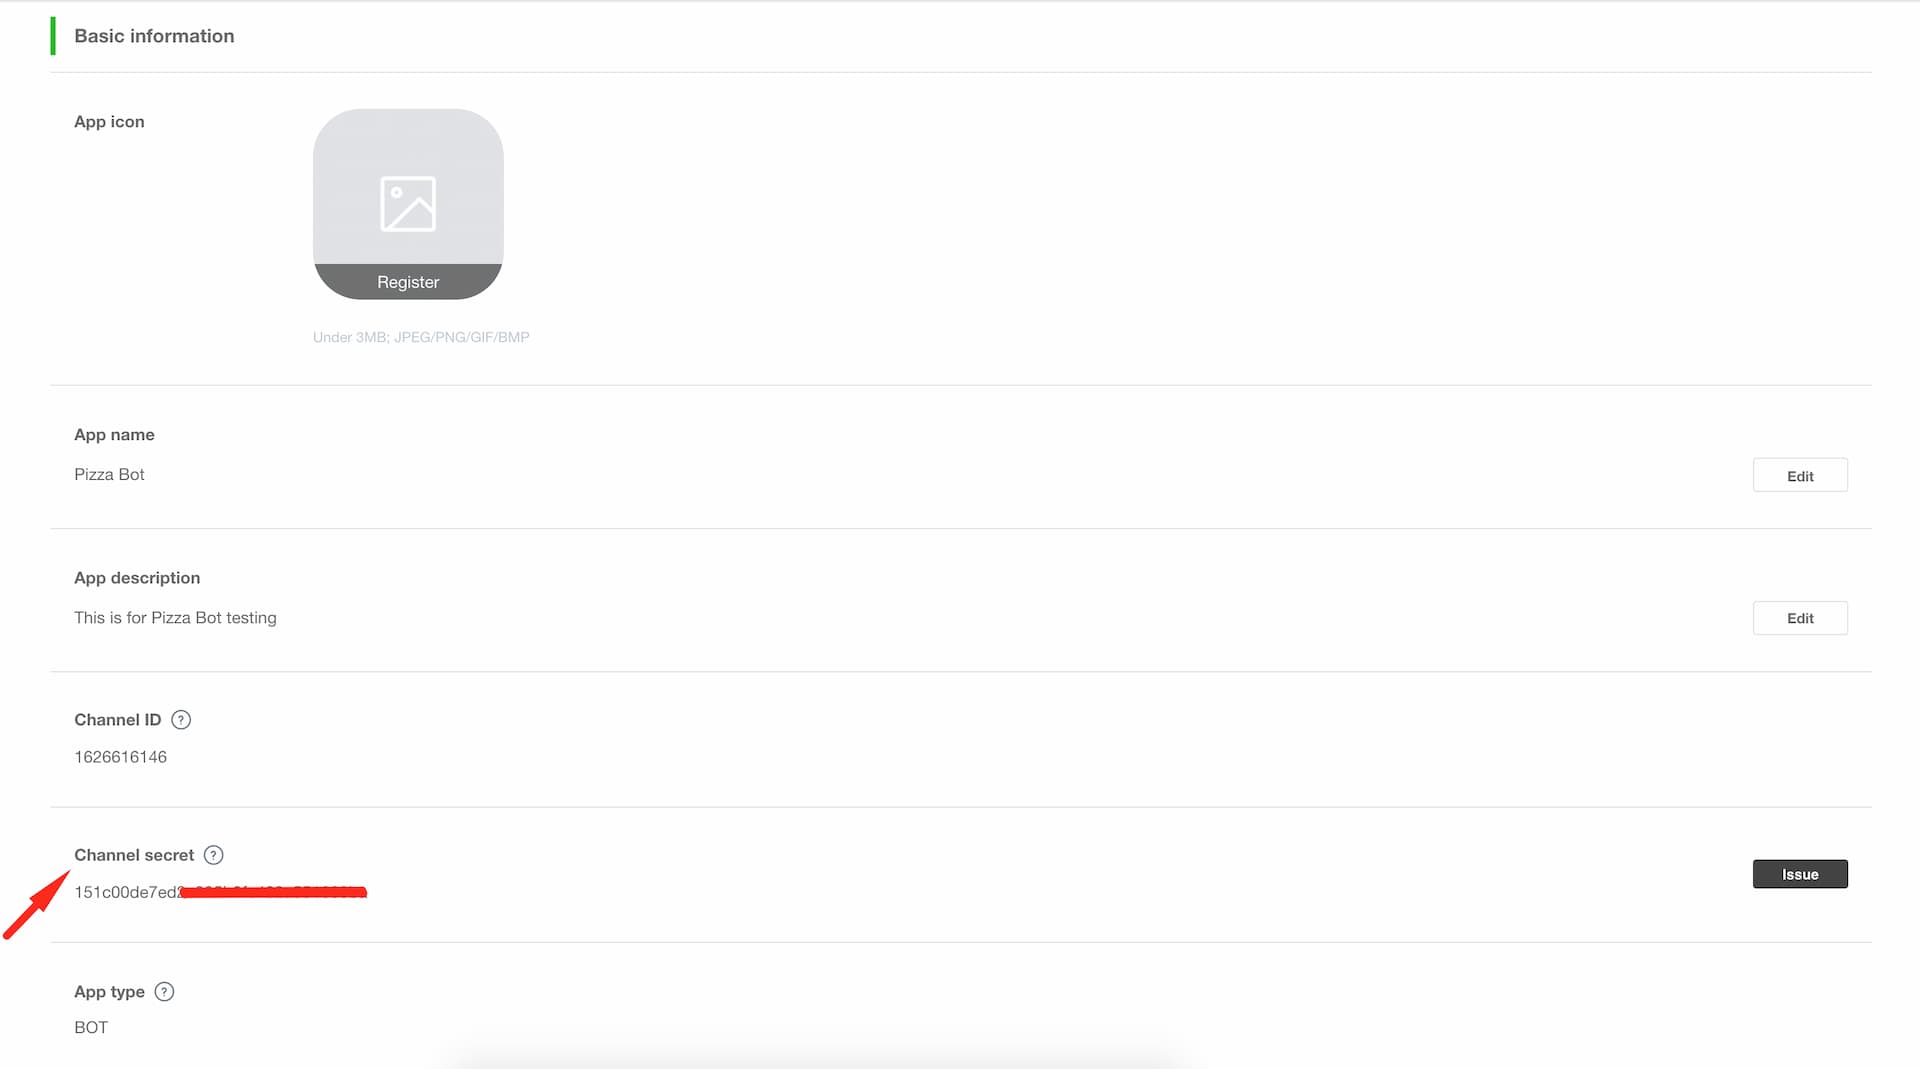
Fill in Channel Secret field
In Basic Information, copy Channel Secret from LINE to Kata | Platform


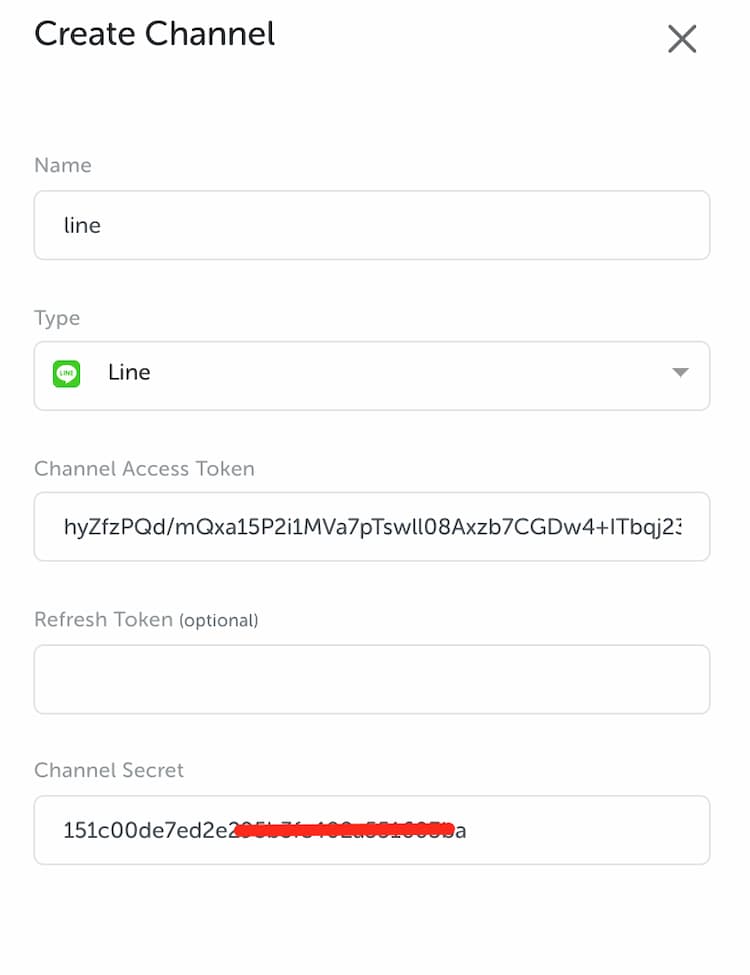
Final result in Kata | Platform will look like this

Click “Create” to generate webhook URL from Kata | Platform.


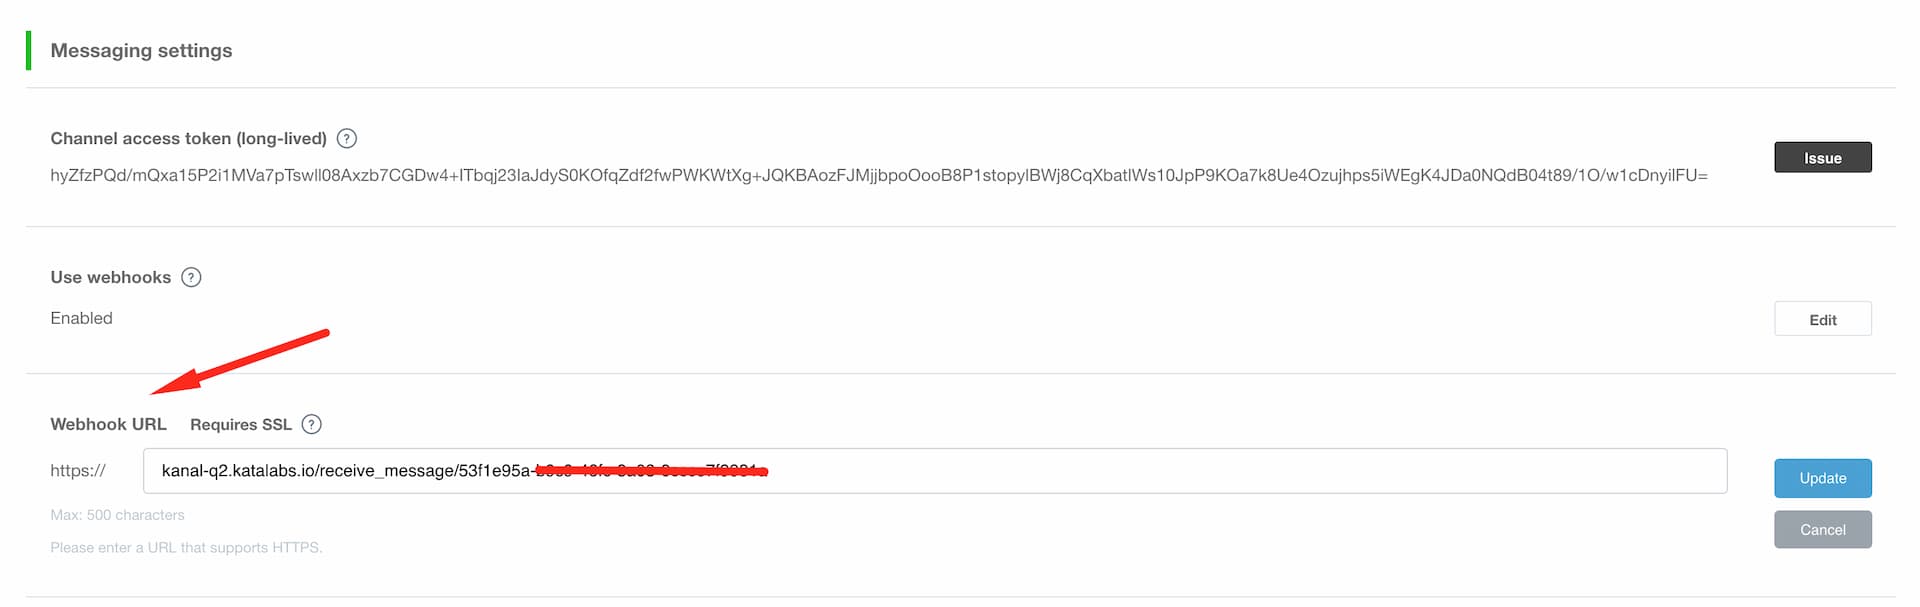
After webhook URL is generated, go to Messaging Settings in LINE developer console to enable webhook. Please check that you already enable the webhook by click on Enable in "Use Webhoooks" section which placed above Webhook URL field

Click “Update” then paste the webhook URL to LINE developer console.

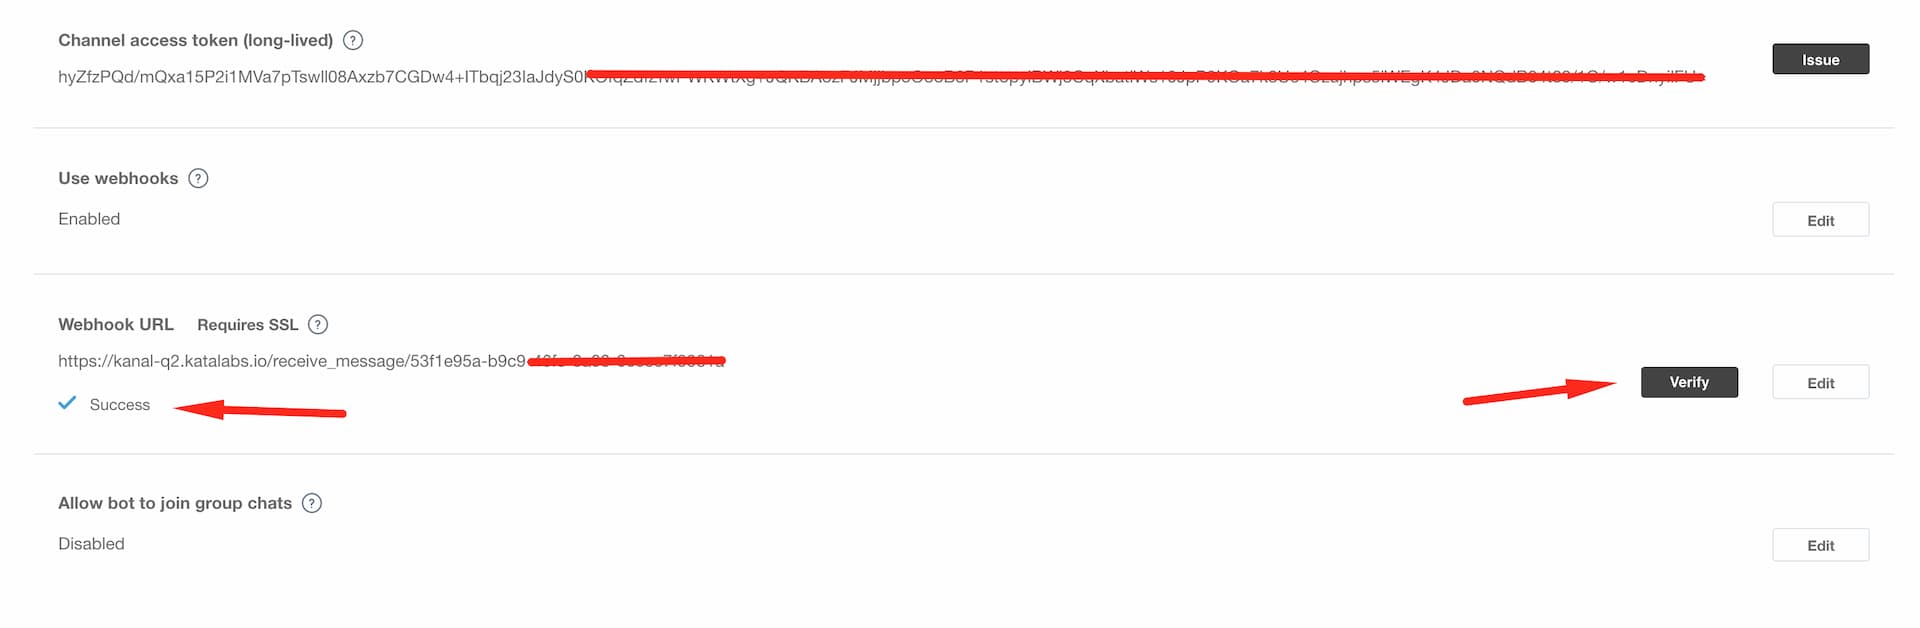
Click “Update” then click “Verify.”

Next, disable auto-reply messages and greeting messages


Voila! You have successfully deployed your bot to LINE Messenger.
Scan the QR Code in LINE Developer Console to add the bot.

Then, test to scan QR Code