
How to deploy your chatbot to LINE
LINE is a free messaging platform and is famous in Indonesia. This messaging platform supports various interactive action types such as carousel, button, Image Map, and many more.
This tutorial will learn how to deploy your chatbot to LINE. Let’s start.
Create a deployment
Deployment is a step to merge all Revisions in Flow, NLU, and CMS so that you can integrate bots into the channel. Before starting channel integration, chatbots must at least have 1 deployment.
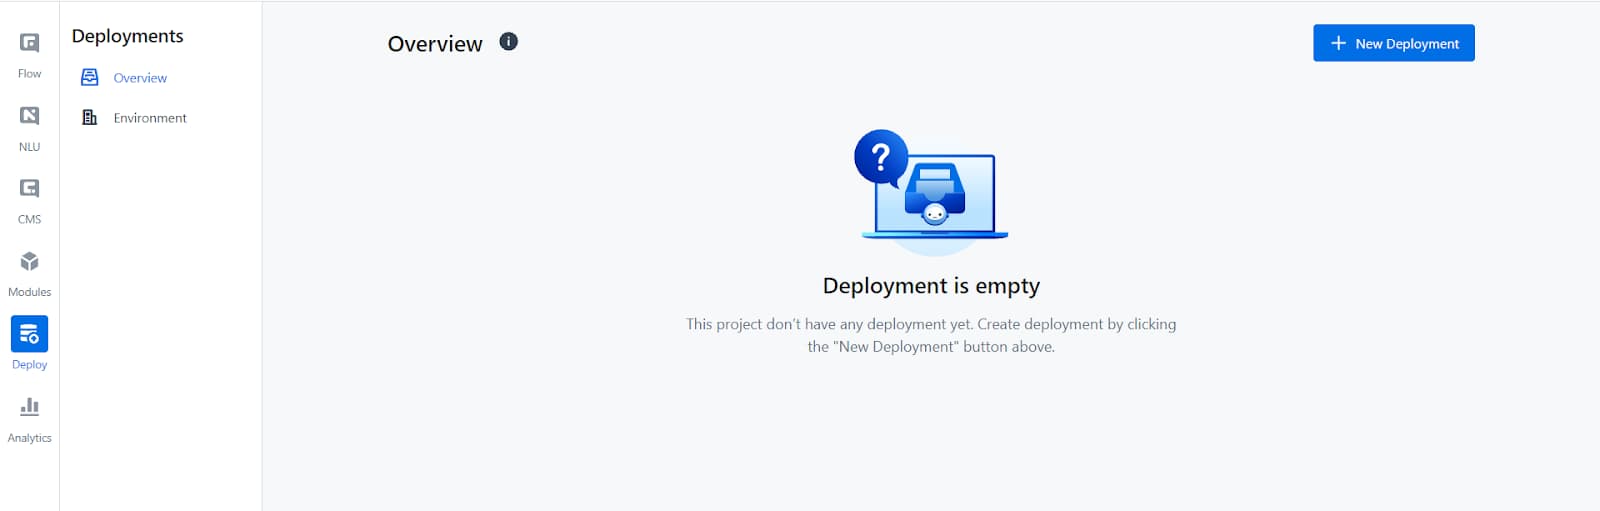
- In the sidebar, choose the Deploy menu. Then, select Overview.

-
Click the New Deployment button. Then it will show a form on the right screen.
-
Choose the deployment version. In the Kata Platform, there are 3 deployment versions which are:
-
Major to deploy significant changes, such as change chatbot use-case.
-
Minor to deploy medium changes, such as adding new features in your chatbot.
-
Patch to deploy small changes, such as change copy in action.

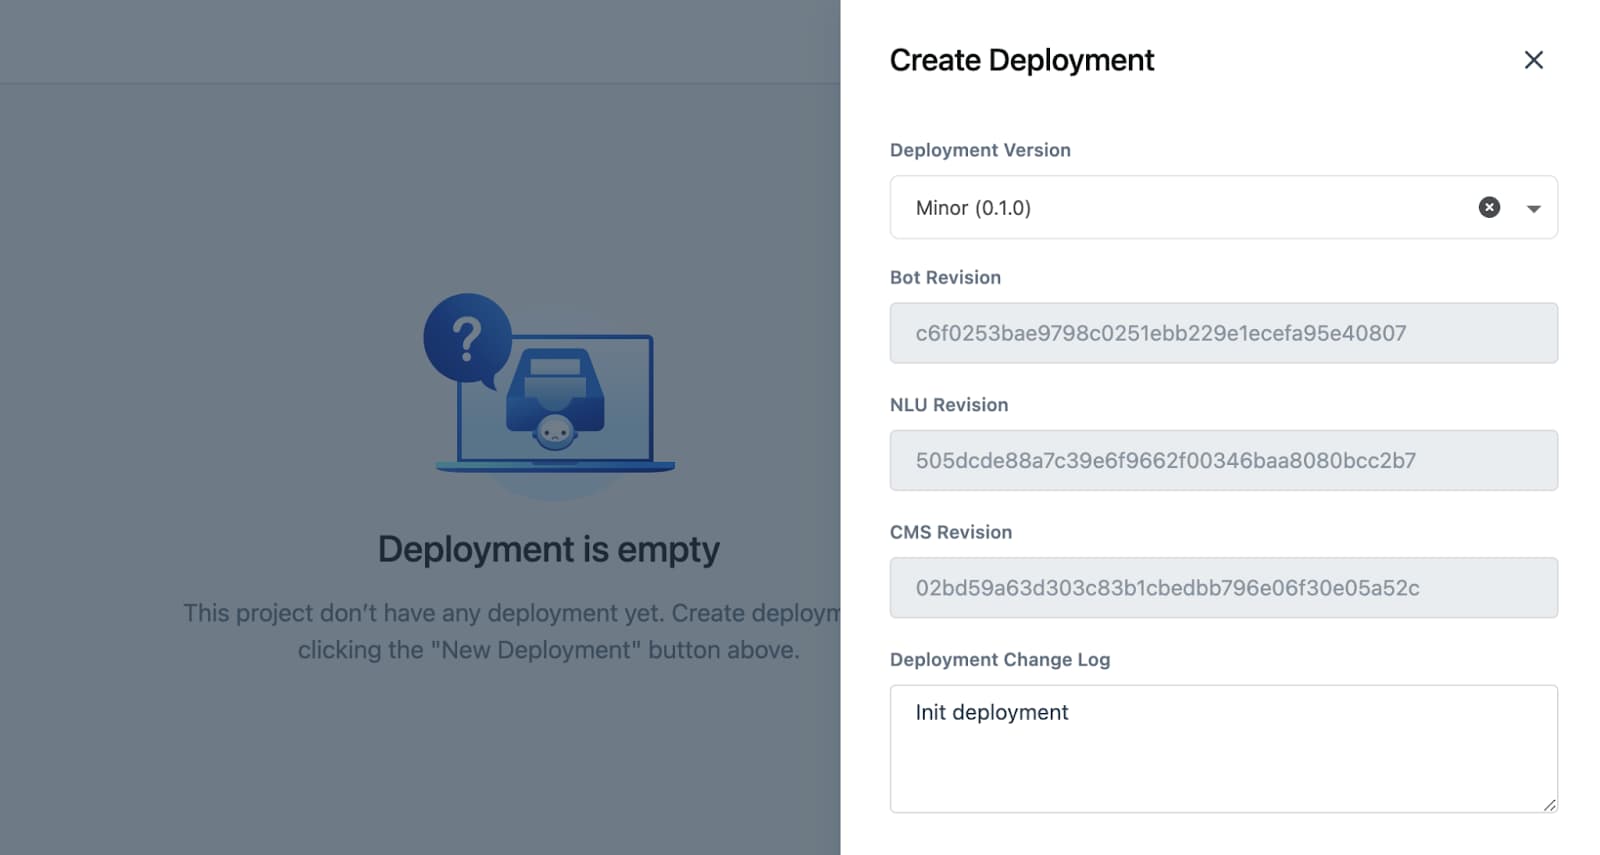
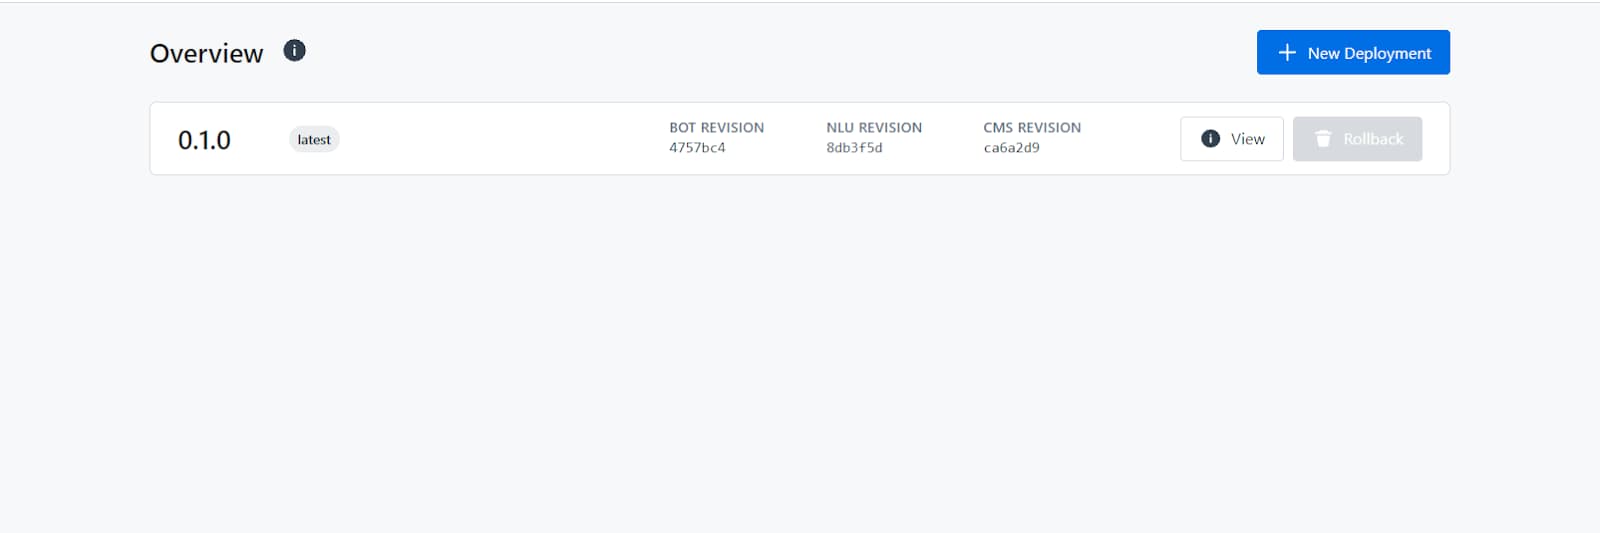
- Then, click the Submit button. If deployment is successful, then the interface will be shown like this.

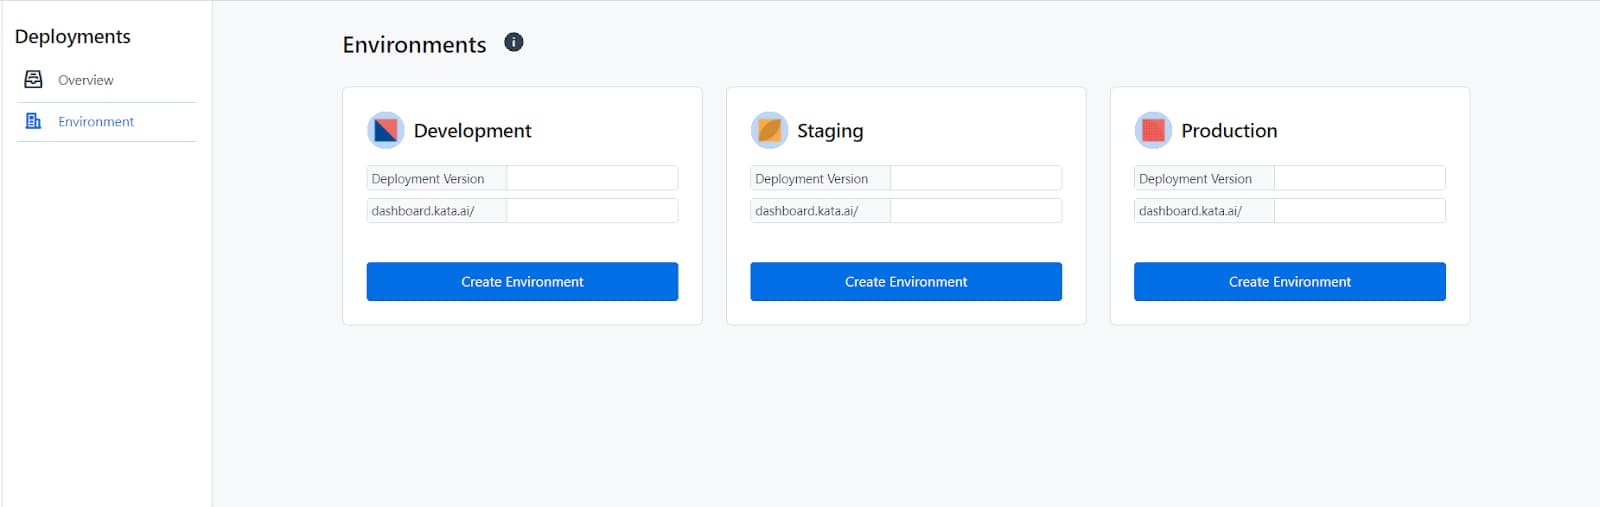
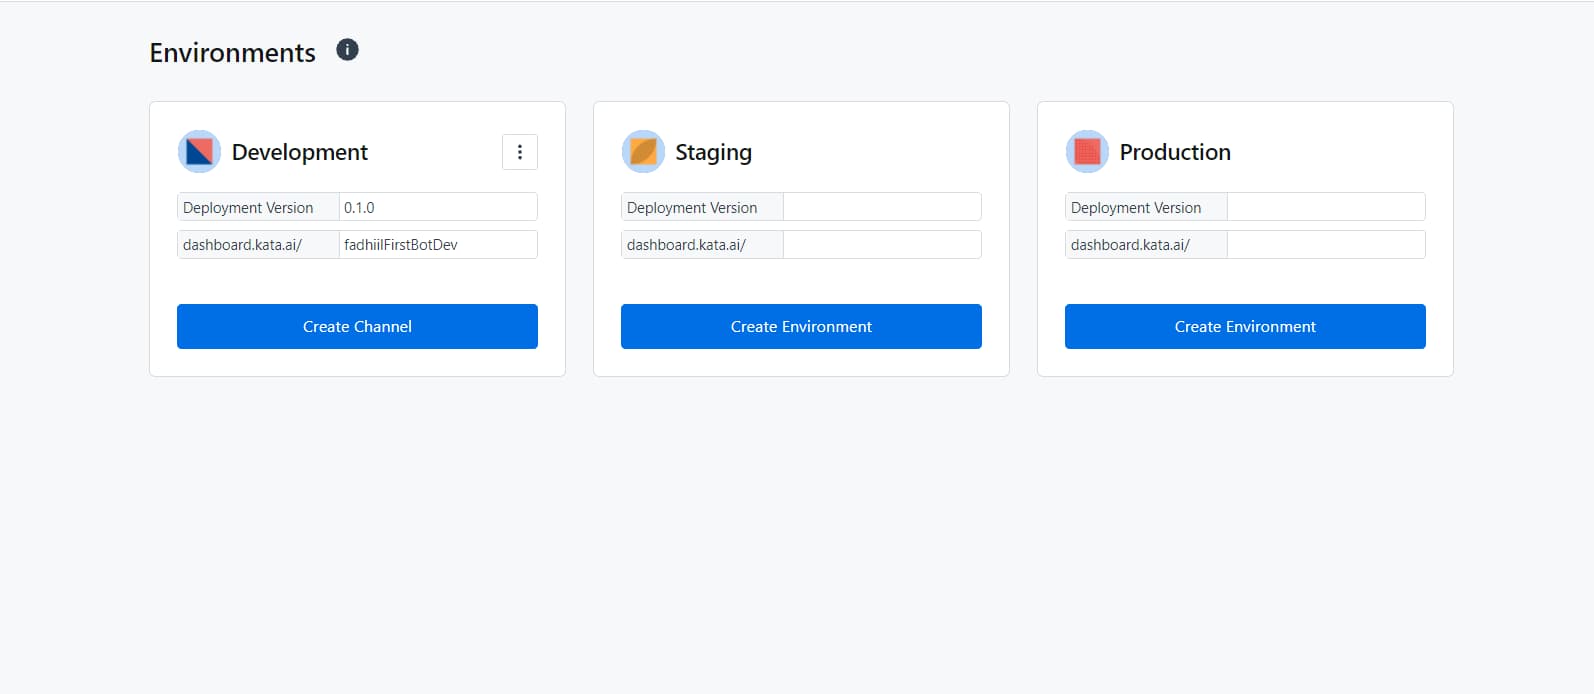
The step after creating a deployment is to create an environment. An environment is a zone in computer science that provides a place to run integrated applications. For example, Kata Platform has 3 environments: development, staging, and production.
- Choose the menu Deploy, then choose Environment.

-
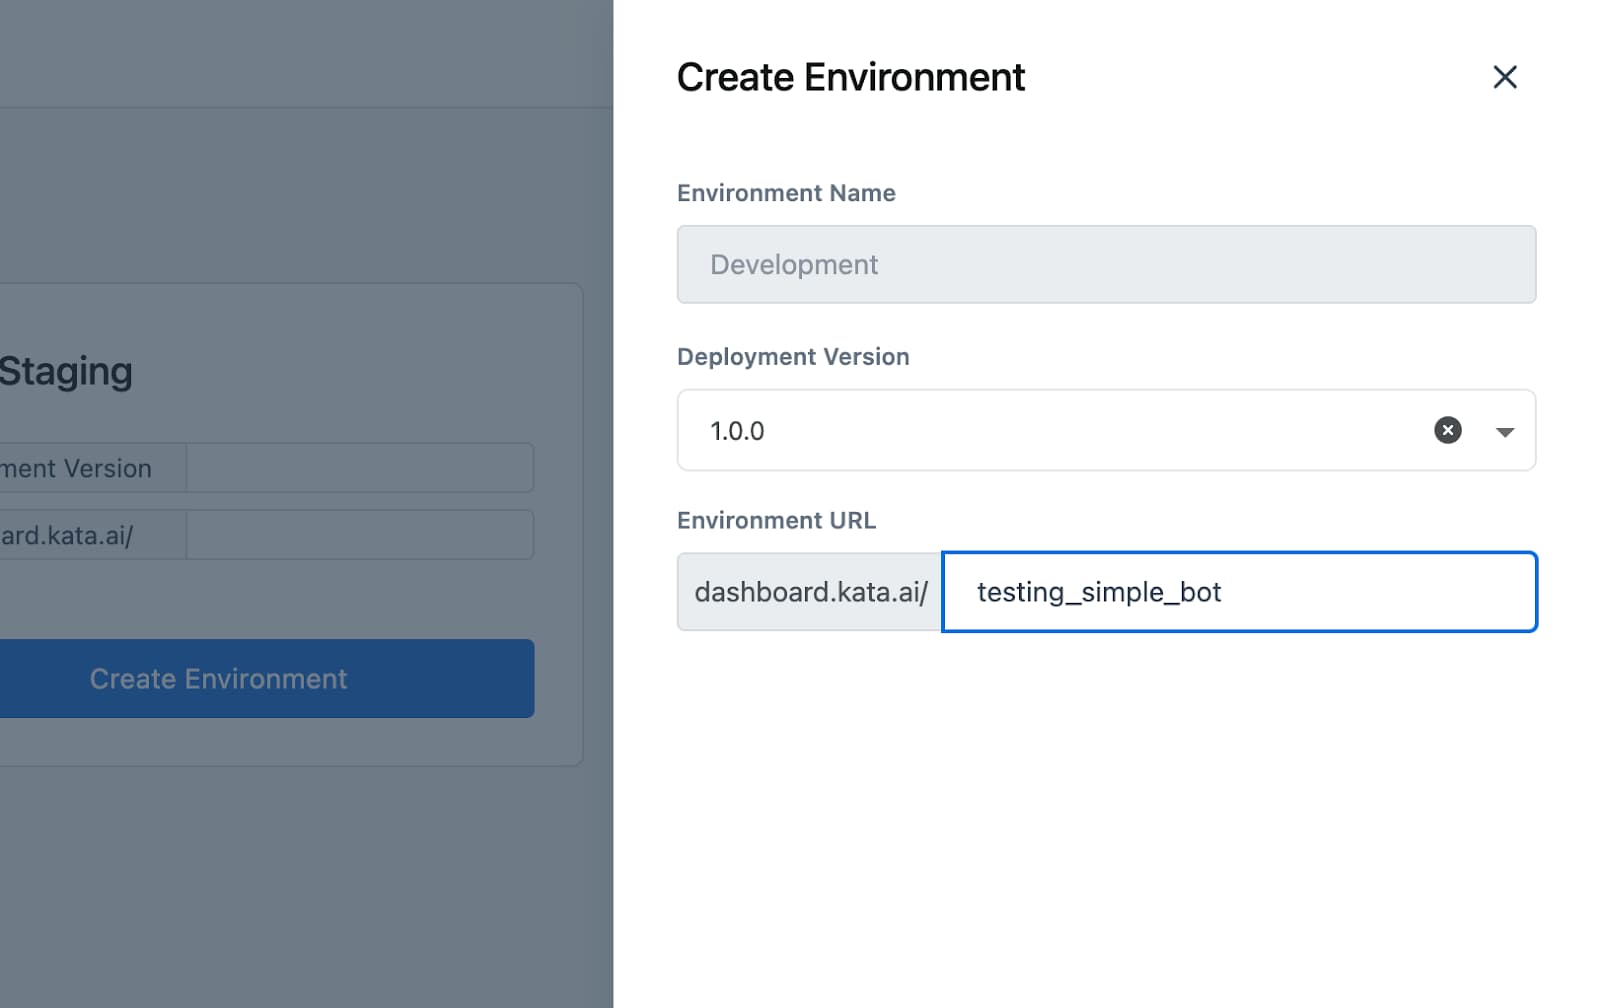
In this step, you will create a Development environment. Click the button Create Environment in the Development card.
-
Fill in the environment, then click Create.

Integration to a channel
This step will create a chatbot integration with the Telegram messaging platform. Telegram is a free messaging platform to deploy chatbots with a simple setup.
- In the Deploy > Environment, click the Create Channel button.

-
You will redirect to the Create Channel page. Click the “+ Create Channel” button to create a new channel.
-
Fill in the channel name and choose type as LINE.
-
To fill in the Bot User OAuth Access Token field, we must set up a chatbot in Telegram first. The next step is to open your Telegram application and log in.
Before you start, you need a LINE account already registered and logged in to your application.
Registration to LINE Developer console and setup
-
Create a LINE account. To sign up for a LINE developer account, you have to have a LINE account by installing a LINE application, either desktop or mobile app.
-
After you successfully registered, sign in to https://developers.line.biz/en/
-
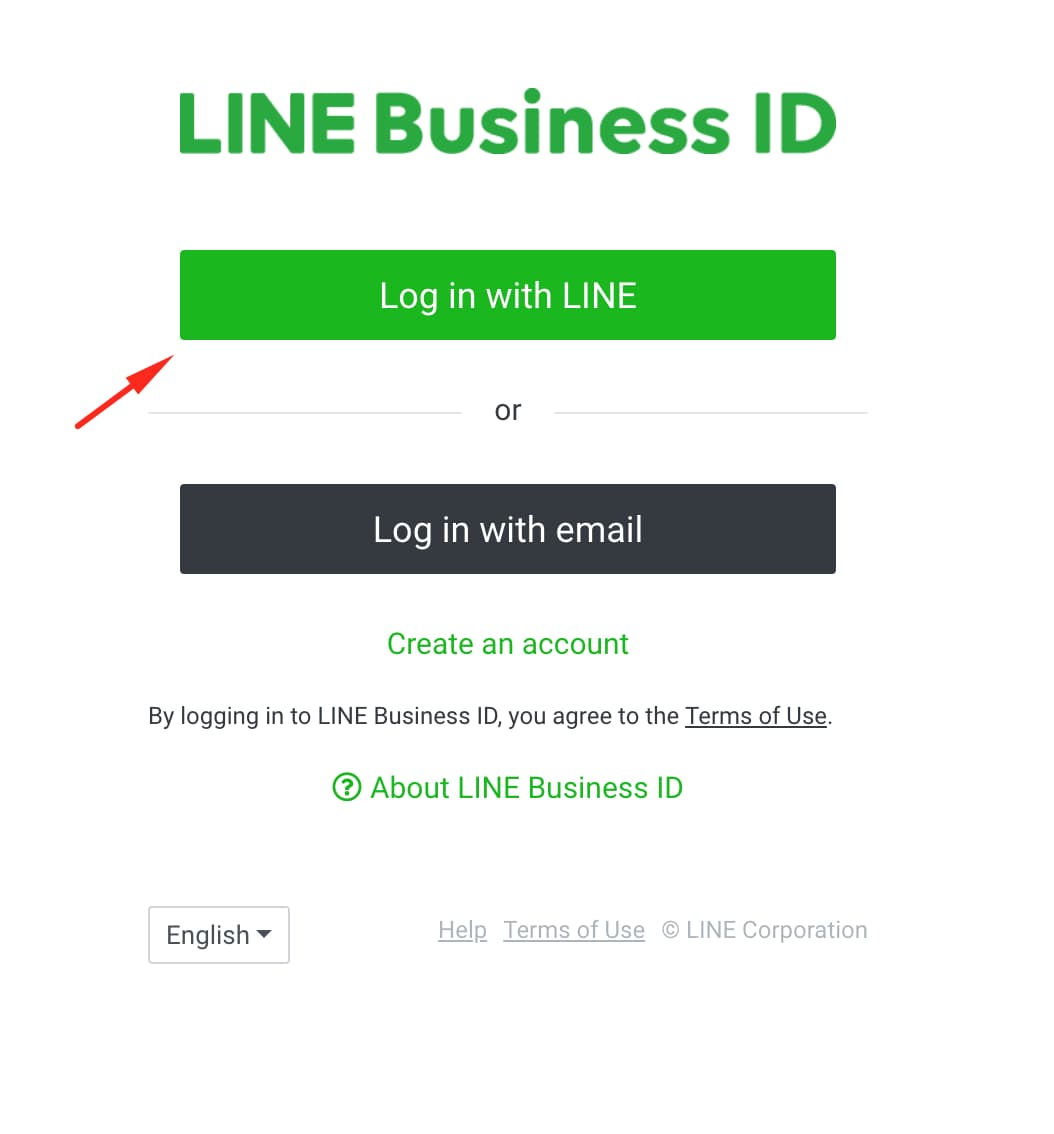
In the LINE Developer Console, click Log In.

- Next, click on Login with LINE.

- Enter your email and password. After you successfully log in, you will be redirected to the provider list dashboard.

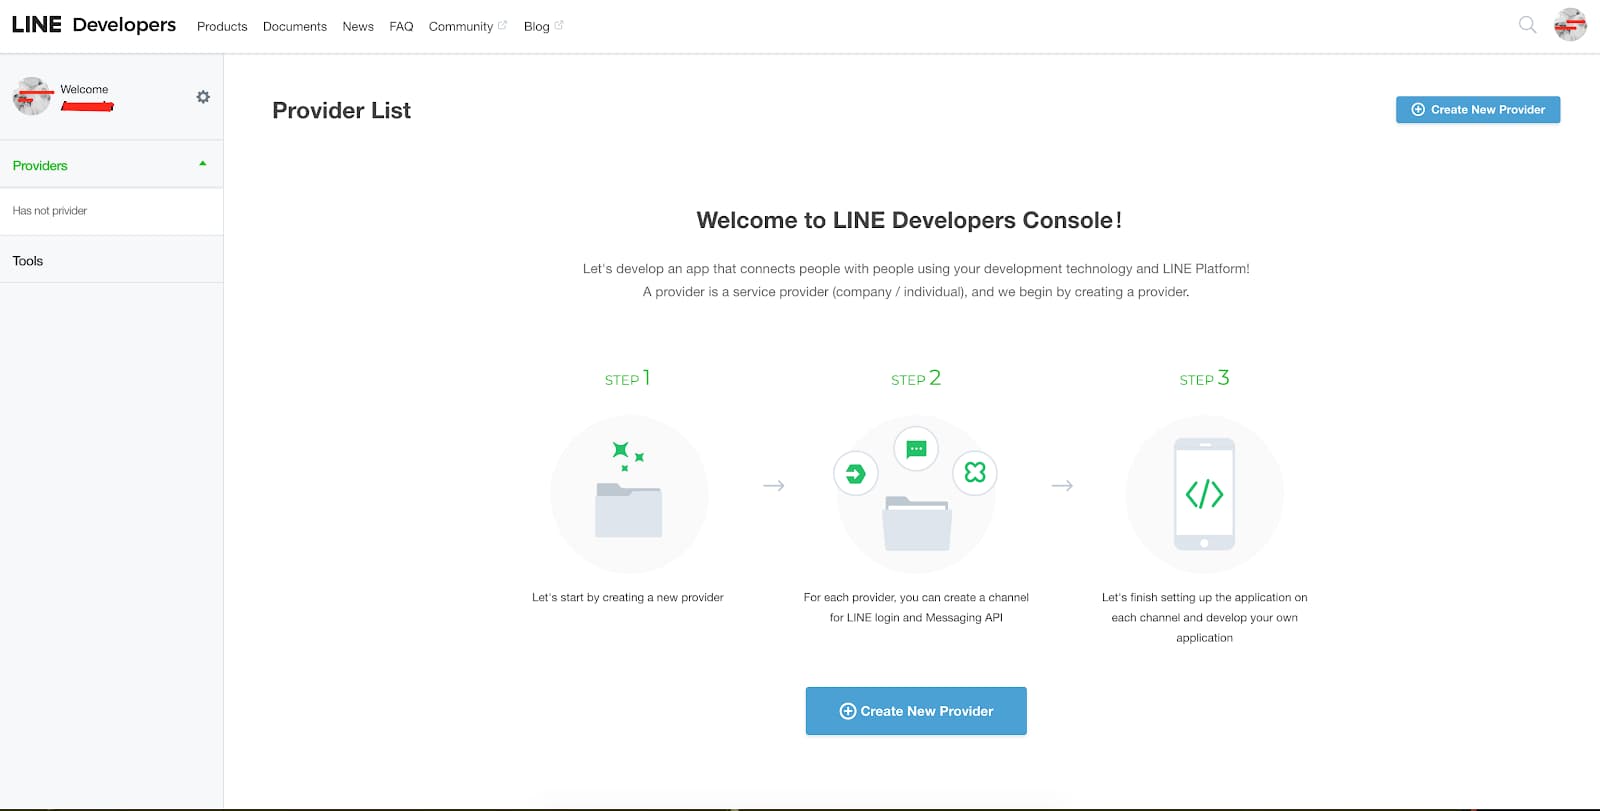
-
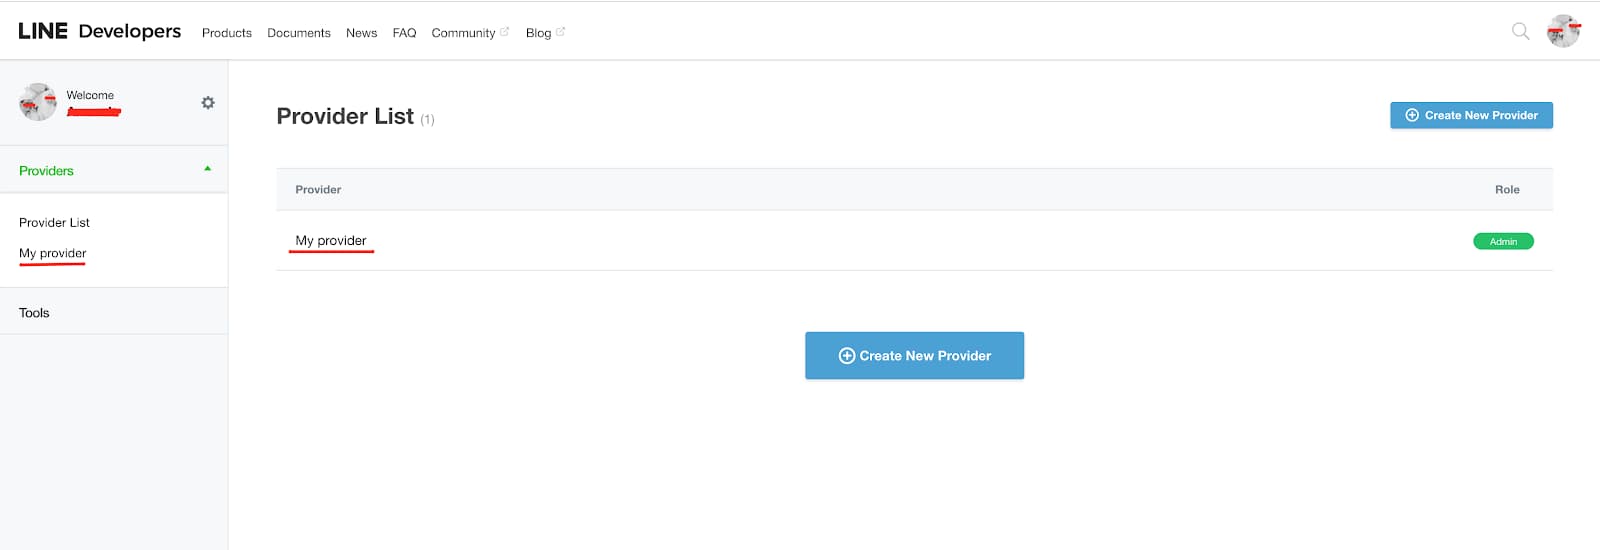
Next, click “Create New Provider”. Fill in the provider name.
-
Click Confirm to continue.
-
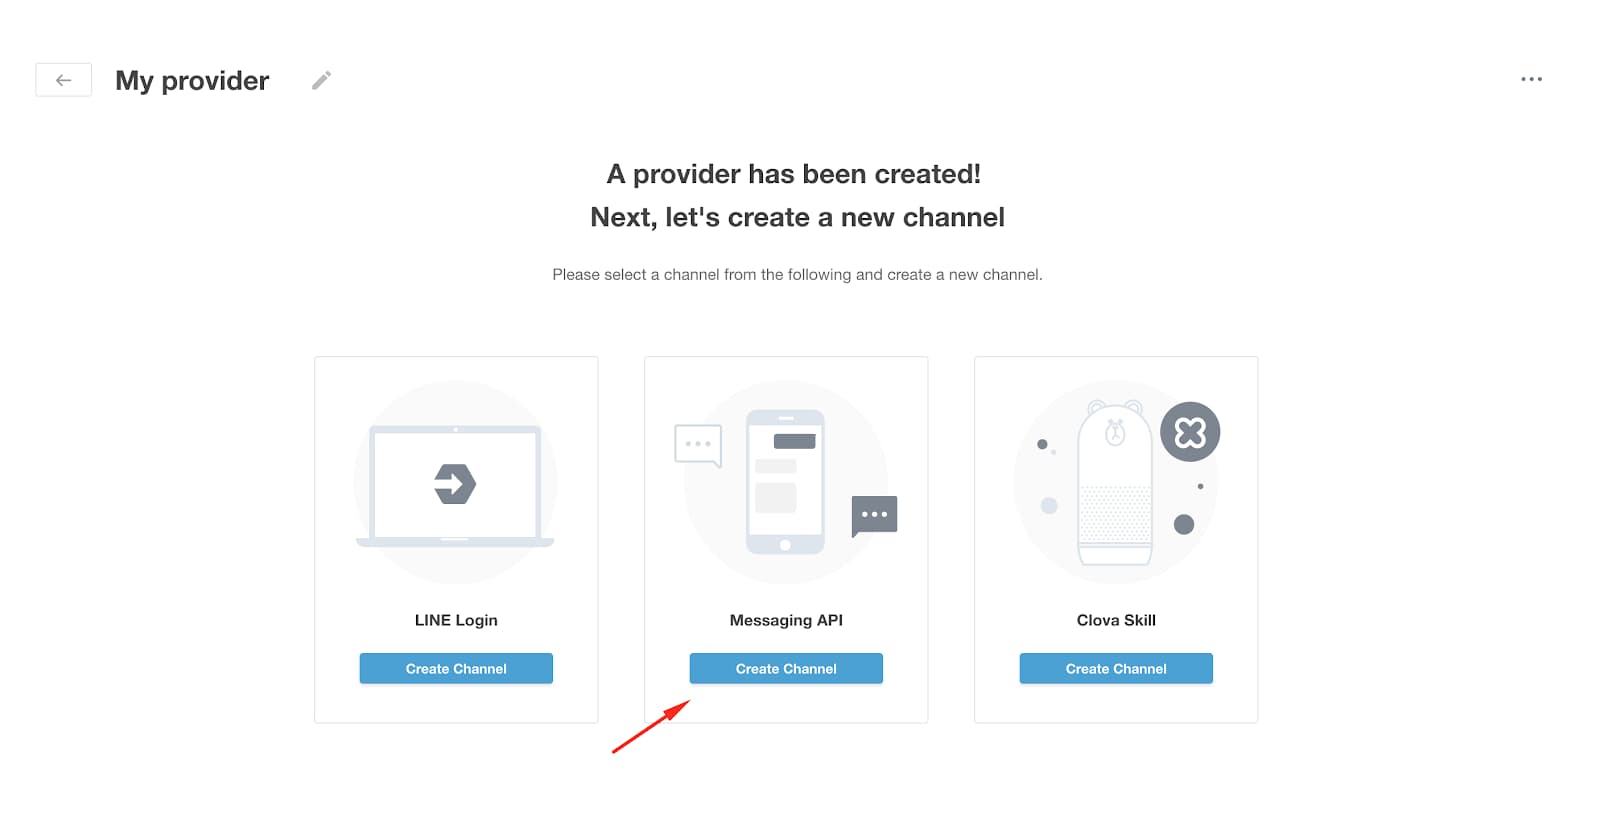
Your new provider has been created.

- Next, set up the channel in the Messaging API by clicking Create Channel on Messaging API.

-
Fill in your LINE bot detail.
-
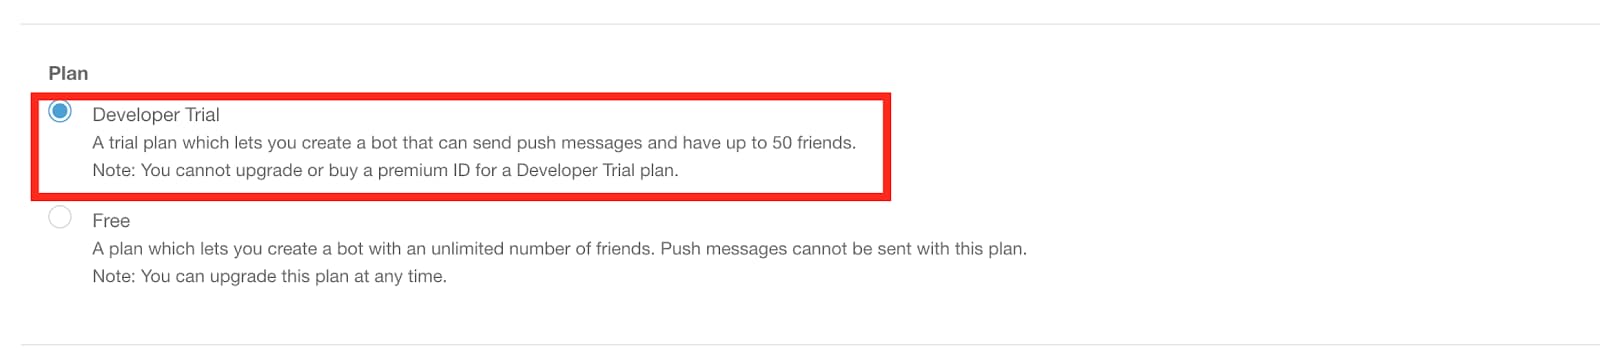
Next, you have to choose the Developer Trial as Plan.

- Finally, click Create. The successfully created channel will look like this.


Integrate LINE to your chatbot
-
Click on the created channel to fill in the Channel Access Token
-
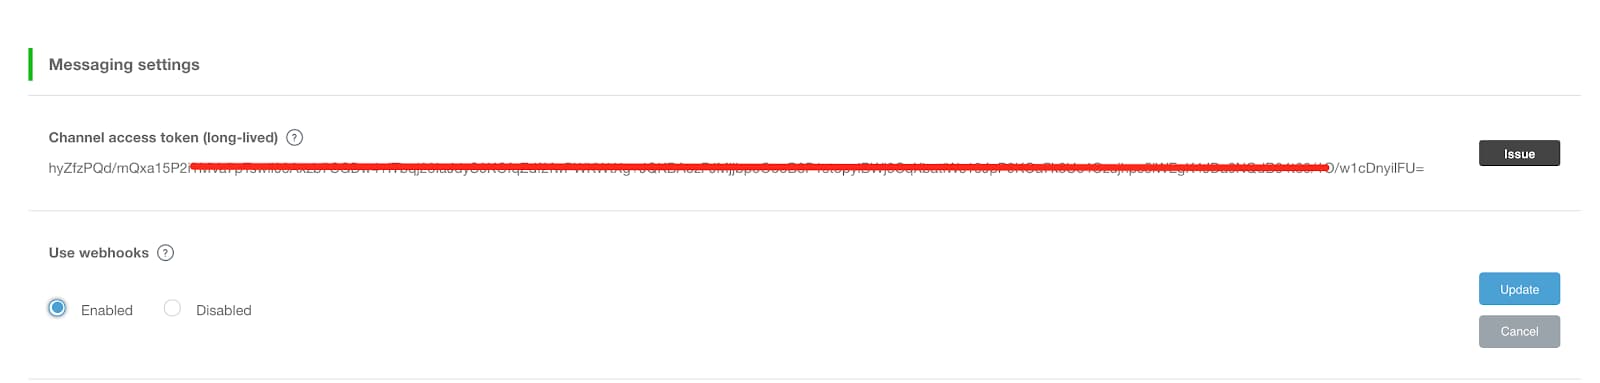
Click “Issue” in the Messaging Settings section.

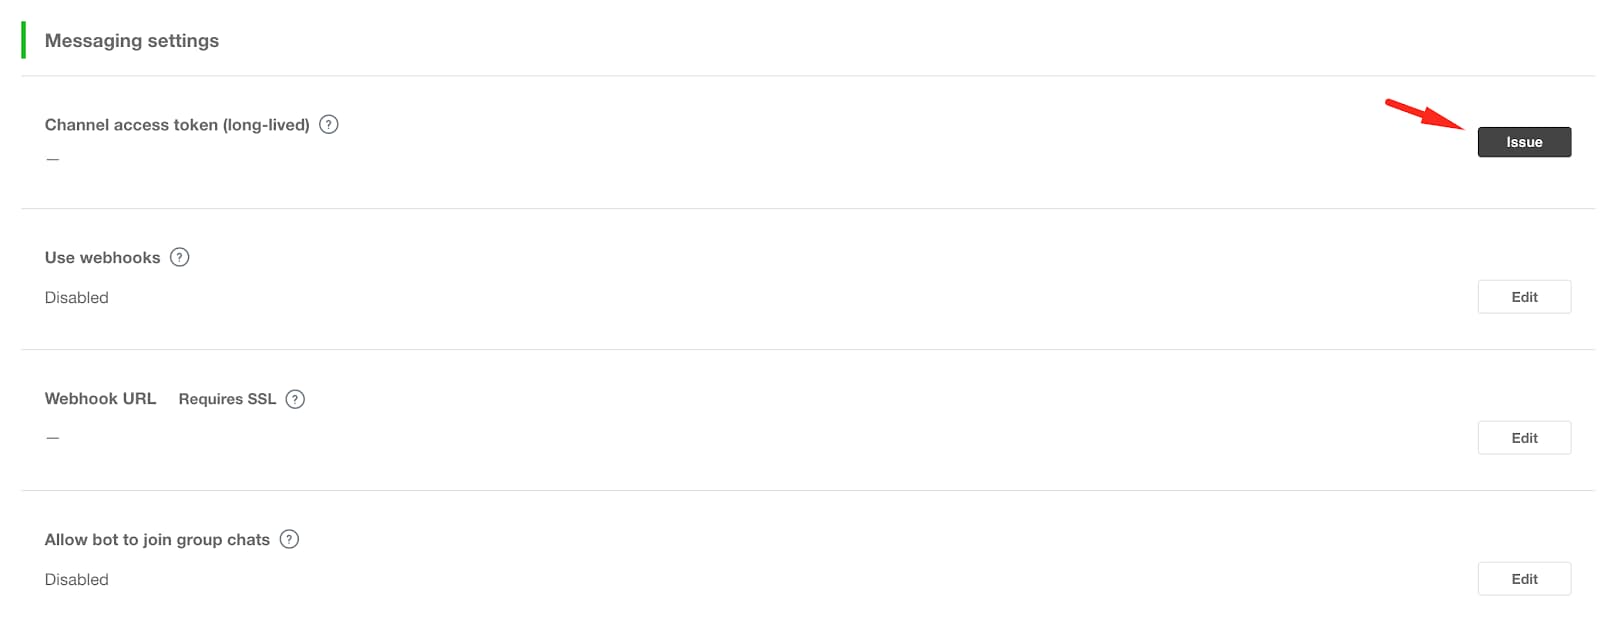
-
Then, a dialog will show. Click on Issue to continue.
-
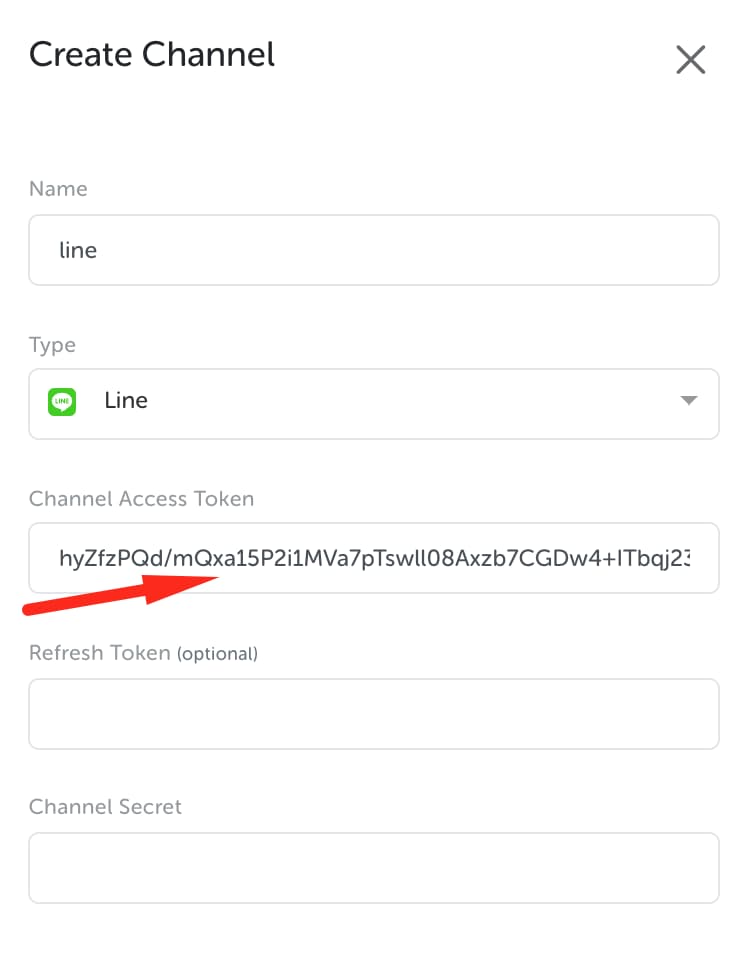
Finally, copy the Channel Access Token below and paste it on the Create Channel form in the Kata Platform.


- Go back to Kata Platform, then paste the Channel Access Token.

- Next, you will fill in the Channel Secret field. Then, in Basic Information, copy Channel Secret from LINE to the Kata Platform.

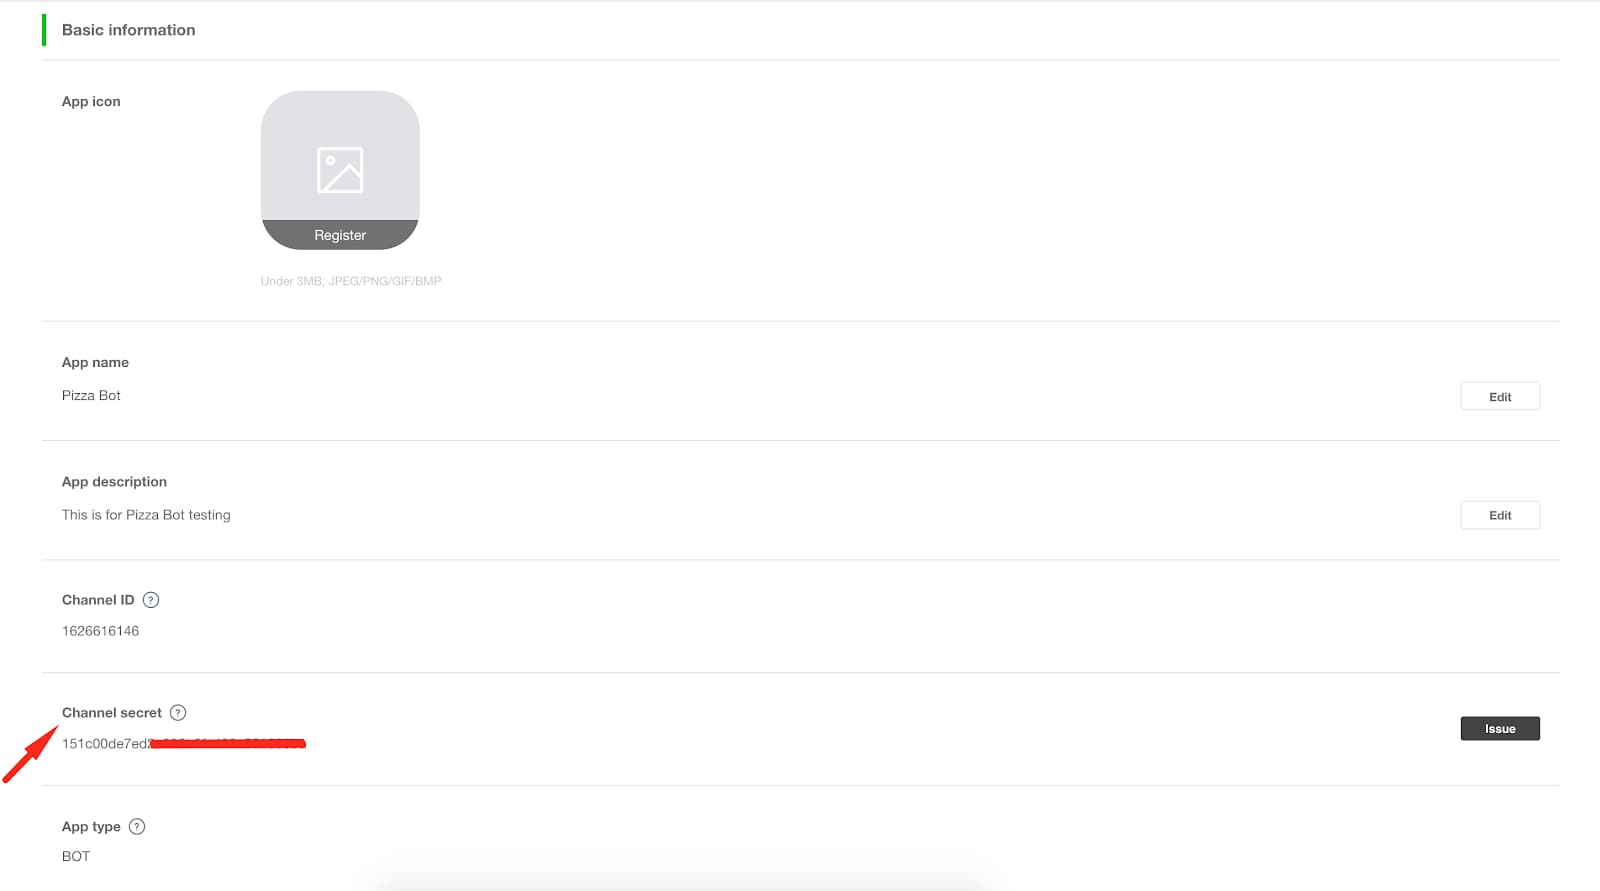
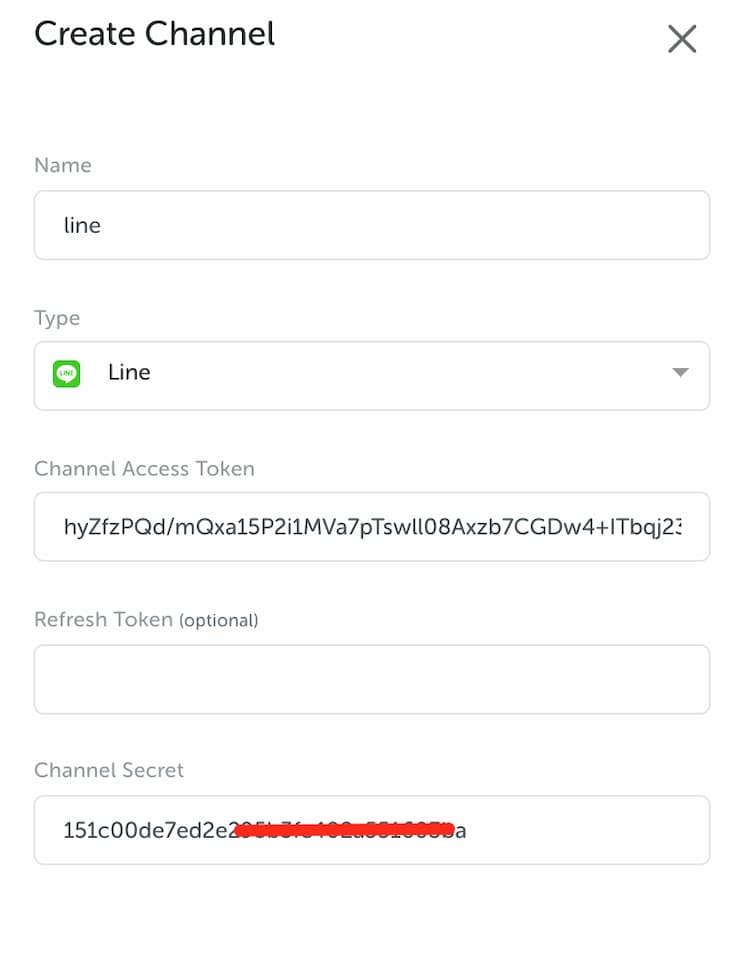
- Go back to the Kata Platform, then paste the Channel Secret.

- Click “Create” to generate a webhook URL from the Kata Platform.
After the webhook URL is generated, go to Messaging Settings in the LINE developer console to enable webhook.
- Enable the webhook by clicking on Enable in the “Use Webhooks” section, placed above the Webhook URL field.

- Click “Update,” then paste the webhook URL to the LINE developer console.

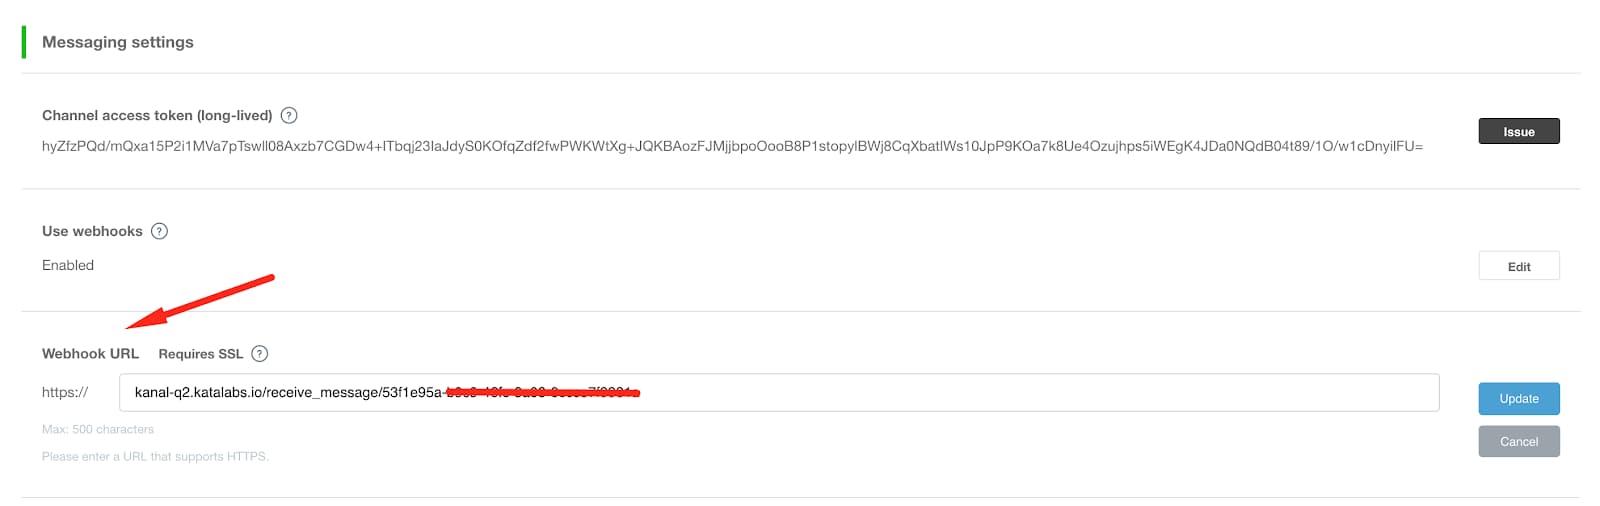
-
Click “Update”, then click “Verify”.
-
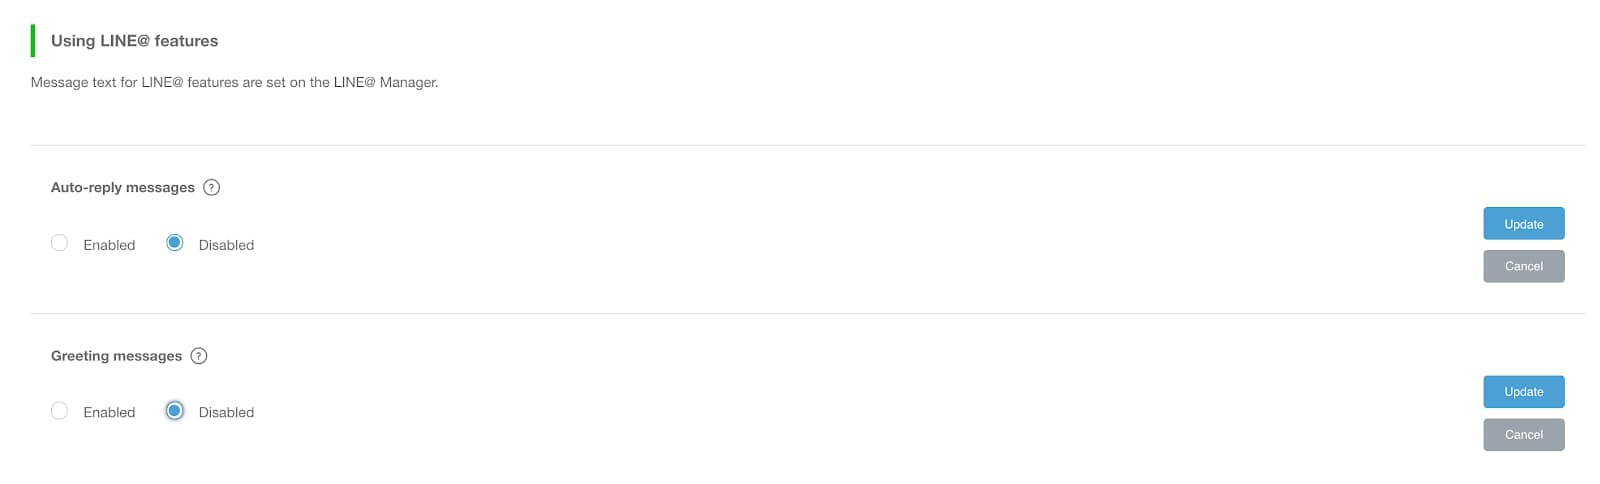
Next, disable auto-reply messages and greeting messages by following figure 21.

-
Congratulations, you have successfully deployed your bot to LINE Messenger.
-
Next, test your bot by scanning the QR code.
It is the end of the guidance. If you find it difficult to follow, you can contact support@kata.ai. Thank you.