
Tutorial
How to deploy your chatbot using Twitter
Twitter is a trending social media for most countries, so Twitter chatbots will be a great opportunity to join the trend ✨ In this tutorial, you will learn how to deploy the bot to the Twitter direct message channel. So, let’s get started.
Deploy your chatbot
- Click Deploy menu in the left sidebar
- On the Deploy page, click on the New Deployment button in the top right corner. It will open up the Create Deployment menu.
- Choose any deployment version you want to deploy and fill in the changelog.

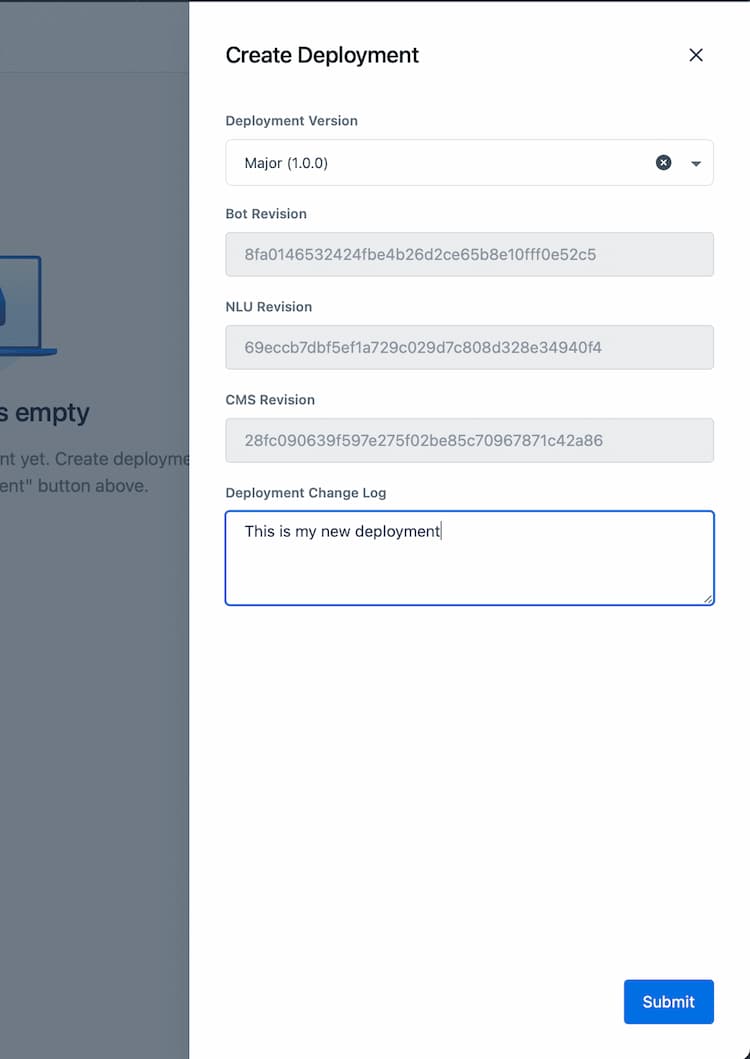
Figure 1.Create a new deployment
- Click Submit to finish the deployment
If you already have an environment created, skip these steps.
- Go to the Deployments > Environment menu.

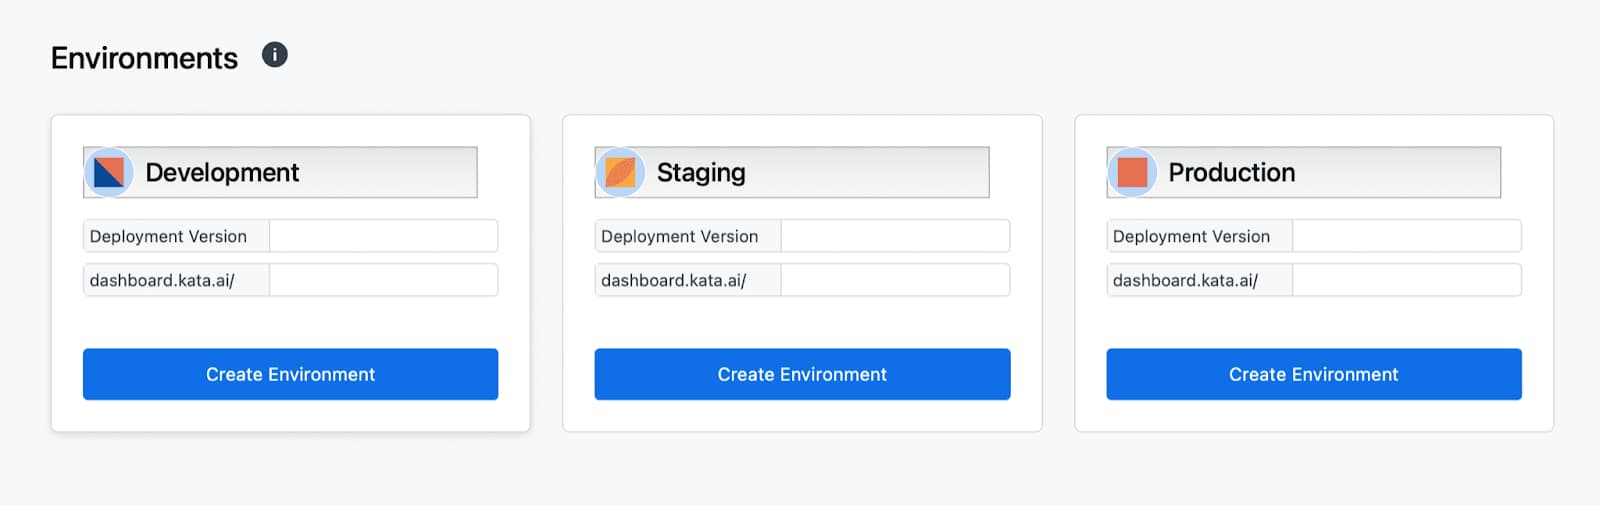
Figure 2.Set up environment, then set up Twitter channel
- Click the Create Environment button in any environment. You will see a drawer to create a new environment.
- Choose the development version you want (in this tutorial, we use the 1.0.0 version)
- Fill in the environment URL. This environment URL is used for CMS. Learn more about CMS.
- Click Create to create the environment.
- Created environment now has a Create Channel button.
Continue to choose Twitter as a chatbot channel.
- Click the Create Channel button to start adding channels to the environment. It will open up the Channel menu within the environment.
- Click the ”+ Create Channel” button in the channel table list. A menu to set up the channel will be shown.
- Choose Twitter in Channel Type.

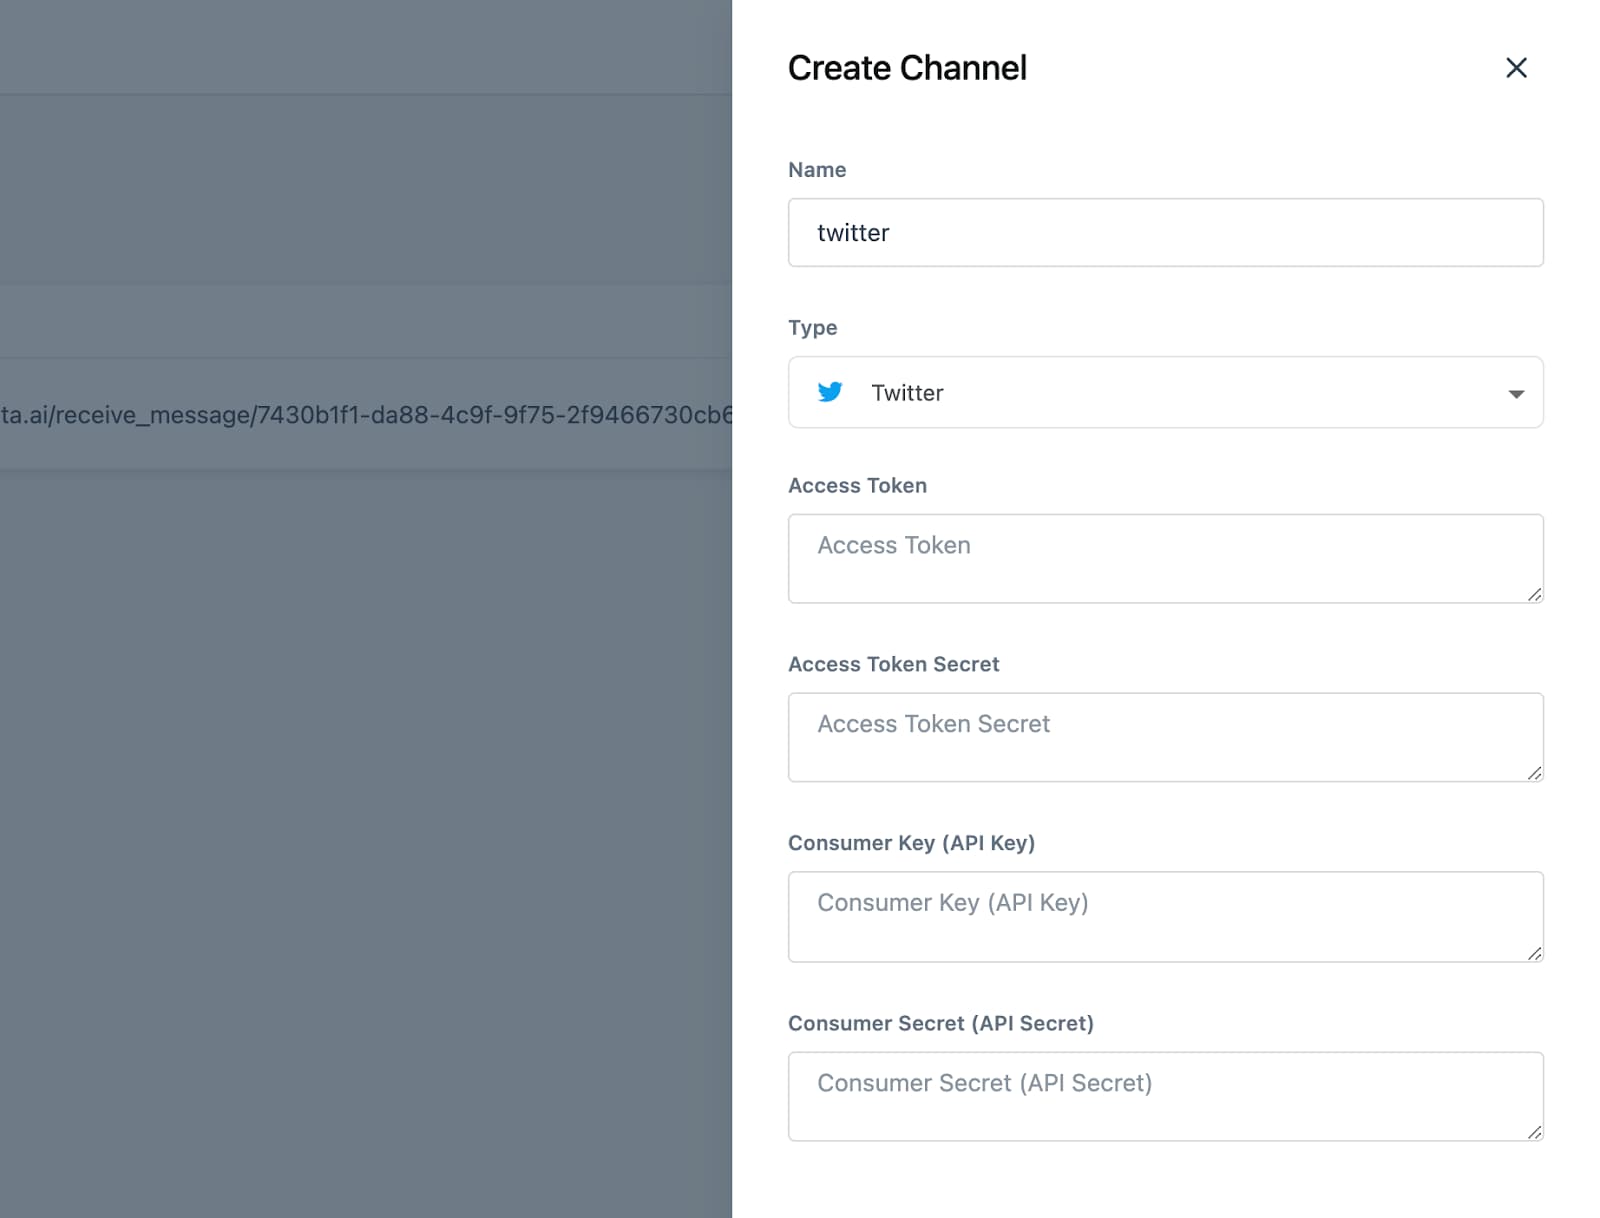
Figure 3.Create Twitter channel
Field Name |
Functionality |
Limitation |
|---|---|---|
| Name | Your channel name | Max. 30 characters must contain only alphanumeric characters (A-Z, a-z, 0-9), |
| Access Token | - | - |
| Access Token Secret | - | - |
| Consumer Key (API Key) | - | - |
| Consumer Secret (API Secret) | - | - |
How to collect API secret key, access token, and access token secret
- To deploy your bot on Twitter, you need to register for a developer account. Go to https://developer.twitter.com.
- Continue to sign up by following the instructions.
- Then, log in to the Twitter Developer Page. You will see the homepage.
- Click on Create An App tab, then your page will be shown like this:

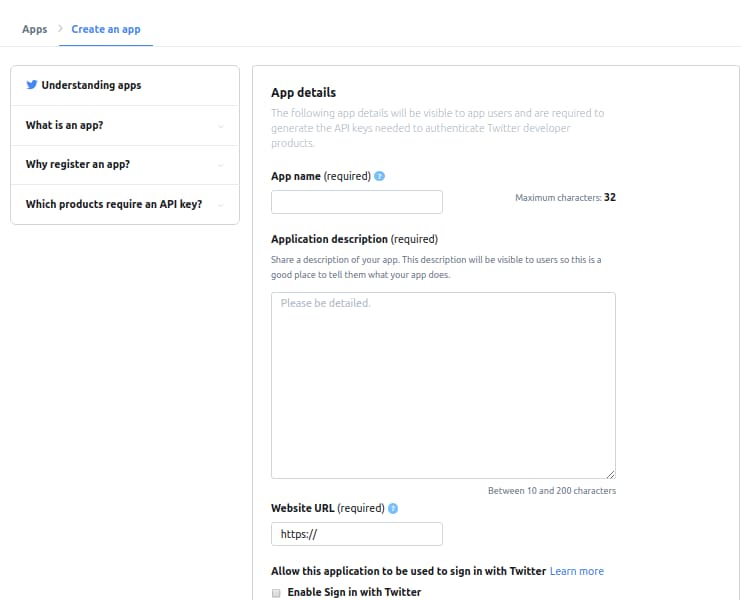
Figure 4. Create an app page.
- Fill the form then click on Create button
- Then, go to the Keys and tokens tab. Click the Regenerate button to generate an API key, API secret key, access token, and access token secret. Here is an example.

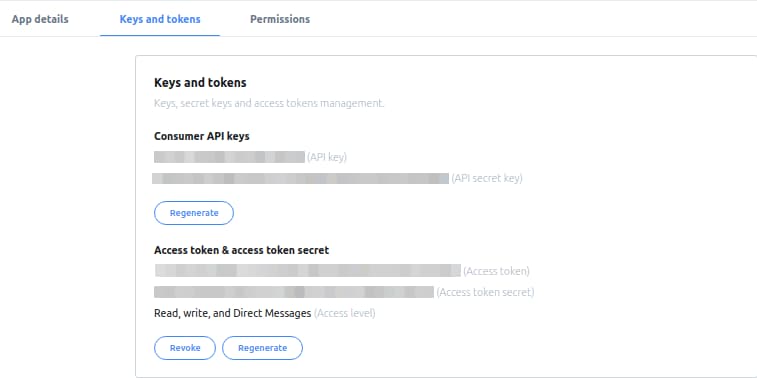
Figure 5.Generate access token and access token secret
- Then, go to the Permissions tab. In this tab, change access permissions to Read, write, and Direct Message.

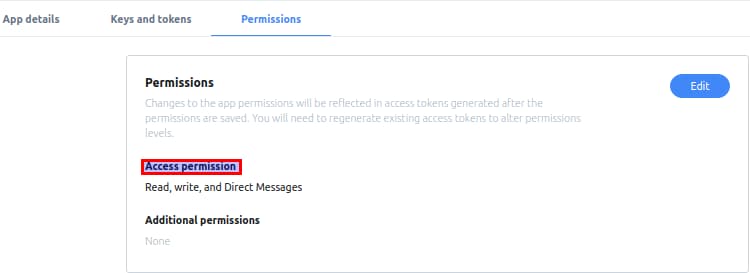
Figure 6.Access permissions changed to Read, write and Direct Messages
- Go to the Dev environments(https://developer.twitter.com/en/account/environments), then click the button Set up dev environment to begin.

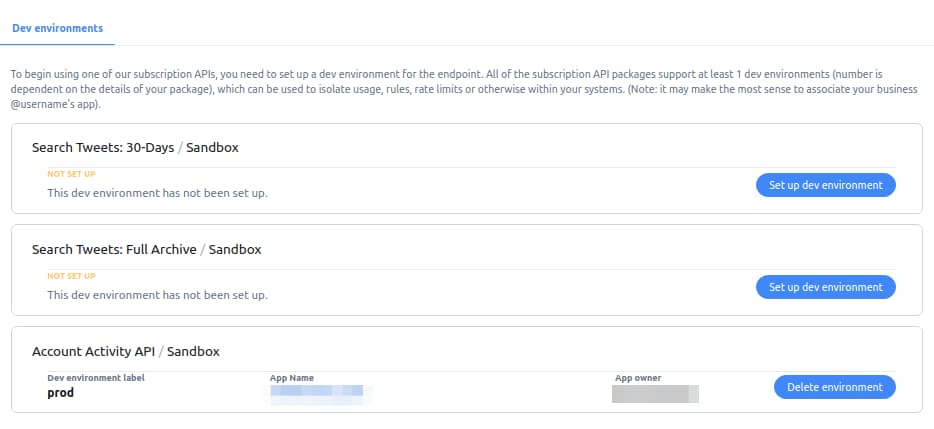
Figure 7.Set up dev environment
Next step is to paste the API key, API secret key, access token, and access token secret from Twitter to the Kata Platform.
- Go back to the Key and Tokens tab, copy all fields.
- After copied, go back to Kata Platform (https://platform.kata.ai)
- Paste the API key, API secret key, access token, and access token secret there. Here is the example:

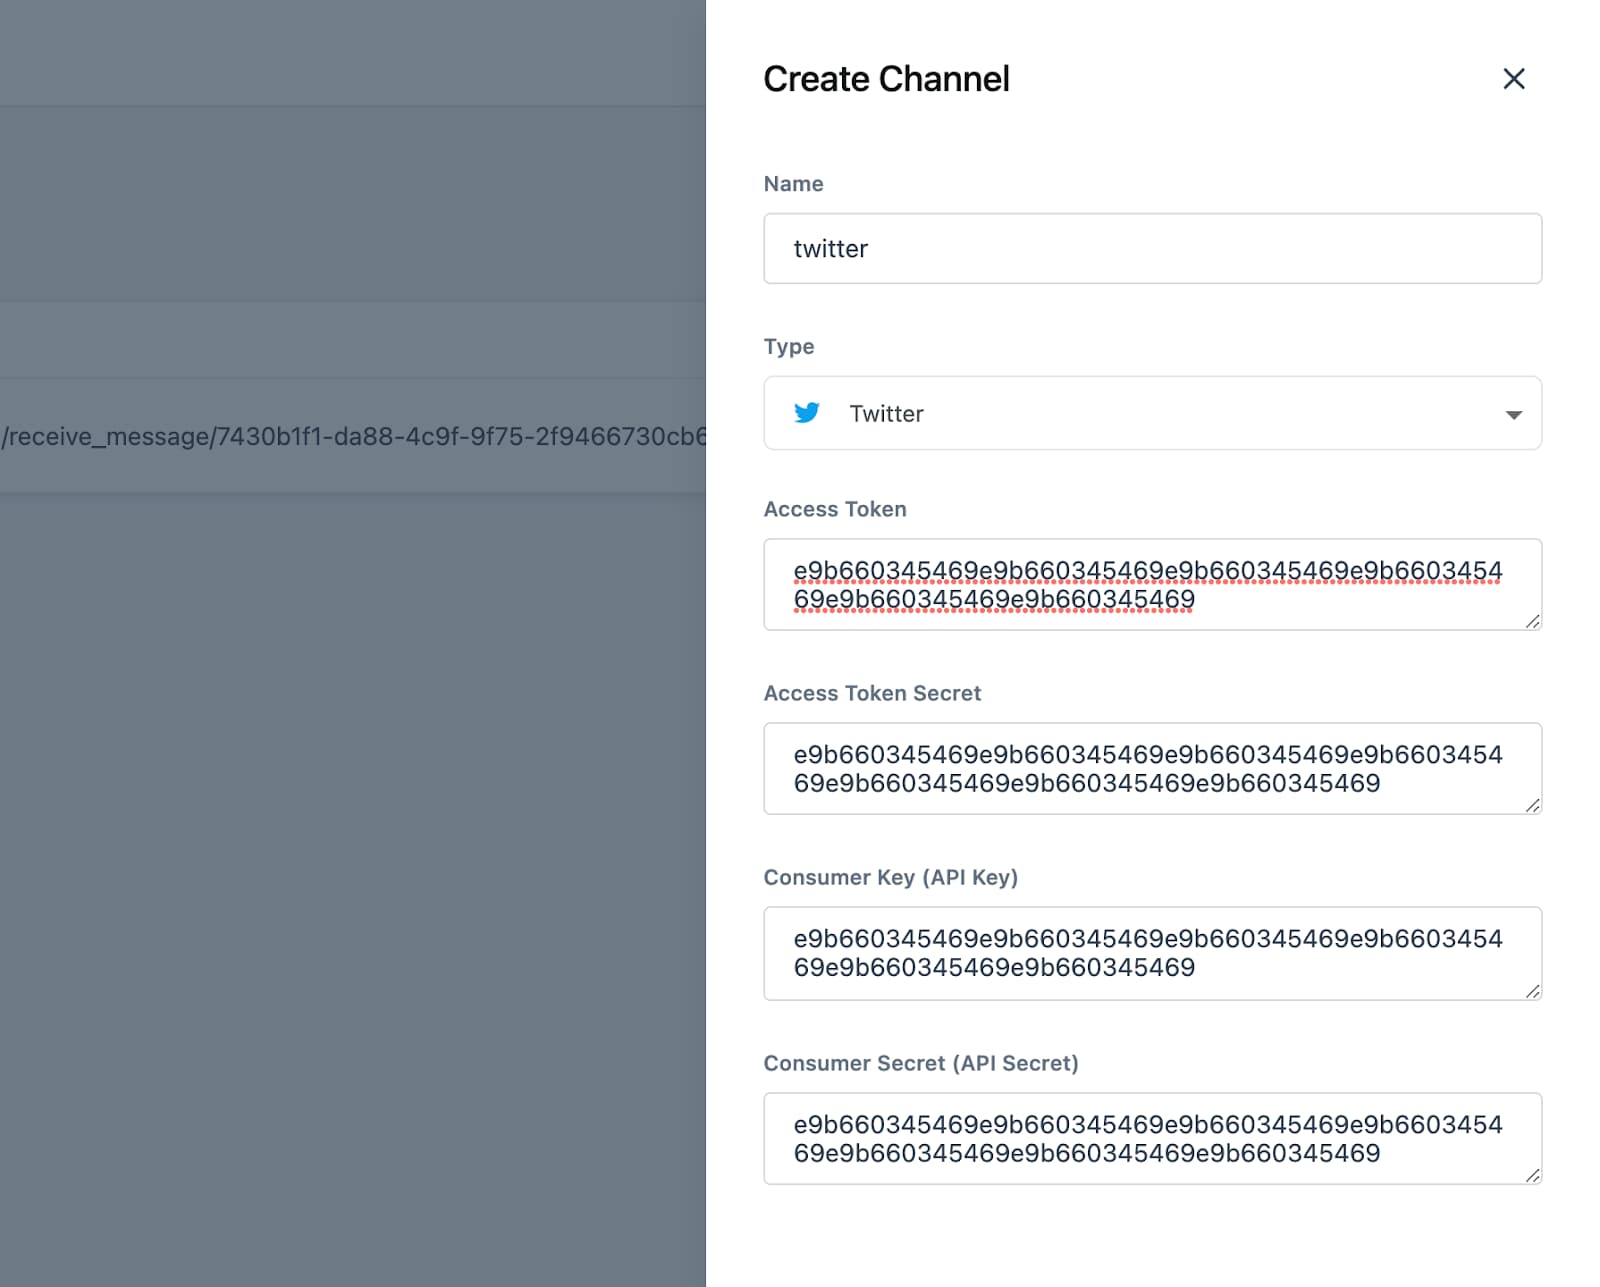
Figure 8.Paste API key, API secret key, access token, and access token secret
- Click Create to generate the webhook. You can see a webhook URL from the generated channel.
- Click the copy icon to copy the webhook URL.


Figure 9.Copy webhook URL
Finalize Twitter Direct Message Set Up
- Clone this repository: https://github.com/twitterdev/account-activity-dashboard
- Install Node.js dependencies using npm install command.
- Create a new config.json file based on config.sample.json & .env file based on env.template and fill in your Twitter keys, tokens and webhook environment name. Twitter keys and access tokens are found on your app page on Apps Dashboard (https://developer.twitter.com/apps). The basic auth properties can be anything you want, and are used for simple password protection to access the configuration UI. Environment name is found on the Dev Environment (https://developer.twitter.com/en/account/environments) page. Make sure you have access to the Account Activity API.
- Revisit your developer.twitter.com Apps Settings page, and add the following URL values as whitelisted Callback URLs:
http://your.app.domain/callbacks/addsub
http://your.app.domain/callbacks/removesub
- Run locally using npm start command
- Open http://your.app.domain/webhook. If it succeeds, username and password are inserted with basic auth properties that you have defined before.
- Paste webhook from Kata Platform to Create or Update Webhook. Click Create/Update to continue.

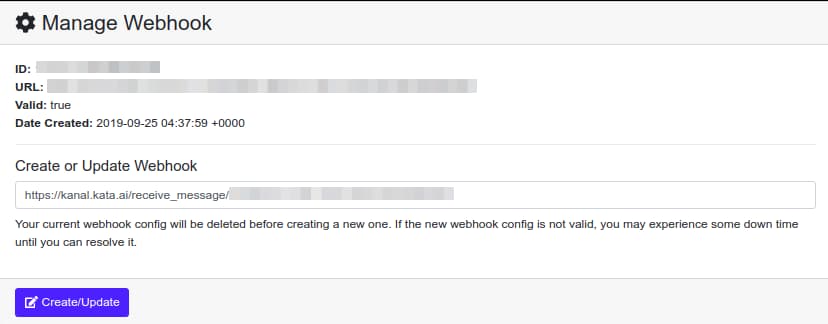
Figure 10.Paste webhook URL from Kata Platform
- Next, open http://your.app.domain/subscriptions.
- Then, click Add to add a user subscription. Login with the same account that you set to become the bot.

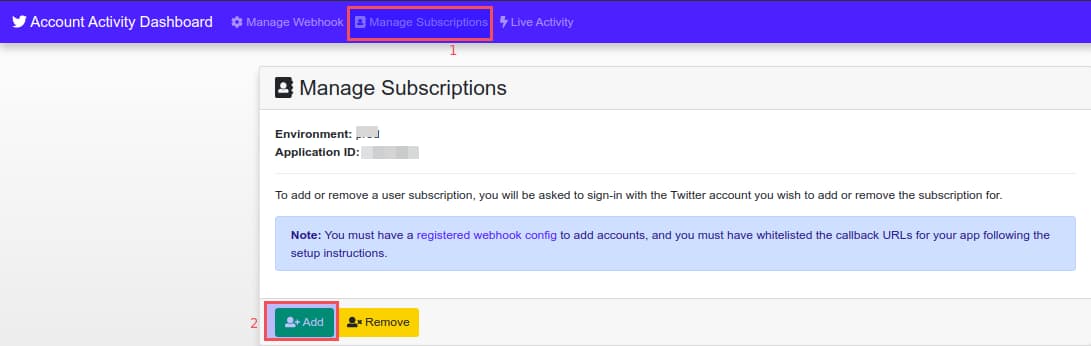
Figure 11.Manage subscription page
- Finally, create a direct message to the bot account.

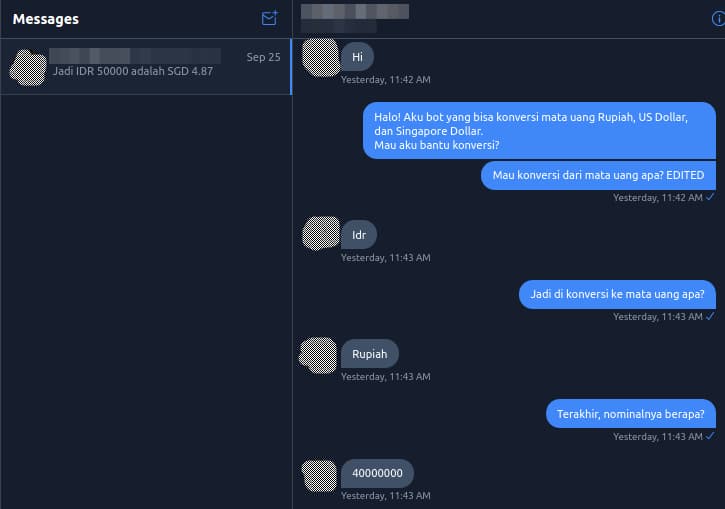
Figure 12.Chatbot successfully deployed
This is the end of the guidance, you can contact support@kata.ai if you have any difficulties when implementing this.